37 weeks: Full Term baby, limited food options:)

Thirty Seven weeks: 5.9.12


37wA


37wB


37wC 

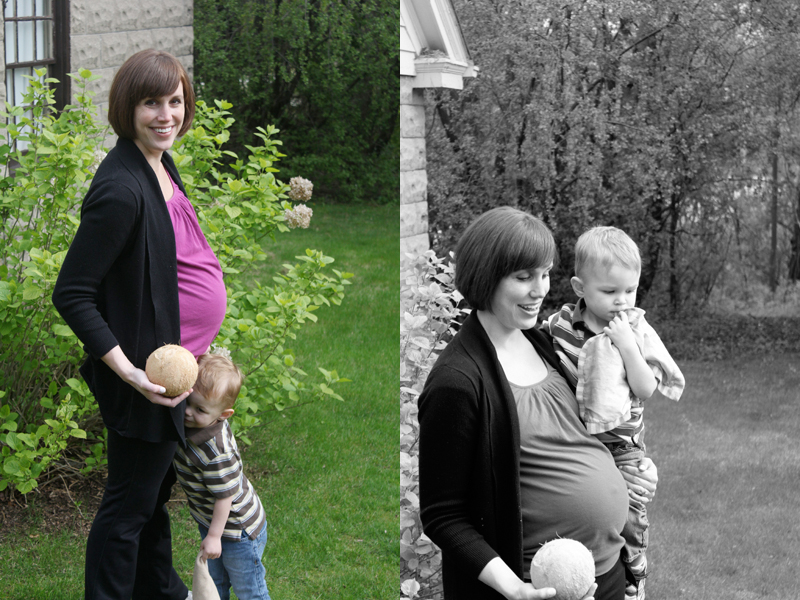
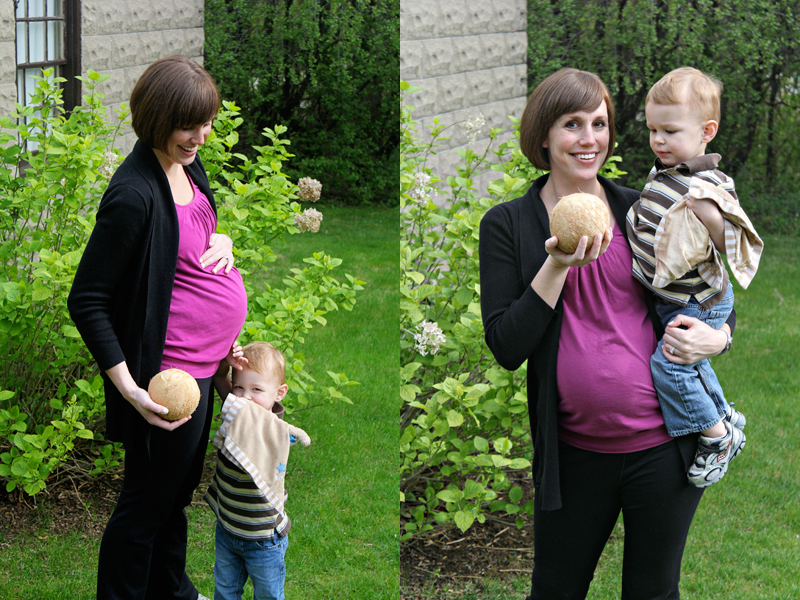
Photo Thoughts: My 'first born' Henry dog was much more willing to get in this picture than Truman was this week. Didn't forget about him, did you? And see? My belly isn't as huge as it looked last week in that pink shirt. Yes, I look very pregnant but it's not as startling to look at these images this week for me.


Size of baby: A wintermelon according to TB, or swiss chard according to BC. I am holding random, half-eaten green leaf lettuce because I thought that might be sort of similar to swiss chard. Sigh. From here on out, it's basically just pumpkins and watermelons so I was stuck this week.

Cravings/Diet: Not reaching the second trimester 'starvation' mode but I've had a few moments of being super hungry again. But then I get full really fast and feel super uncomfortable. Food is such a tease.

What I love: I'm full term, baby! I just want to write that in all caps and leave the rest of this post for some other time because WOAH. FULL TERM. Cue the squealing on my part. I cannot believe I am here and I'm fighting back tears when I think about the beginning of this pregnancy. It was so scary, so hard to stay positive, and so uncertain. This baby girl was a 'probable miscarriage'. I would have given anything in the world to be 37 weeks along at 6 weeks when I was bleeding scary amounts of blood. And now I am full term. Words just can't express the gratitude.

What I'm looking forward to the most: Having her. The anticipation is killing me!

Worries: My OB appt last week was a good one but guess who is lucky enough to have Group B Strep again? Me. I had it with Truman and you only have a 30% chance of having it with each individual pregnancy, but I'm one of those lucky 30% for round two. It's really not a big deal at all, since all it means is that I need to try and get to the hospital with at least 4-5 hours before baby girl makes her entrance. They like to give IV antibiotics to 'flush' the system of this intestinal bug that comes and goes in all of us (no, it's not an STD, thanks) that has absolutely no symptoms for the mom, but it could potentially make a baby sick with pnuemonia or other infection. But even if I don't get to the hospital with that much time to spare (since I was technically in labor for 40 hours with Truman and I still didn't get the antibiotics at just the right time, 4 hours before delivery) it should be okay because they only see babies become affected 1.5% of the time WITHOUT the antibiotics. Truman was fine and I'm sure this baby would be fine. But it's just one more thing to worry about even though I know I have a 98.5% chance of it being a non-issue. I was SO hoping for a fast delivery but now I'm nervous about knowing when to head to the hospital versus letting myself labor at home until the point of no return. I don't want to jump the gun and get there at the first contraction but I also don't want to wait too long and then have her come super fast once we are there. I guess only time will tell.

What is different this time around: Last time the 37 week update was my last one for the entire pregnancy!!! Does that boggle your mind as much as mine? My induction started at 37w5d and I had Truman right at 38w0d. I just cannot wrap my head around the fact that after next Wednesday, assuming I'm still pregnant, that will be the most pregnant I've been and I will be entering new 'Super Pregnant Woman' territory. Still doing great with my BP this time so I'm thinking that pre-E might miss me as a victim for baby #2 (please don't jinx me, blog world). I'm really feeling a lot better overall because I'm not dealing with the BP and the labs and multiple appointments and fatigue. And this week I haven't had too many timeable BH contractions but they were just starting up last time.

So I guess the overall theme for this pregnancy has been: rough and scary complications in the beginning, but totally normal for the rest of the time (so far). And with Truman it was the opposite: picture perfect pregnancy until 34 weeks and then the complications came.

Symptoms: Definitely feeling more uncomfortable this week. It's hard to sit still which means driving in my car for work is really awful at times. My middle back and upper stomach are just so freaking tender and painful at times. It's hard to roll over in bed, I get out of breath easily, and I notice myself feeling winded if I wind up flat on my back in bed. But really, overall, I'd still stay I'm feeling pretty darn good for 37 weeks. Especially in the beginning of the day, I feel amazing. Then by the end I'm totally ready for bed and feel grouchy and impatient. I hope that is normal for this stage.

Sleep: A little less restful lately, waking up in the wee hours to find a more comfortable position. Which can sometimes be impossible but for the most part I still sleep like a rock.

Movement: Huge, painful kicks at the top of my belly and into my ribs. I love it so much and am really starting to think about how I'm not going to have her all to myself in a few more weeks. I just adore feeling my child move inside my belly and I'm SO going to miss this!

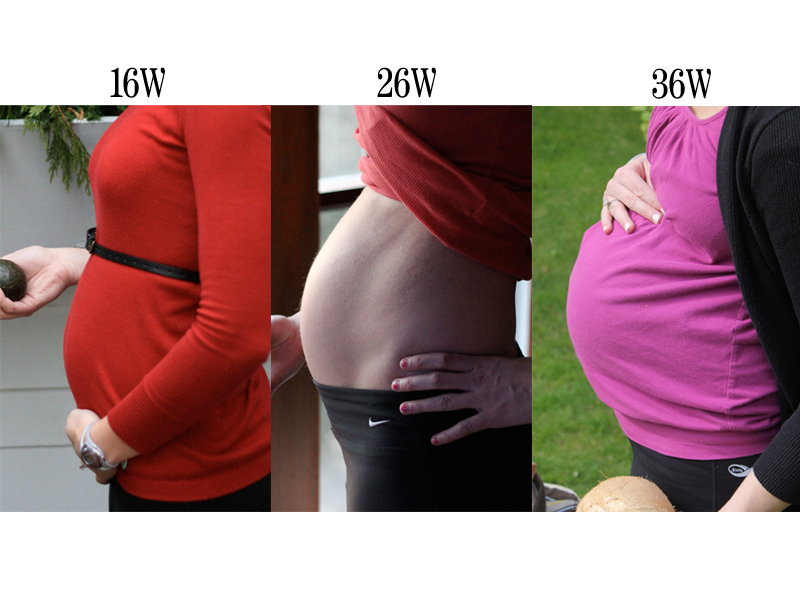
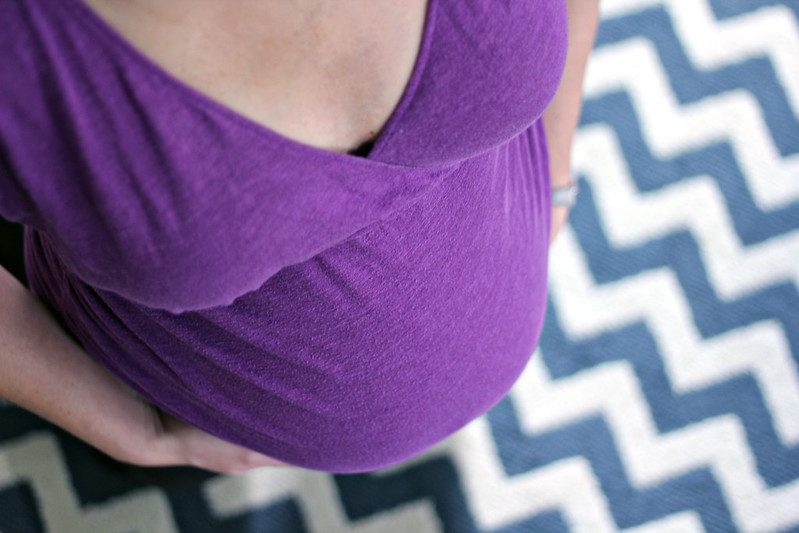
The belly: Very high, according to most, and my linea negra is much darker this week, too. The belly button is still comical and although I feel pretty huge I realize that my bump is not really THAT astounding compared to a lot of other girls 3 weeks away from d-day. I am also going to miss the bump when I'm not pregnant anymore. Not looking forward to the after-birth belly that will likely stick around for awhile: flabby, soft, and just an odd/in between stage. I'll enjoy my firm, high bump for now!

Milestones: For me: making it to 37 weeks with 'stellar' blood pressure and only 30 pounds of weight gain is a big deal. Since, you know, last time at 37 weeks my BP totally sucked and I was up to about 37 el beezies with a scary 6 pound weight gain approaching in just a few more days. Baby girl is just chilling in there, laying down fat and getting her lungs ready to meet us soon. Full term, baby. Wow.

Amusing comments from the general public: I did get a classic 'How can you be due in three weeks? You are so tiiiiiiiny!' comment this week. Eh, whatever. I'm also getting a lot of patients saying goodbye to me a the end of each visit as if it's the last time they might see me. Like, 'Yeah, I'll see you again on Friday IF you don't have the baby before then.' Can't wrap my head around that statement.

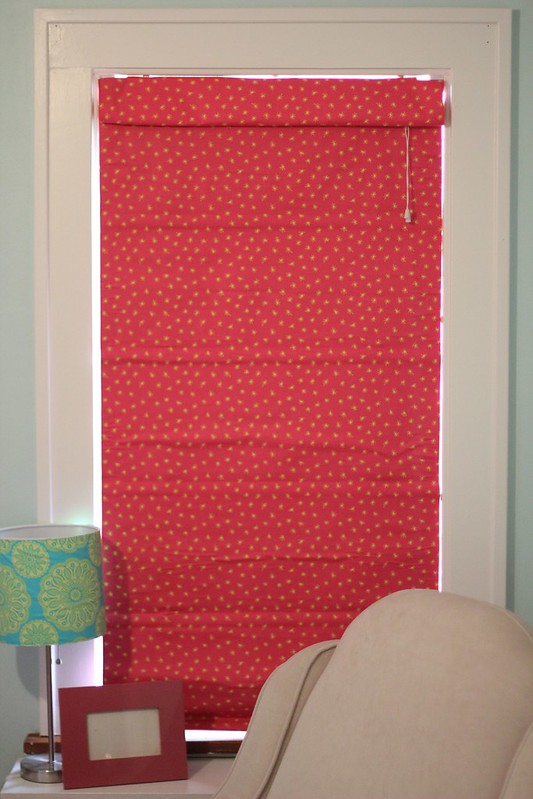
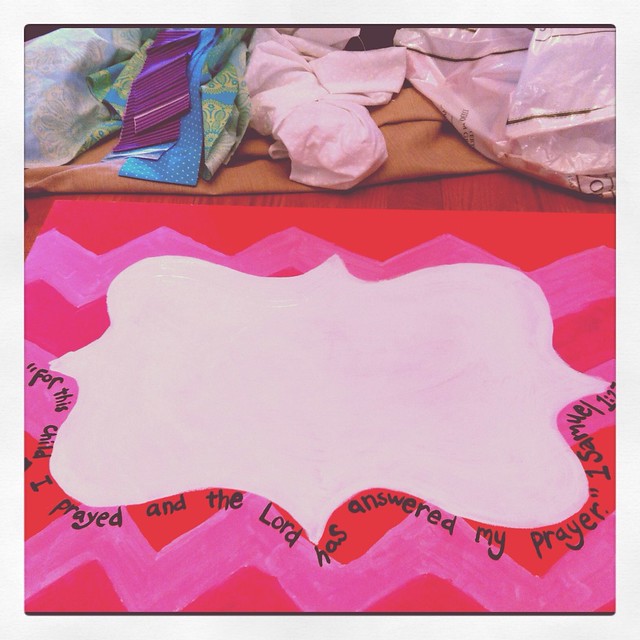
Best moment of the week: I completely finished baby girl's nursery which means I get those special flutters of excitement and anticipation when I peer into her room randomly throughout the day. I'm really not trying to keep you in suspense to be a tease but it just seems silly to show you her nursery now, since I'd have to blur out her name on a few key pieces of decor. I'd rather just wait and show you the real deal in a few more weeks because it will be a lot prettier without giant blurs--and I know that will only fuel the fire to 'figure out' her name under those blurs:) But anyway, the best moment of the week had to have been when I hung the final picture frame on her wall, sat back in the new rocker, and daydreamed about bringing baby girl home to this happy little room. Cannot freaking wait!

How my mom made us a bajillion Roman shades

My mom is the bomb, you guys. She offered to help me make curtains, a bedskirt, a changing pad cover, and a quilt for baby girl. And after she did all that I somehow convinced her to continue making Roman shades until she was blue in the face. Not really, but man---I am SO glad I didn't have to make these by myself. It's not that they are particularly difficult or require a lot of skill but I guess I just don't have the patience for these types of projects. Set me up in a room and I'll paint walls all day long. I'll paint canvases and cribs and shop and decorate. But anything that remotely resembles sewing (which, this tutorial doesn't even require THAT) and I go bonkers.

So I sent her a few Pinterest links and this one was the main site she used to make the shades. But she did change a few things around and the instructions she sent me are VERY detailed. As in, I should really try to make the final Roman shade we want in our upper bathroom. But it's just so darn easy to let the pro do it, you know (wink, wink, mom). 

I knew I wanted the shade to be mounted inside our window frames because, well, I am really into staring at the WHITE paint that I so meticulously slaved over for so long. I really like the look of an inside mount more than putting the shade on the outside of the wood/window area, too. So my only duty (besides buying the fabric) was to measure each window and buy the mini blinds. We measured from the inside of each window and found really cheap blinds for about $4 a pop at Menards. My mom somehow calculated how much fabric we would need per window treatment and that is how I purchased the fabrics of my choice. I believe for a window that is 29.5 inches wide, and 54 inches long we needed 1 5/8 yards. Not sure if that helps at all. I am SO bad with calculating inches to yards---probably another reason I am not into sewing right now. 

Let's look at some 'real time' pictures just to get you pumped up for this project, shall we?

IMG_0080

IMG_0057

IMG_0049

IMG_0023

The Kitchen shades:
IMG_0075

IMG_0351

Truman's shades:
IMG_0096

IMG_0097

Baby girl's shades:
IMG_0113

IMG_0352

(they aren't usually this wrinkled when let down, but I ALWAYS have them up in baby girl's room)
IMG_0354

Are you ready to make them? I just copy and pasted my mom's email to me into this post, so if the alignment and font seem weird, that is why. Not sure why her pictures don't always show up either---I see them in my blogger preview, but not when I view the actual blog. Oh, well. Enjoy!


Supplies needed:
-mini blind
-Fabric and liner (Medium weight fabric makes a nicer shade than thinner fabric, may not need a liner if you don't care about blocking out all of the sun. We used the liner in the kids rooms but skipped them in the kitchen and family room)
-cans or pins
-wax paper
-fabric glue, 
-brush, 
-Ruler, 
-tape measure, 
-cutters to clip off the hook, 
-pencil, 
-sharpie, 
-scissors, 
-heat n bond if you line the shades, 
-iron, 
-rotary cutter/cutting board/rotary guide.


Roman Shades made from Mini Blinds: by Julia's mom, Pam

  1. Determine the size mini blind you will use.
  2. Remove the 3 round little stoppers on the bottom big slat.  Untie the knots.
  1. Lay out the mini blind. Clip the 3 ladders being extremely careful not to cut the larger cord inside two of the ladders.
  1. Remove all of the slats.
  1. Clip off the hook on the top header
  1. Glue 10 slats together (to be used as a bottom weight later).  Then glue 4 (or how many slats you determine you will need)  additional sets of 3 slats together.  You end up with one stack of 10 glued together and 4 stacks of three.  (The vinyl slats are thin and this helps reinforce them).

  1. Determine the FINISHED size of your curtain.   Add 3 inches to width and 3 inches to length for dimensions to cut fabric.

  1. Cut out the fabric
  2. Divide the FINISHED length by the number of slats you want to use ( Our finished length was 53 inches so we divide 53 by  4 slats and got 10.6 inches between all 4 slates).  There is a calculator that might be helpful at  http://www.terrelldesigns.com/Instructions

  1. Iron the fabric to get out any wrinkles and the center fold line.  I used spray water and steam iron. 
  2. Draw lines 1 ½ inches from the side edges of fabric.
  1. Iron the sides along the lining line you drew on the fabric and then turn under the side ¼ inch and iron. (These pictures are taken with shades lined)
      
  1. Brush on glue, turn under ¼ inch.  Brush on glue and fold along line and glue onto the lining.  Avoid over brushing an area. This makes the fabric stretch and pucker.

  1. Place the top header along a line you draw one inch from the top of the fabric. Center and mark edges. (Picture is of lining along the top drawn line with a notch cut out for area NOT to be glued)
  2. Glue header to fabric using the line as a guide.  Leave the ends unglued. After you install the shades you will glue (or Velcro)  these ends in place.
  

  1. Use the measurement you got in #8. On the wrong side of the fabric, measure from the top of the header to the top of the first slat. Center, mark edges, the top and bottom of this slat with a pencil (I just drew all the way around the slat).  Measure the top of this first slat to the top of the next slat and mark on both sides of the slat.  Continue for all slats. (Better to mess up on the drawn lines than the glued down slates.  See my drawn and messed up, erased markings)
   
  1. String on the slats.  String on the stack of 10 slats and finally string on the thicker bottom slat.  Glue the stack of 10 onto the bottom thick slat.  Make sure you keep glue away from the strings.   I put a heavy book on it to hold it down while it dried.

     
  1. Pull the strings so that they are straight – not really tight – but no slack in them.  With a sharpy or pen mark where the string just comes out from the stack of slats. 
  
  1. Raise the bottom heavy slat up the string so you can tie a knot so that the mark still shows.  Measure & mark finished length from the top of the header to make sure you have the right length. Run a line of glue along the line at the bottom heavy slat.  Replace the bottom heavy slat along the glue line and put cans in place to hold the slat in place while it dries.
 
  1. Now you glue the  slats into place.  After some experimentation I think it is best to put the glue on the rounded side of the slat, brush on the glue on smoothly. Using wax paper under the slat so you can get glue all the way to the edges.  Stay 1 inch away from the strings on either side. The glue can not get on the string or you can’t raise and lower the shade.

  1. Flip the slat over to glue into place inside the drawing of the slat.  Finger press along the edges to set the glue and make sure fabric is making good contact with the entire face of the slat.  I sort of pulled the fabric so that contact could be made with the entire surface.  If you just lay it flat, then it will only adhere to the middle and not the edges of the slat.  This will help make a crisp inside fold. 
 
  1.  Cut off the extra string at the bottom and tuck the extra up inside the little holes.
23.  Brush glue onto the fabric that is below the bottom heavy slat and wrap fabric around the heavy bottom slat, making sure it is smooth.  It gives it a nice finished look.
 
  1. I let it dry for several hours before I tried to pull the cord and see how it would fold. 
  2. Pull the cord and play with the folds and help them to make crisp lines in the back of the shade along the edge of the slat before you install.  I left the outside folds softer for a more rounded look in front.

26. Then we decided that the shade worked a lot better if the string came down the front of the shade instead of the back.  Actually Nate figured this out.  So now, cut around the pully opening on the header and pull the strings through to the front.
  1. Cut a strip of fabric for the top loop that will hide the pully opening.  Measure the same width as you did for your unfinished shade.  The length is the exact measurement that you placed between each slate.  Mark 1 ½ inches on each side just like you did to the shade.  Fold in, iron and glue like you did in #11, #12 & #13 to the shade.
 
  1. Run a line of glue along one long edge and fold, gluing the edges together.
  
  1. Now you are ready to glue this “loop” of fabric to the top header of your shade.
  1. Run a line of glue along the top of the header like you did in #15.  Leave the ends unglued so you can install the shade.  You can glue or Velcro these ends in place once they are installed.

Taa Daa  -- A Roman Shade:) Whew.


HOW TO MAKE THE LINER:

We lined some of the blinds with “block out” lining.  It made for a more substantial shade.  If you want to line the shade:
  1. Cut lining to be the exact size of your finished shade. Place the lining on the wrong side of the fabric.  Leave 1 inch at the top, 2 inches at the bottom and 1 ½ inches on each side.  Mark around the lining.
  2. Insert this step now before you glue #13 edges in place. 
Use Heat N Bond tape and run it along the top of the line you draw for the slat in #16.  Iron on per directions of tape. Use a pressing cloth. 

Do this for each slat.  You will want to re-draw your slat lines onto the lining now.

    
This step adheres the fabric to the lining so that it acts as one piece of fabric from here on out.  
 -------------------------------------------------------------------

Does this seem easy to you? Go for it and let me know how it turns out?? I'll patiently wait for the final 3 shades to arrive at my doorstep once my mom finishes them back in Missouri. Spoiled? Yes, I am.

36 weeks: A coconut

Thirty-six weeks: 5.2.12

36wA

36wB

36wC

Photo Thoughts: I think the top makes my bump seem even bigger than usual---something about the gathering around the boobs, and the fact I'm wearing a too small sports bra that smashes the girls down. But wow. Pretty huge. And yay for an outdoor shot WITH Truman!!

Size of baby: A coconut according to TB or a crenshaw melon according to BC. The coconut was easier to find but it just seems SO much smaller than the past few weeks of foods. I mean, a coconut is not any bigger than a honeydew melon from last week, or even the cauliflower from week 27.  As someone said on Facebook, is that supposed to be the size of just her head? Whatever, I guess there are only four more fruits to go!

Cravings/Diet: Really into sweets. What else is new?

What I love: Saying the following phrase--- "I am going to have a baby THIS MONTH!!" {we will not discuss the option of her being late as a June baby. I will be very upset with her if she makes me a liar when I say I'm due this month}

What I'm looking forward to the most: Labor and delivery. Birth photography. Meeting our little lady. I can barely stand it all, really.

Worries: I was seriously convinced that baby girl was going to make an extremely early appearance last week. On Wednesday after work, I started having very regular and fairly intense contractions to the point that I was timing them on my phone and freaking out. They were anywhere from 4-11 minutes apart and quite uncomfortable, with period-like cramps accompanying them. Nate was totally freaked out when I finally started packing my hospital bag and printing off disability forms online. Luckily I had my OB appointment the next day and she is not worried about the contractions at all because if baby girl decides to come at this point, they aren't going to stop her! Also, I had my first internal during the strep B test and I'm totally closed up, so these crazy contractions are just more BH/bogus ones. Very odd to feel like I COULD have her at any moment though! I am a total newbie to a natural labor so I have no idea if I will know when to go to the hospital :)

What is different this time around: Last time at 36 weeks I was having lots of BH (huh, I don't even remember them last time!) and dealing with high BP. I was getting weekly NSTs and was preparing to see my boy on an ultrasound again to check his growth. This time my BP is still my friend and I'm having those silly contractions again, but no NST and no ultrasounds for me. I want to say that I'm a little more uncomfortable this time around but I don't know if that is really true or I'm just blocking it out from my memory the first time around. I know that since my BP is so much better, I'm not napping as much (or at all, really) so I must be doing fine. It boggles my mind to think that I only took ONE MORE weekly photo with Truman's pregnancy before I got induced!!!

Symptoms: Contractions, cramps, slowly leaking pee on myself which makes me wonder if my water is breaking (TMI? Sorry.), difficulty getting up from any position, pain in back with sitting, super sore upper belly, feeling overly full with eating, getting really winded on the stairs, and overall feeling like a giant pregnant blob. I wouldn't say I've hit The Wall or anything, and I am still enjoying this pregnancy, but wow. I finally feel pregnant. 

Sleep: Love it, but feeling really congested again like I did in the second trimester. And rolling over is getting a little ridiculous.

Movement: She has NOT slowed down at all in the past few weeks even though I know she has no room in there. Some of her kicks are definitely painful and take my breath away. My least favorite kicks are the ones to the inside of my ribs. Ouch, baby girl!

The belly: Massive and totally tight/stretched. Like my ab muscles are seriously hurting me right now from being pulled away from each other. I still cannot believe I don't have stretch marks. I startled myself in the mirror the other day, when my reflection caught my eye and I wasn't prepared for the belly. Pretty sure she had another growth spurt. Also, isn't my outie belly button funny?

Milestones: Hitting the 'one month left' milestone and reaching the month of May in general are both HUGE for me. Baby girl is just packing on the fat at this point but is mostly developed and almost ready to meet us! I still think that hitting 38 weeks will make me feel better about an early arrival, just because that is when I had Truman and he was totally fine and ready to come out early.

Amusing comments from the general public: Huh. Nobody told me I'm small this week. Wonder why:)

Best moment of the week: I scored MORE clothes for baby girl at my favorite consignment shop---about 17 new pieces for just $50. I think she has everything she needs at this point which is SO exciting to type. I also got a great start on nursery decor projects and am dying over how fun it is to work on little things for the room each night. Packing my hospital bag made this seem very real too, and my fabulous OB appointment (complete with great BP, good weight gain, and measuring right on track) is always a highlight for me. I'm so glad I have an OB who doubles as my psychologist because she makes me feel so confident and excited when I leave her office. Also, my birthday was on Friday and we had an amazing weekend of celebration (and food). I even splurged on myself with some birthday money and bought two new nursing tanks and an adorable nursing gown/robe to wear both in the hospital and beyond. It seems so frivolous to get something like this but isn't that what birthday money is for? Oh, and I got a mani/pedi with a friend last weekend, too, which was divine. I guess I'm really treating myself lately (I type as I'm off to schedule a pre-natal massage....).

Instagrammed shot of my favorite thing: lists! For baby girl! Check out my obsession with keeping tabs on my BP:)
Untitled

Me and my boy on my birthday:


Untitled

Another Instagram of the canvas I painted for her nursery---it's a sneak peek because this is before I painted her first and middle names on there. Pretty fun to read everyone's response to this little tease of a photo. I really can't see how this blank white space would give away ANYTHING about which name went in there, but I love reading the theories!
Untitled

And just for fun, the sixes:
six
Related Posts Plugin for WordPress, Blogger...