Showing posts with label DIY. Show all posts

House Thoughts

This post has no real point except to document our gargantuan (read: expensive) dreams for this house. Nate and I love to discuss all of the options for the exterior of our home, and you can regularly find us sitting outside after kid-bedtime, going over the same ideas on repeat. I'm sure many of you can relate, especially if you have a house as old as ours, built in 1925 with constant projects in the works. Or at least, at work in our head;)

We've already done plenty of updates to the interior of our house. But now the 'big dogs' remain: windows, insulation, roof, siding, and....possible addition for a fourth bedroom and master bath. YIKES, right? But if we do these updates, we could feasibly stay here forever and we really don't want to change locations. We love everything about the inside of our house, except that we only have three beds and one full bathroom. But the exterior? Not our favorite at all.

So much brown. Wood, painted siding needs a complete scrape and re-paint job. I don't think we would replace the wood siding and cedar shakes with cement board, just to preserve the original look of the house and because the wood is in great shape (paint is not).

The roof is probably never going to leak but with a solid three layers of old shingles, it's a tear-off that needs to happen more for aesthetics than anything.

And our windows? The bottom level boasts original 90 year old windows, the upstairs have some replaced screens but are mostly original, too. We still have to switch out storms in the winter and screens in the summer, something that many people don't even understand as a possibility! Storing a boat load of heavy storm widows, then massive screens in our basement is really not fun or effective. We had an energy audit done to the house and the windows themselves are in great shape and really don't need to be fully replaced, just cleaned up on the inside and we want to get a new exterior storm/screen combo. Bear with me, folks, I know these details are boring! But look at the potential. BEFORE (current):


All Photos-182

GLORIOUS AFTER! (a friend's husband did this photoshop version for us, love it).
House updated picture

We might not do a bright door and are leaning more towards restoring the original wood door, staining it dark possibly. But the color scheme of a dark gray roof, lighter gray siding with the upper cedar shakes slightly darker than the lower level, and then white trim are going to happen. I like the idea of keeping the windows darker gray with the trim white, since we love the look of our windows and want them to pop. I would even consider a fourth shade of gray for little accents around the windows and the trim.

It's all so fun to think about and dream about and talk about. Actually DOING these renovations are daunting, and we aren't crazy enough to think we can DIY it all. But Nate and my father-in-law are convinced they can scrape off the old paint on our siding, and repaint it in 'just a few weeks'. Insert major eye roll emoji here, seriously. Tony HAS scraped off all of the paint at his own house, which also has original wooden siding. He has been repainting the house for oh, four years now....but to give him credit, I know he could potentially do this mammoth project at our house. Not sure how he thinks he will have the time, though.

We'd hire someone for the roof, obviously, and would buy the exterior windows somewhere. The dudes think they can hang the new part of each window. Did I mention we have thirty-three windows in our house, and a window company once told us that an average house has thirteen windows to be replaced? Yeah, that's a fun fact. $$$$$$$. Insulation needs to go in around the house, which is a 'hire-out' job, too. Oh, and the garage. We need to repaint and re-roof the garage, too. Sigh.

The addition is a concept that just won't quit in our heads, either. We have a full, walk-up attic with a flight of stairs to the third level right now. To make it functional and not completely pitched, we'd have to re-do the back of the house at the roofline. Then we could have the attic as a master bedroom and bathroom, plus an extra room across the second level of our house where our 'airing porch' lies right now. I would think that if this addition is actually happening in the near future, we should just wait to do the roof and also the siding at that point, right?

This is when I start to space out and just stare at the 'after' picture. Isn't it pretty? Someday! We just need to decide if it's worth it to invest so much money into our beloved house, or if buying a different house makes more sense. For now we talk and dream. Extensively. Who else loves to dream about house projects with us?

A Super Mario Brothers Halloween

Halloween is the special time of year when children get an absurd amount of sugar in candy form, thus creating power struggles with their parents for weeks there after. (Can I have a piece of candy now? How about now? What about just a small piece? Now?). Halloween is also an excellent excuse for family costumes, especially since all three of our kids are vertical and mobile. If you follow me on Instagram @mrsjuliagoolia you know that this happened. Oh yes, it did:
My Life in Transition: Super Mario Brothers

This year neither Truman nor Cecelia had particular requests for their costumes...except that CC did want to be the same pink owl she donned last year. I talked her out of that in the name of variety while also searching online for DIY family costumes. Oh the ideas were somewhat overwhelming, but I knew I wanted to keep this inexpensive, preferring DIY/random compilations of costumes, and FUN. I mean, someday I hope we can be a BLT sandwich with Nate and I as the slices of bread. Or perhaps a family of care bears in colorful sweat suits. The options are limitless with good old Pinterest, I'm afraid.

After scouring the internets many-a-night, I finally pieced together my plan: Cecelia had a pink princess dress she hasn't worn yet. While shopping at Joann Fabrics one day, I found a long blonde wig at 50% off, so it was $7. Then I found a pink sequin crown for $1. After that, I knew we had our Princess Peach for the Mario Brothers theme. Now to compile the other four costumes without breaking the bank.

CC walking to our Halloween Hop last week, she was ridiculously adorable in this costume. That wig made it amazing!
All Photos-413

I began frequenting the local Goodwill store and went an embarrassing amount of times over the past few months. Probably at least seven trips total, as I recollected my thoughts each time and went in search of specific pieces. At first I was going to find denim overalls for both Porter and Truman (because we do have overalls already but none of the sizes are quite right for them, the growing goons.) A friend offered to lend me her Porter-sized denim and so I was off to Goodwill for Truman's size. Instead, I found both a Luigi costume in a boys size small, and a Mario costume in a boys size XL. Hmmmm, not quite the correct sizes but I considered being Mario and making Truman be Luigi instead of his requested Mario. Hold that thought on me fitting into a kids' costume, yikes.

I found both a Luigi hat and a Mario hat completely randomly with the rest of the somewhat shabby Halloween gear at Goodwill and figured it was meant to be. Each of the overall set was $10 and the hats were both $2. So I got both full costumes (no gloves, but oh well) for a total of $24 and the brand new versions on Amazon were $30 a pop. Yessssssss. I love finding exactly what I'm looking for at a fraction of the price as something new.

IMG_0812

IMG_0813

I did actually find some denim overalls for Truman for $5, too, but ended up not using them. I thought the brightly colored, stretchy polyester costumes would be more 'fun' somehow. And once I tried the XL on for myself in hopes of being Mario, I knew this was NOT an option. Mario doesn't need to wear skin tight and crazy short overalls, just no. Horrifying. I put the XL on Truman and the S on Porter and was shocked that with a little rolling of the sleeves and pants, they fit just fine! I mean, they could totally grow into them but it worked. And again, for $12 a costume I will take it. Add in black eyeliner mustaches and it was a total win for the boys' costumes.

Luigi was thrilled, obviously.
IMG_0807

That's better. Happiest without his hat.
All Photos-404

These three:
IMG_0802

At the Halloween Hop, love this one so much.
All Photos-417

So then the question remained: what should Nate and I be for Halloween? Pinterest told me that a Yoshi, a Bowser, or a Toadstool would be my best options. I was not about to sew anything elaborate and didn't want to get a store-bought costume for us either. And so, I began to stop by various Dollar Stores in search of costume paraphernalia.

I decided Nate had to be Bowser when I found a big plastic green bowl at the Dollar Store. That combined with foam cones that were in the floral section of the Dollar Store and I knew we were in business for a rocking turtle shell. I forgot that I already had red duct tape at home from Halloween costumes of yesteryear, and when I finally set down to create the shell it fell together nicely when I remembered that the spikes on Bowser's shell had a bit of red at the bottom. I was going to just hot glue the foam cones but taping was a lot easier and probably more sturdy. Then I wasn't sure about fixing the shell onto Nate's back, considering a backpack or maybe using the punk rock spike belts that my future sister-in-law let us borrow for Bowser. Then I decided to just use the red duct tape to make straps, taping it underneath the shell and then on top of the tape to finish it off into actual strips. Red wine helped this shell creation GREATLY.

All Photos-582

Nate also needed red spikey hair, and after numerous trips to Goodwill and the Dollar Store, I figured that a $10 option for a new wig on Amazon was actually a great deal. It didn't come with the horns so I used some white felt that was $1 at Michaels and hot glued them into a cone shape. Then Nate actually sewed the horns onto his wig for me, apparently he is better at sewing than me!

All Photos-613

The final piece to Nate's costume took me until the day of Halloween to secure. Bowser has a yellow body and I so badly wanted to find a fuzzy yellow unitard of sorts for him. I made my final trip to Goodwill and would have been happy with just yellow sweat pants and a sweat shirt but NOTHING was there for me that day. Except when I found a form-fitting, green bodysuit in the Halloween section. It was tagged as $10 but rung up as $5 for some reason. It had fingers and feet and was a size large, so when texting with Nate about my find, he agreed to breathe life into this baby. Sure, it was green and Bowser is yellow but it works!

Oh, boy.
All Photos-618

When he tried it on for me, we got a little nervous about the appropriateness level in the crotch region. I thought maybe he could wear pants underneath to pad/obscure the area a little bit but no dice. Too tight. Nate had the idea of cutting off the feet of the costume to release some of it's tautness and it worked. He also wanted to cut off some of the ('really freaking nasty') fingers so he could properly use his phone and eat that night. He also slit the wrists of the costume to allow full hand access when the gloves got to be too much. Nate surprised me when he pulled out bright green swimming trunks of his drawer to make the green body suit much more family friendly. And thus, Bowser was born.

IMG_0789

All Photos-621

Intense!
All Photos-625

For me? I decided to be Toadstool and had great luck at Goodwill for my outfit. I was hunting for a blue vest and found an amazing sweater vest for $4 first. Then I found a neon yellow tee shirt for $5 and my unflattering but awesome white pants (size 10 petite, totally me!) were $5. I wanted white hammer pants and thought about adding gold duct tape to the edge of my sweater vest but settled on the more basic version of my costume. For my hat, I bought a white shower cap for $1 at the Dollar Store and planned to stuff it and add red felt polka dots. When I tried on the cap I realized that was a joke as this shower cap was really small and oddly shaped. So when I sucked it up and bought Nate's red wig for $10 on Amazon, I also found an actual Toadstool hat for $10 and declared it was worth it.

All Photos-568

Shower cap fail is now the hottest toy around.
All Photos-586

And that is how we became the Super Mario Brothers. Have I showed you enough pictures, yet? How about some outtakes?
2015-11-01_0001
2015-11-01_0002
I was very happy with my tripod pictures considering it was cold and raining all day long, then cleared just a bit by the time we were ready to go to the big neighborhood pre-party.  The gang knew I *had* to get a few family pictures and they were quite cooperative, probably because we were all amped up for the party/trick or treating. And seeing all of the neighbors in full costumes, including the adults and hoards of children on our block? Priceless. I won't share pictures of the party itself but it was ridiculously fun; good food, great friends, and wild kids. Can't go wrong!

The actual act of trick or treating was pretty successful. Truman and Cecelia snagged the most amount of candy I've ever witnessed any children snagging. Truman had a ball and was mostly with his friends a house or two ahead of Nate and I, but he slowed down by the end so that I could carry his overflowing bucket for him. 'Too heavy', he claimed. CC had one little wipe out when she tripped, her pumpkin flew across to the next house, and she lost most of her candy. Luckily the neighbor friends we were with helped us gather the goods, but it was a little difficult to recover after such a fall. She needed mommy for a solid five houses after that which was interesting because I had been carrying Porter prior to this. Both little ones needing me = only so much room to hold a babe, sorry. Nate took the boys while CC and I hung back and iced her palm for a few minutes.

We made it for about 1.5 hours which was the longest we've survived yet. Crazy that it was raining all day long but was actually pretty tolerable for the time we trick or treated! I handed Porter one sucker about half way through and that kept him highly entertained and content the rest of the time, go figure. He was also adorable when he would toddle up to a house, grab a piece of candy, and then he would refuse to let that piece go. He did NOT like putting candy in his bucket, right into his hand was his preferred method, thank you. I only had him get maybe 20 pieces of candy because there is really no need for him to be in competition with the sugar-high of his older siblings.  Also, Porter wanted to keep walking back to the very first house we tried because he must have not understood the sea of candy that awaited him at numerous other houses. I ended up carrying him most of the night and my biceps are still sore, the boy is getting so big!

By the time we came home, it was about 7:30pm. The party was from 4-6pm, then ToT from 6-8 so it was a long evening. Tony and Lois were handing out candy at our house and they wanted to see the kids in their costumes. They hung around to witness the candy organizing and ooh'ing and ahhh'ing over individual finds. Let it be noted that this weird Warhead dipping sugary powder with a candy stick is the ultimate favorite declared by Truman and Cecelia like.

The in-laws left around 8 and we did bedtime right after that. Of course, Cecelia was the only one who was wired enough to stay up well past 9pm, possibly still awake at 10pm. The boys passed out despite the sugar rush as Princess Peach raged on into the night. We will not speak of the horrors that the time change brings to all parents alike. Sort of a cruel joke to have DST end the day after Halloween if you ask me. Obviously no 'sleeping in' exists in our universe, or ever.

And now for a quick comparison game, because it's me and you know I love comparisons.

All six of Truman's Halloweens:
All Photos-675

All four of Cecelia's Halloweens:
All Photos-678

Both of Porter's Halloweens:
All Photos-680

And then Truman and Cecelia together over the years:
All Photos-683

I love Halloween so much now that I have kids. I also love: Goodwill, the Dollar Store, red wine, and Pinterest so there's that.

Home Projects | Updated Bathroom

The upper bathroom renovation is complete and beautiful and one million times better than it was a few weeks ago. Nate even said to me, 'the bathroom is so awesome, it just makes me want to smile when I walk in there.' This is saying a lot since Nate was the one who did a lot of the intense, manual labor with his dad while I took care of the children over at my in-laws for three days. I'm not sure which part of our deal was more challenging but we all survived and got a new bathroom out of the chaos, so it's a win. And isn't it a pretty transformation??

2015-09-07_0004

Things we updated when we first moved into the house: we replaced the sink and console cabinets, replaced the medicine cabinet and mirror above the sink, updated the laundry chute and shelves to be white and less hideous, and painted all of the trim white instead of the horrifying creamy yellow that screamed at us from every square inch of this bathroom. I had originally painted the walls a light blue and found a shower curtain that sort of pulled together the creams, browns, and blues together. It worked, it was 'fine' but the speckled tile ate at my soul a little bit every morning. We talked about just re-glazing the tile, or paying for a gut job but both options were super expensive, and we really do enjoy the DIY process.

I mean, this tile and these towel racks...
All Photos-23

Also, there was just entirely too much tile in this bathroom, not sure why it was necessary to have a renovation sometime in the 1970s that included tiling all four walls? We are also assuming they did the floors then, too. I wish I could have seen the original 1920s tile floors, I bet it was amazing! We left the 70s speckled floor alone with this renovation since going on top of it would make the floors way too tall and tearing it out would be a ridiculous headache. We just hoped that removing the speckled tile walls would make the floors look less ugly somehow. Because really, here is the 'before' in all of it's glory. The old lady grab bar will not be missed.

All Photos-18

So what did we do this time around? Number one, we tore out the god-awful speckled yellow tile and replaced it with white subway tile. THIS PART IS MY FAVORITE. Nate and his dad started by pulling off all of the old tile on Friday 8/21 around 1:00. This is when I took the kids over to the duplex, along with an obscenely full van packed with 1/2 of our belongings, and we began our weekend-o-displacement so that the dudes could work late into the night without waking the children.    They tore down all of the tile pretty quickly and then started scraping off all of the nasty glue that was under the tile. This is the part that really sucked, I guess, and it was so so so messy and dirty. Some of the walls were in really rough shape and this is when they had to tear out the plaster walls inside of the shower all together. Always odd to see inside of walls that were put up ninety years ago, a little eerie or something.

It really scared me to see it like this. Walking up to the bathroom to see it in person after this part was also horrifying, the mess was all the way up the stairs and all of the hallway. Nate could tell I was freaking out and later did a great job cleaning everything thoroughly but yeah, pretty horrid.

All Photos-49

All Photos-51

Sometime on Friday afternoon, Nate texted and asked how I felt about wainscotting for the lower half of the walls outside of the shower, since there were a lot of cracks that would probably not ever look good painted even with a lot of patching. I was into it since we added it to the lower half bathroom and it looks really good, so that saved them some time with the scraping and patching. But they still had to add cement board to make walls in the shower, Tony had to re-do some of the plumbing (I know, right?!), scrape glue, and patch the heck out of the walls. Nate ended up coming over to the duplex around 11pm that first night to sleep, and so did Tony, because we didn't have running water at our house by the time they stopped.

The guys went back over fairly early on Saturday and Tony kept working on the plumbing while Nate   continued to work on the walls. So much prep work before it was ready to tile, but eventually Nate primed the walls and ceiling with Zinsser. Our ceiling was pretty nasty with some mildew from the shower that just wouldn't quit and a big crack, but both were fixed with scraping, patching and Zinsser stain blocker. Once the plumbing, new walls, scraping, patching and priming were done it was time for the actual tile!

Saturday after dinner they started tiling the shower. Nate thought it would take 'a few hours' which means at least a day, obviously. After I put the kids to bed at the duplex, I asked Lois to listen for them and I went to Home Depot to pick out wall paint. Nate thought I could feasibly start painting the walls that night and I was skeptical, but figured it would be nice to have the paint on hand in case. We discussed gray paint but couldn't decide between my favorite light neutral gray (Behr's Dolphin Fin) or something a little darker. I couldn't even find the card for Dolphin Fin at the store and took that as a sign to go a little bit bolder, so I picked a new gray: Pencil Sketch, and bought a gallon of the high-end Marquee paint in satin finish. The guy sold me on upgrading to Marquee in the hopes that I would only need one coat and I prayed that I liked this fifth shade of gray in our house. Cue the jokes about Fifty Shades of Gray...we are getting close to that around here!

I got to the house around 9:30 armed with the paint. The tiling was going well but was slowing down significantly as they had to make more cuts for the side walls. Tony was the tile cutter with his station set up outside on the airing porch, and Nate was the tile layer. The two guys work really well together even though Tony is much more patient and methodical with projects like this. For instance, Nate didn't use the little tile spacers for this project and I could tell it was driving Tony nuts but they managed to work together without damaging their relationship. I think any DIY home project can be a critical point in marriages and personal relationships, so coming out with ours in tact is a big plus. There was not space for me in the bathroom with them tiling, so I headed back to the duplex that night. I hear the guys stayed up until 1:30 am tiling the bathroom, determined to get it all done before bed. Yawn. But I applaud their work ethic here!

All Photos-62


Sunday morning: Nate started grouting the tile right away and Tony headed back over to help a bit, and they returned to the duplex victorious around 9:30. We had chocolate chip pancakes and a big eggs/bacon breakfast to celebrate the huge achievement of the weekend. The bathroom looked so stinking good already and the grout made it even brighter somehow!
All Photos-69


After breakfast they spent the rest of Sunday adding the new hardware for the shower head, faucet, and handle which took longer than expected. Nate also pray painted the radiator, since I bought six more cans of the paint we needed on Friday and dropped it off on one of my numerous trips back and forth to our house. He and Tony had to unhook the radiator and take it outside to our upstairs airing porch so they could pull the tile off behind it, so spraying it when out of the room was SUPER easy for him. I wish they could take all of the other radiators out of the house so I could spray them easier but apparently they weigh hundreds of pounds or something, blah blah blah.


New shower hardware!
All Photos-93

So beautiful to me. And you can see on the left side of the shower, where the guys had to cut the tile super tiny. I love how old walls in old houses are never quite level and make projects like this incredibly easy.
IMG_9895

Radiator! Come to mama. Wainscoting looks so good behind it, too.
2015-09-07_0003


After the radiator was sprayed, the brought it back inside and hooked it up again. The grout was finished and once the hardware was installed in the shower, they caulked all around it and the edges of the tile. They hung the new shower curtain rod which is AMAZING, since it bends out away from the shower stall to make the whole thing seem ginormous when your showering. Take my word for it, pure luxury.

Next came time to start on the wainscoting for the walls and the baseboards and I know the men were getting really freaking tired at this point, but they plowed through until Sunday evening when they just had to stop. BUT! We had a working shower which was the main goal for the weekend, since Nate was leaving for Chicago the next day and I did NOT want to extend my stay the duplex into the week. I was so proud of the guys for doing this mammoth project in a weekend and also so happy to be back home.

The displacement was fine and kind of 'fun' in a way, but I hated feeling like we were inconveniencing Lois the entire weekend by wrecking her pristine house and increasing the noise factor by about a hundred. She said she had a ball though, and didn't mind us crashing her pad. We stayed really busy too, having a big pizza dinner on Friday night with the guys, too. Saturday I walked with the kids to a nearby playground and then we walked straight to McDonalds for lunch (treats abound!). After naps that day we went to a birthday party, which took up our entire afternoon and dinner time. Sunday I went grocery shopping with just Cecelia and Porter while Truman stayed back with Lois, and then after naps we had another get together with friends out at a family farm. So lots of solo parenting by me but it was totally fine, the kids did sleep fair away from home, and we didn't drive Lois too crazy.

Oh, and if curious, my in-laws have three spare bedrooms in the duplex: Truman and CC slept downstairs on Tony and Lois's level, one kid in the bed and one on a twin air mattress. Then upstairs, I slept in a bedroom and put Porter in the other one, in a pack and play. All kinds of emotions and reminiscing going on for me this weekend, since living in the upper flat was a huge part of our lives as newlyweds and when we only had Truman. So surreal to sleep in that same bedroom, then walk to the same 'nursery' where we brought Truman home from the hospital....but to see Porter's smiling face instead. Deja vu, memories, all of the above.

But back to the bathroom, here is what it looked like Sunday night after 2.5 full days of work!
All Photos-87

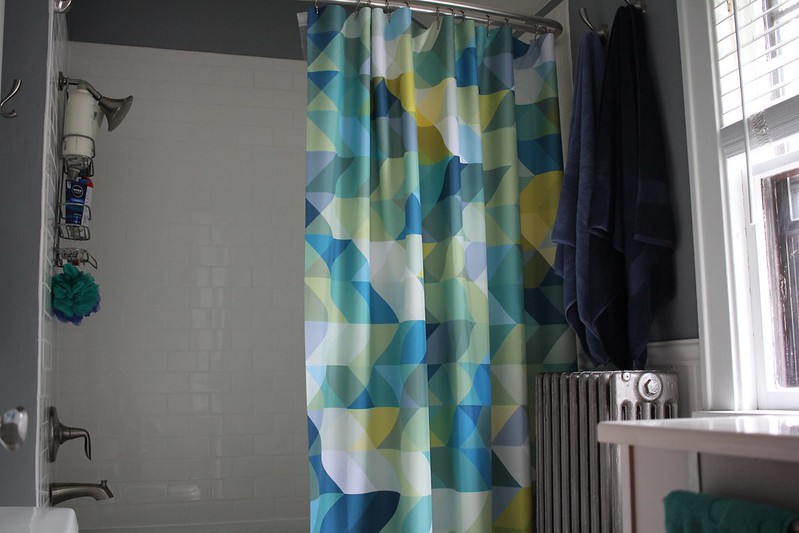
So we moved back home on Sunday with the bathroom in a functional and improved state. Then Monday night I painted the ceiling white with a satin finish. The next weekend Nate and I painted the walls our Pencil Sketch gray, and throughout the week Tony and Nate worked more on the wainscoting. I bought a new shower curtain from Deny Designs and it's definitely a favorite part of the room for us now. If you haven't been on that website before, watch out---there are about 9,000 options to choose from. I finally settled on the Gabi Into the Blue design, and each of the pieces can be turned into phone covers, throw pillows, blankets, prints, clocks, etc. Like I said, DANGEROUS!!

IMG_9899

Porter approved:
All Photos-215

Painting process during the week, aka my contribution besides spending money on finishing touches:

All Photos-99

I hate painting ceilings so much. But hi, shiny white tile behind me!
All Photos-94

Wainscotting:
All Photos-407


I bought new brightly colored towels from Kohls which felt amazing, since our old ones were from our wedding and did not age very well at all. I bought a new throw rug, some hand towels, and Nate hung the towel hooks in respectable locations (high above the radiator so the towels don't always plop on top of it, next to the sink so you can actually dry your hands without reaching over the toilet, a towel on the side of the sink console so the kids can reach it without using our bath towels). The previous bathroom remodel included absurd amounts of tile AND towel racks, so it was very freeing to pick the hardware and locations for our towels this time around.

All Photos-406

IMG_9897

All Photos-411

The only thing left to do in the bathroom is for me to select a print to frame above the toilet. I have lots of ideas but can't quite decide between a quote or a photograph. I might just design something in photoshop and print it myself but we'll see. So glad there isn't any tile on this wall anymore!

2015-09-07_0005

Other than that? It is finished. And glorious. And no, we didn't plan for our shower poufs to match the new curtain. That's just fantastic luck, I promise I'm not that psycho.
IMG_9894

Wall with the sink:
IMG_9893

Floors that stayed and don't look too bad anymore without the wall counterpart.
All Photos-347

So welcoming and modern now. I just love it.
IMG_9890

I did take videos before and after the renovation if you are interested. But hopefully pictures do the change justice. It's like a brand new bathroom and suits our style so much better than before. Major check mark on the House Projects list, complete!

How I Painted Our Old Radiators

At the very top of my To Do list on my phone lies my nemesis, 'paint radiators'. How can two measly words cause such dread in a person, and how can a project morph from apathetic feelings to full on hatred-motivation after staring at the same two words for many months? I'll tell you how that happens: we hosted Porter's first birthday party and I failed to get the radiators painted before dozens of people were in our house, so once it was over I had a fire lit under my butt to FINALLY start (and finish) this project. I don't know why that did it, but I felt motivated to clean them up once and for all.

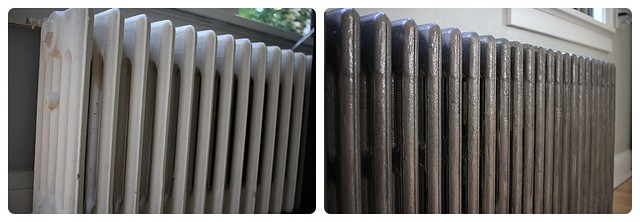
Sneak peek: worth it!
2015-07-21_0001

Painting the radiators is something I've wanted to tackle for some time now, maybe even since we moved here. I know I originally looked into having custom radiator covers made because I thought they were ugly and dangerous and then we moved in and they bumped way down on the priority totem pole. We have also discussed sandblasting the heck out of the radiators to strip all of the old paint away, to get them back to their natural state. But that would require moving the beasts outside and probably is not going to happen. So more paint on top of the hundreds of layers of paint, it is.

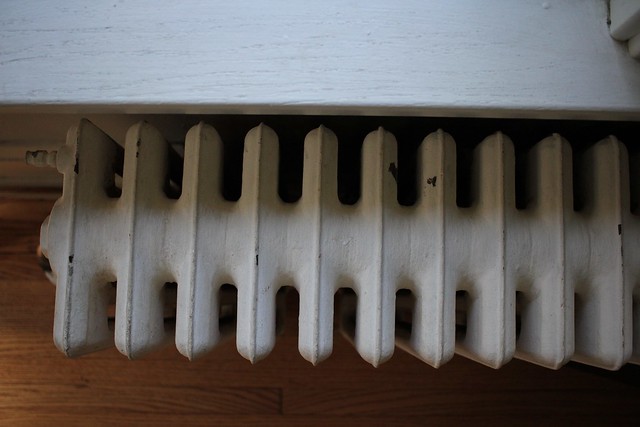
I mentioned it in my Current List of House Projects post back in April, and one common question I've gotten from readers and friends is, 'Are the radiators too hot for kids to touch/are they dangerous?' I was worried about this aspect before we moved into our ninety year old home, but now that we've logged a few winters here I can safely say that our radiators aren't burning hot to the touch. They are warm (and excellent for drying/heating a bath towel!) but won't burn a kid if they put their hand on a radiator, or fall into one. If anything, my biggest issue with our radiators are that they collect dust like a mother and the countless paint jobs the previous owners did to these babies haven't held up well over the years. I'm pretty sure the last owners had every wall and every radiator painted this flat cream color and therefore cream has become my most hated shade in this house. We are close to having every square inch repainted or refinished now---floors, walls, trim, ceiling, EVERYTHING. But the beloved radiators somehow scraped by without getting our personal touch, mostly because it was so overwhelming to consider such a project.

I did paint Porter's radiator in his nursery with a brush, using the same wall paint for his room, and although it took me an absurd amount of time and destroyed my paint brush I liked how the radiator fades into the wall a bit (instead of jumping out at me with it's nasty yellowish-creamy-chipped-as-hell color). I figured that painting all of the others by hand with a brush was an option, a very clean and precise option, that could possibly take me ten years to complete. Nate says that detaching the radiators and moving them outside for me to get a spray paint assembly line going is impossible, since they weigh a billion pounds and something about draining the water from them, blah blah blah. SO, it was either a paint brush and a thousand hours or attempting spray paint and hoping that I didn't ruin the entire house in the process with the mess. 

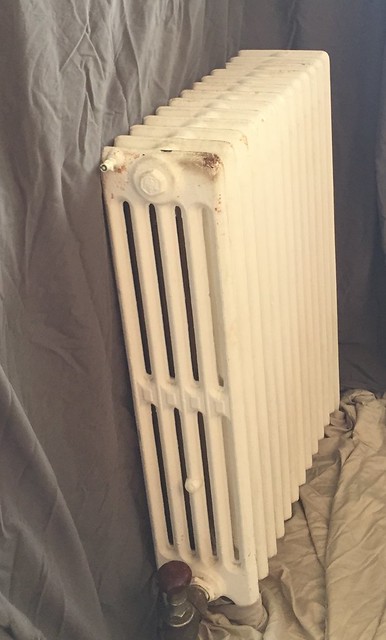
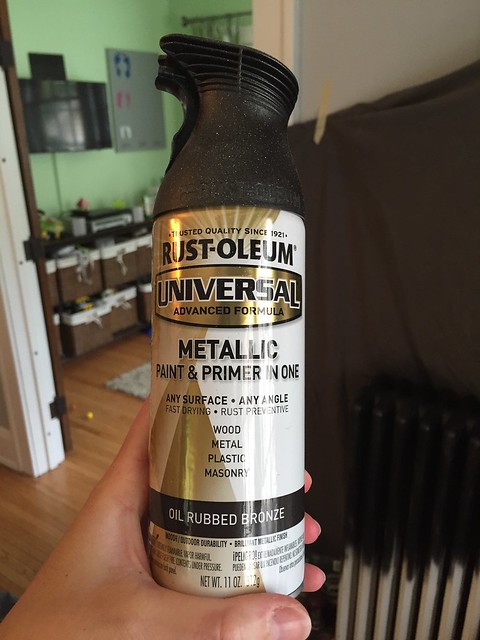
After Porter's party I was staring at my least favorite radiator with disgust, noting the weird rusty/chipped area on the corner that constantly screamed my name as I walked by. I knew Nate wanted to paint (i.e. wanted to have ME paint) the radiators a wrought iron color to match our fireplace and all of the pulls on our built-in buffet, plus a few of our door knobs. I remembered that we had a partially used can of spray paint in the basement from our fireplace project and randomly decided to try it out on Saturday morning. 

Tell me that nasty corner doesn't make you want to dry heave.
All Photos-113

Let's give this a shot...
All Photos-116

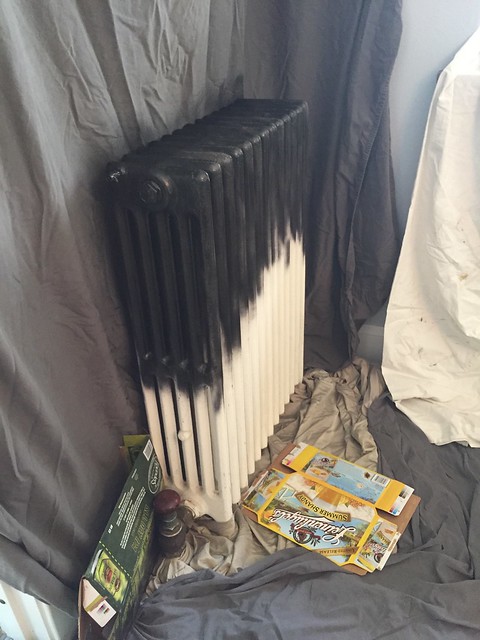
I grabbed six drop cloths (which are basically just old bed sheets we've saved for painting projects), put them on the floor and taped them to the wall and tried to drape as much as possible. I should have worn a mask and gloves but I was feeling lazy, so now my fingernails look like I'm homeless and my brain cells have been killed. I DID clean the radiator as best as I could using this super long dusting brush thing, designed for radiators, sort of like this one. I did NOT sand or scrape the old paint because I figured my spray paint was made for metal and had primer in it, and: lazy. I opened every window in our house and placed three floor fans near the radiators and I started to spray the beastly radiator. I tried to corral the stray paint particles the best I could using cardboard beer boxes because I'm classy. I seriously considered creating a giant wall-o-sheets behind me, taped floor to ceiling, to stop the paint mist from spreading everywhere. I'm sure that having fans blowing didn't help the spread of paint but when I turned them off I almost died from heat stroke and fumes. Well-ventilated area? Sort of necessary for this project, I know. I did not make a wall-o-sheets to contain my spray but still think it would be a nice idea for the future if I didn't pass out from the paint fumes.

I immediately thought this was entirely too black for my tastes but it already looked better than the cream. Once I ran out of this can I started brainstorming about a possible color change since I knew I *had* to finish this radiator ASAP or the two-toned look would surely drive me mad. I texted Nate, since he was out with the two older kids, and said, 'I started a project, need to go to Home Depot later.' He didn't seem too alarmed but the kids were VERY perplexed by my choice in home project when they returned from their bike ride with dad. 

All Photos-114

Before I went to the store to buy more paint, I started becoming psychotic about the black paint landing on the floors, the table, the buffet, etc. I washed the dining room floors by hand, scrubbed the table and buffet, and was finally somewhat satisfied that I had gotten it all before it set into the surfaces too much. It's not that you could see black paint on everything but it was just sort of sticky and dingy looking and I could not handle it! I seriously considered just painting the rest by hand but Nate assured me that we could appropriately clean up any stray paint particles, PLUS I still really did not want to spend years on this project with a brush.

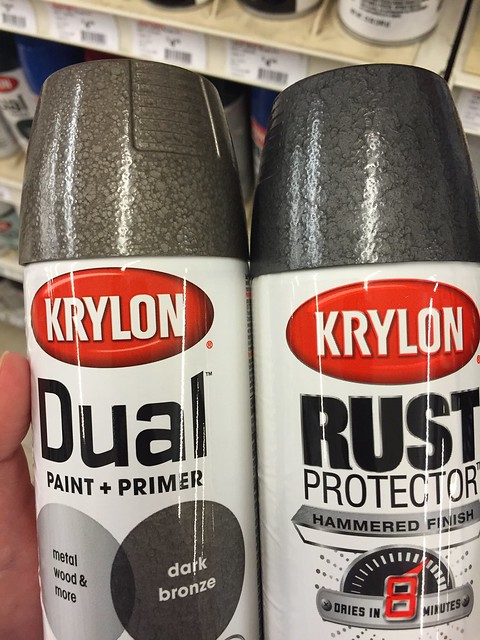
I went to the hardware store later and couldn't find any more of the Rustoleum spray with the trigger. I did find a lot of other semi-metallic options and finally, after texting Nate back and forth no fewer than 50 times, we settled on a Krylon version with a regular spray top button. This is foreshadowing for my complaints later regarding the ease of such spray paints!
All Photos-118

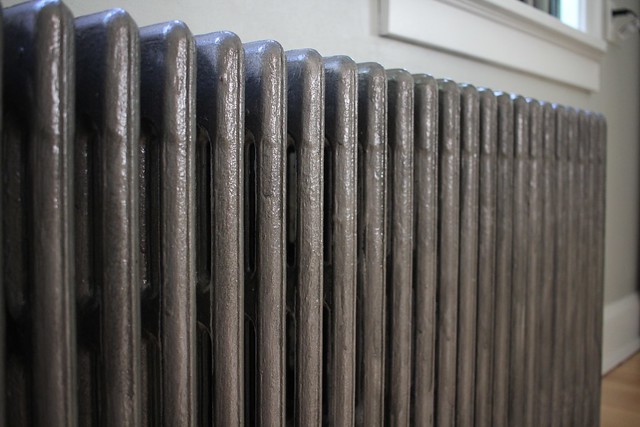
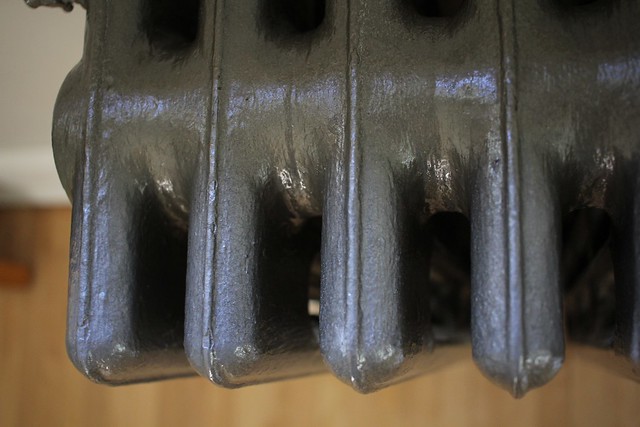
We chose the dark bronze on the left, thinking the hammered texture would be better for our old radiators (can I call them 'rads?') and went more bronze versus silver. I personally wanted a lighter brushed nickel or stainless steel look but Nate was adamant that would look horrible, so we compromised with the dark bronze. I purchased three cans and hoped they would cover my partially finished rad and also the bigger one in the kitchen. I believe each can was a whopping $7, so I'd say this project was fairly economical.

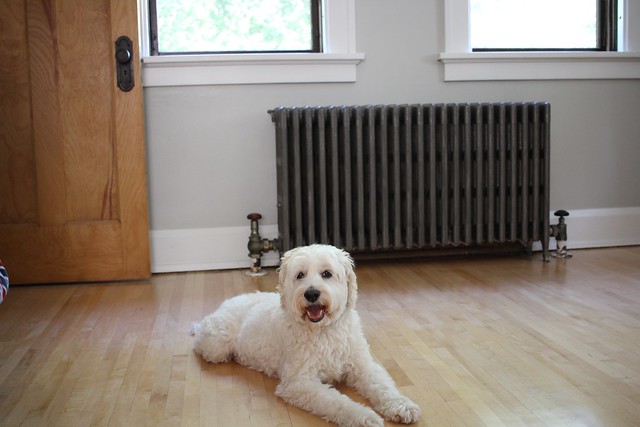
After the kids went to bed, I added a few more drop cloths to the dining room floor and repositioned my fans for the long haul. I sprayed the entire radiator and covered up the previous blackish color, declaring the dark bronze much better. The only thing that sucked (well, not the *only* thing) was that this standard spray can button kept clogging and my wrist/forearm immediately decided to cramp up in defiance. Lots of shaking, removing the little cap to inspect for clogs, and a fair amount of curse words later and the dining room rad had a new coat of 'dark bronze' paint.

It got a little tricky for the radiator feet and the underside of it, but I just did my best to cover everything and then had to use a bit of paint thinner on an old rag to wipe down any mishaps on the floor/walls. The next day I definitely had to clean all of the floors again despite my best efforts with drop cloths and the paint smell was pretty strong at first, BUT still a success. I secretly enjoy the smell of paint fumes anyway, but Nate was not a fan and poor guy had to sit outside with a cocktail while I slaved away indoors.

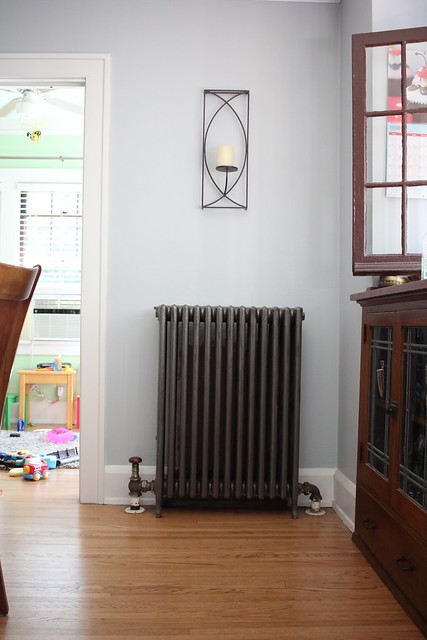
TA-DA!
IMG_8404

So fresh and so clean, clean.
IMG_8399

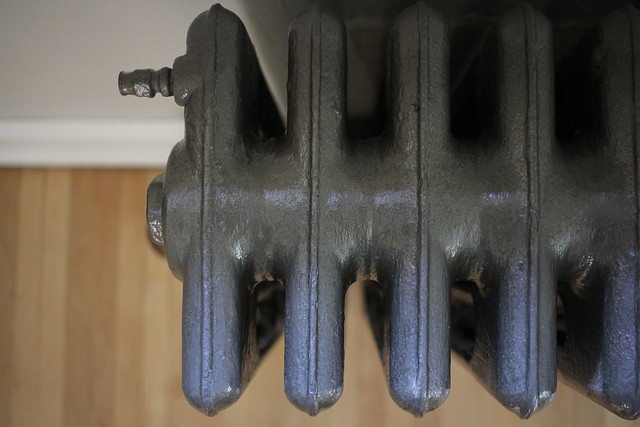
Looks like a newer version of these 90 year old beauties, still not trying to be too terribly modern or anything.
IMG_8406

Next came the kitchen radiator and I immediately decided to go for it as soon as I finished in the dining room. I definitely made myself a cocktail and turned on some music and tried to force my raw finger and thumb to work again. Same thing: drop cloths, open windows, fans, cardboard to help guide the spray a little, and lots of and lots of shaking. I later found out on Instagram that there is an adapter you can buy to make any aerosol spray can into a trigger mechanism, therefore saving your fingers/forearms. Will for sure be buying one of these next time!

Before:
All Photos-127

After (plus sweet Henry):
IMG_8398

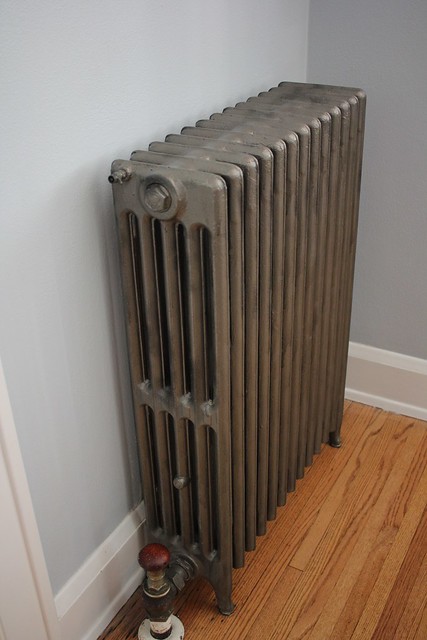
It's not perfect by any means, and it could probably use another full coat on it because there are just so many nooks and crannies and it's hard to get way inside of the radiator. But I like the end result a lot!
IMG_8401

Glad we picked this color, could still be happy if it was a lighter version of this and more silver but at least it's gray-ish and not too gold/bronze, not cream, and not the black that startled me so much at first. And shiny now instead of flat!
IMG_8412
So I did both of the radiators in one day, probably about 3-4 hours total?

I think when I buy more paint cans for the other radiators, besides getting a spray can adapter I will also see if I could get a small little 'touch up' size of paint that matches this color so I can brush the feet and the missed spots a little better. We will see, maybe I won't care about the little thin coverage spots over time....or maybe I will;) I'm sure I could get a small pint of this dark bronze color matched, don't you?

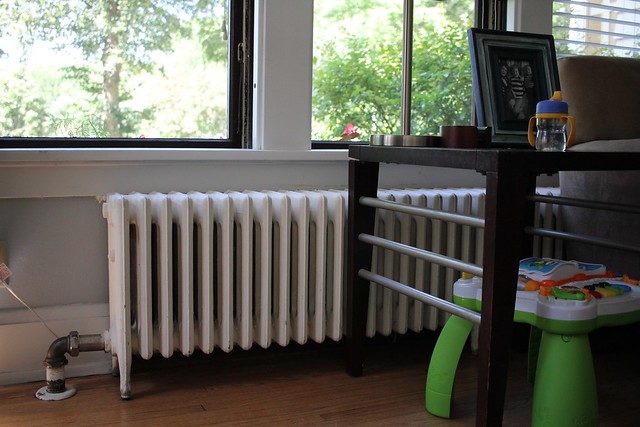
Next up has to be this giant radiator in our family room. It's partially covered by the couch but I still want it to match the others now. It looks white here but I assure you it's cream.
IMG_8411

And chipped. And shows dirt like crazy.
IMG_8414

Anyway, two down and three more to go on our main level. I don't care as much about the bedroom radiators but don't get me started on the upper bath radiator (hatred!). So I suppose I would have three on the main level and three on the upper level of our house if I was being crazy about all of them matching. I at least want the downstairs to match and I find that I need to plow through these type of projects before I lose steam and don't care anymore, so maybe this weekend? I won't hold my breath if you don't.
Related Posts Plugin for WordPress, Blogger...