Showing posts with label recipes. Show all posts

Oatmeal Breakfast Bake | Recipe

I've had several requests to post the oatmeal recipe I raved about in my Day in the Life.  This is one that Nate got from a co-worker, and we modified it slightly. It's so filling and delicious, I highly recommend if you want to stay full until lunch time and not stalk the clock like I sometimes do for my next meal. The kids will even eat it (without raisins, also they don't love the giant walnuts). Plus, my mom and also my sister-in-law are gluten free, and we made a huge batch for them over the holidays. A huge hit!! We probably could have made more for them and both took the recipe home, too.

YUM.
All Photos-96

How do we like to eat it? We prefer to take a square of the oatmeal, put it in a bowl, and pop it in the microwave for 1:30. Then we add a ton of grass-fed butter and maple syrup on top. I also like to add a half of a banana or blueberries to the dish, or sometimes I'll smash it up and add milk to it like a true baked oatmeal cereal.

I am obviously a food blogger with professional pictures.
All Photos-98

I have no idea if you can print this off or not, give it a shot I guess?

Oatmeal Breakfast Bake
This recipe makes 12 squares in a 9x13 pan.

Read through entire recipe as you will need to soak oats and groats overnight, or at least 6-8 hours.

Ingredients:
5 c lb rolled oats ( NOT quick cooking oats)
1/4 c buckwheat groats (help make oats more digestible)*
1 T plain full fat yogurt (or coconut kefir if dairy free)
2 cups full fat milk (or coconut milk for dairy free) 

6 large eggs (preferably pastured and organic)
2 T Pumpkin Pie seasoning
2-3 T maple syrup

3 T chia seeds
1 cup shredded coconut (unsweetened)
2 T ground flax seed
1 t sea salt
1/3 c coconut oil or butter, melted
1 c pecans or walnut
1/2 c raisins, cranberries or currants


Place oats, buckwheat groats(recipe will work without these if you can’t find), and yogurt in a large glass bowl and cover with warm water. Let stand on counter for at least 6 hours. We do this overnight if we can remember to plan ahead.

After oats are soaked, preheat oven to 350 degrees convection (or not, we just like it better), place in colander and drain, but do not rinse.

Add milk, eggs and the rest of ingredients except nuts and fruit back into large bowl and mix thoroughly. Add oats back into bowl along with nuts.


Add fruit and stir to combine. Pour into a greased 9 X13 baking pan. Bake for 45 minutes to 1 hour, or until it is browned and fluffy.

Cool and cut into 12 squares and refrigerate or freeze for future. ENJOY!


*Buckwheat groats help to reduce the phytic acid on the oats as they soak overnight, which makes the grains more digestible. They are available at most health food stores or online, we found them at Outpost and also our local grocery store. Also, they are gluten free and make us feel super healthy. 

Recipe | Best Chocolate Chip Cookies Ever

Back to baking and desserts, since they are seriously my favorite recipes ever.

Many years ago, my blog friend Darci shared a recipe for her favorite chocolate chip cookies. Since this was back in 2009 before either of us had children, I made them a few times and filed my hand written chicken-scratched recipe paper away in a recipe book. Then one time recently I found the beloved paper, with smears of vanilla and butter and the simple title of 'Best Chocolate Chip Cookies Ever' written at the top. Hmmm, I was making another favorite over and over again, but wanted to see if my previous acclaim held true.

I changed a few things with the original recipe (less flour, added M&Ms, added salt sprinkles on top) and sure enough---seriously amazing. Like, 'eat all of the dough until I am nearly ill' amazing. The kids like to help me make these since we use the Kitchen Aid (the other recipe I was using does not use a mixer, but does use melted butter---I should do a post on those someday, too). You should absolutely try these the next time you want to devour an amazing cookie. Then come back here and tell me if you love them or if I'm nuts for thinking they are the best.

See? Are you drooling yet?
All Photos-59

Best Chocolate Chip Cookies Ever:

Ingredients:
-1 cup of butter (refrigerated is fine)
-1 cup of brown sugar
-1/2 cup of white sugar
-2 eggs, room temp if possible
-1 tsp vanilla
-2 2/3 cups of flour (this is my own personal preference for amount of flour)
-1 tsp baking soda
-3/4 tsp salt
-1 cup semi sweet chocolate chips
-1 cup of M&Ms
-a bit of kosher flake salt

All Photos-60

The process: (preheat to 350 degrees, ungreased cookie sheets)

1. Cream the butter, brown sugar, and white sugar together in the mixer
2. Add eggs one at a time until creamy
3. Add vanilla
4. In another medium bowl, mix the dry ingredients together (flour, baking soda, salt)
5. Pour in the dry mixture to your mixer with wet stuff
6. Stop the mixer and add the chocolate chips and M&Ms.
7. Bake for about 10 minutes or until you find them to be the perfect amount of dough versus crispy. I love doughy, barely-done cookies but Nate likes his crunchy. I usually do a dozen of each to keep us satisfied. Also, I have used my new silicone baking sheets for these and actually prefer them baked straight on the cookie sheet.
8. When you pull them out of the oven, jam a few extra M&Ms and/or chocolate chips into the tops to make them extra fancy before they cool. Also sprinkle a bit of kosher salt on each cookie. This is my new favorite thing to do with all cookie recipes---surprisingly delicious and a great mix of sweet with salt.
All Photos-93

Enjoy!! (not sure why my two pictures look very different, probably because of the silicone baking sheets versus none. Both were amazing, trust me.)

Recipe | Chicken Burrito Bowls

We usually have some type of Mexican food once each week, and this is my newest favorite dinner recipe. It's a crock pot meal and takes 6-8 hours total to cook on low, but you'll need to add stuff to the pot at the 3-4 hour mark. This is important when planning the meal for me, to make sure I can pull it off on a work day or when we are out and about for a long span. It's seriously delicious and Nate and I aren't sick of it yet, plus two out of three kids enjoy this dish as well. That's about as good as it gets around here, folks.

(not the most beautiful picture but I promise it's tasty).
All Photos-103

Chicken Burrito Bowls (modified from this recipe at The Kitchn)

Ingredients:
-3 chicken breasts (can be frozen solid)
-1 14 oz can of diced tomatoes
-1/2 cup of chicken stock
-2 tsp of chili powder
-2 tsp of salt
-1/2 tsp of cumin
-1 15 oz can of black beans
-1 cup of frozen corn (I have used canned corn and it works, too)
-rice (prepared separately, we like brown rice)

In the morning:
Put the chicken breasts, tomatoes, chicken stock, and chili powder, salt, and cumin in the slow cooker. Cook on low for 3-4 hours.

Later:
Add the black beans and corn. Cook on low for another 3-4 hours

An hour before serving, remove the chicken and shred. Place back in crock pot and turn to 'warm' if possible.

Make rice separately---I did NOT like trying to cook the rice in with the chicken burrito bowl recipe.

To serve:
Place rice down first, then the crock pot dish. Is best in a bowl (shocking, with the name and all). We usually top with chopped avocado, sour cream, shredded cheese, and sometimes salsa or cilantro. Serve with tortilla chips on the side, or sometimes we will make these into nachos like the picture shows above. Also delicious to put inside a flour tortilla for a 'real' burrito.

YUM. Saves pretty well as left overs but I haven't tried freezing it, not sure if the corn and beans would hold up?

Recipe | Peanut Butter Chocolate Chip Banana Bread

I feel like sharing several of my favorite recipes of the moment. But you shall soon realize that I am not a food blogger or photographer. I just have a few 'go-to' creations that are tasty, simple, and always seem to get two thumbs up whenever I serve them. Also, I like looking back through the blog for repeat recipes even more than searching through my own Pinterest boards for that one recipe I wanted to try. ;)

This particular one is special because I have never in my life baked banana bread before (not that I can recall at least, possibly many years ago but I doubt it). But all of a sudden one day it sounded amazing and we had super ripe bananas to use. Then I noticed this pin getting re-pinned a ton on Pinterest, which was fun because I didn't know I had pinned it back in the day.

And so, I made the banana bread with peanut butter and chocolate chips. I did not have the mini-Reese's PB cups on hand and figured that chocolate chips would be good enough. I only had a super tiny loaf pan so my first try was a little odd, and also I used what I thought was baking soda but was actually some unidentified substitute powder that Nate had stored without a label. BUT! It still turned out delicious. Not exactly 'healthy' but oh, so worth it.

All Photos-106

All Photos-107

I have since made this two more times, and Nate bought me a larger/perfect loaf pan. I didn't change anything else from the original recipe except to use chocolate chips and not the PB cups. I made it as a 'thank you' gift for one of our neighbors recently and it was a hit! The hardest part was getting it out of our house before Nate cut into the loaf. It's really amazing with peanut butter and honey on top, for those of us that adore peanut butter ;)
All Photos-107

You can read the original recipe on this pin, and I have no clue how to make this printer friendly. But here is a list if it's helpful:

Ingredients:
-3 very ripe bananas
-1/2 cup PB
-1/4 cup vegetable oil
-1 egg
-1/2 cup white sugar
-1/4 cup brown sugar
-1 1/2 cups flour
-1/2 tsp baking soda
-1 1/2 tsp baking powder
-1/2 tsp salt
-1 cup of chocolate chips

Instructions:
1. Preheat oven to 350 and grease your loaf pan
2. Medium bowl: whisk together flour, baking soda, baking powder, and salt. Set aside.
3. Large bowl: banana, PB, oil, egg, sugars.
4. Pour the medium, dry-ingredient bowl into the larger, wet-ingredients. Stir until just mixed, don't overstir.
5. Fold the chocolate chips in, spread into the loaf pan.
6. Bake for about one hour or when a toothpick comes out clean. You might need to put tin foil over the top if it's getting too brown.
7. Let it cool for 10 minutes, then release the bread from the pan and put on a cooling rack.

Enjoy!!

Cheers to the Holidays, Wisconsin Style

It's the final week for Savvy Sassy Mom's Holiday Blog Hop, and the topic is Holiday Dranks. Or 'drinks', if you are classy.

Yessssss, you know I love me a cocktail and I'm going to represent my great state of Wisconsin with this one today. It's not in a cute Christmas cup, there aren't holiday berries sitting in front of that glass to make the picture more festive, but this is still an excellent cocktail. It's legit Wisconsin-style: straight-forward, no frills, loved by hearty Mid-westerners, and with plenty of alcohol;)

BOF

Now, I'm told that Wisconsin has the highest sales for Brandy more than any other state in the US and that is probably because we make our Old Fashioneds with the good stuff. Not whiskey, which is the standard for an Old Fashioned, but Brandy. And here in Wisconsin, we sure do enjoy our alcoholic beverages, pretty much throughout the marathon of mental endurance that is winter. All six months of it. Hold me.

But really, the Brandy Old Fashioned is a fantastic Christmas drink. A lot of my WI friend say these are the drinks their parents used to make for Thanksgiving and Christmas, so just sniffing the Brandy brings them back to the good old days (or something).

I just made these for a girls night out I hosted and they were a huge hit. I just had to dial back the amount of Brandy that Nate and I usually include in our BOFs to make it more acceptable to the general public, since we tend to make ours eye-twitching strong. I did a post all about our beloved cocktail a few years ago but it's time that I revamp the instructions a bit (hint: we are off the Squirt kick and totally on the 50/50 kick for the mixer).

Ingredients (except not Squirt, 50/50 is my preferred):
IMG_7360

Step one: put a little teaspoon of sugar at the bottom of your glass. Sometimes we skip this if we are feeling hard-core and not too sweet.

Step two: Add your bitters. We LOVE that Angostura brand you see above and we are not light on the bitters around here. Maybe a solid 8-9 shakes per glass.

Step three: Fruit! Add one maraschino cherry and an orange slice, peeled. A little cherry juice is alway nice, too.

Step four: Muddle the heck out of it all! We have a real muddler but a kids' wooden block or something would do just fine. I like to smash it up pretty good in there but I don't know that it matters much.
IMG_0928

IMG_0929

Step five: Add ice cubes. We now have very fancy 'high ball' ice spheres we should use to seem even more grown up.

Step six: Time for Brandy! I don't measure the alcohol here, which could be a problem for some. I think it's supposed to be about a shot but in the dead of Wisconsin winter, you better believe we amp this baby up with Brandy.

IMG_0938

Step seven: Soda to mix it up, we just fill to the top of our glasses. I love carbonated drinks so much, so this part is very important to me. If you get a 'Brandy Old Fashioned Sour' in bars, they won't always be carbonated as I think they must use lemon-lime juice to mix. My version here would be more of the 'Sweet' version with soda and if you ask me, it's seriously delicious.

IMG_6409

That's it! Enjoy your wintery/Christmas-y beverage with loved ones around the tree, making memories that will last for years to come. Or just have one on a Tuesday night if you dare. I approve;)

IMG_6413

April 29: Workday Evenings + Dinnertime Alone With 3 Kids

Apparently I'm doing a breakdown of our days, sort of like a mini-DiTL but much more generalized and probably not as interesting. A typical workday morning is here, a typical day at home is here, and now onto a workday evening. FUN!

I get Cecelia and Porter from Lori's at 4:00 pm on my work days. If I have time after my last patient, I will come back to our house, change clothes, drop off my giant work bag, and get Truman from Tony so he can ride along with me.

We get back home from Lori's by 4:30, and if it's nice out we may play outside in the driveway or even on the playground at school for a bit. Sometimes Porter is starving and exhausted from his super social day and will not tolerate anything but his high chair and lots of food. Sometimes Cecelia is incredibly sweet after Lori's, excited to see her big brother and myself, and other times she is quite tired and extra emotional. It varies and because of that, we might just start the dinner process right away when we get home.

At the latest, I'll start making our dinner at 5:00 with Porter in the high chair in the kitchen with me, Cecelia and Truman running around/chasing each other/usually playing pretty nice at this point. They are both incredibly hungry by now so I'll start by slicing up some of the fruit for them, or throwing a GoGurt tube their way. Porter likes to get started with his dehydrated strawberries and bananas (also CC's fave!), or apples, or cheerios. His favorite food in the entire world right now are the Gerber Lil' Crunchies cheese puffs. Not sponsored (I wish!) but this kid could literally eat an entire container of these in one sitting. I reserve these for a Big Dog move when he is especially famished and not tolerating the healthier options I've given him (i.e. everything is thrown to the ground in defiance).

Favorite freeze dried fruits---not nearly as messy as the real stuff, easy to transport, etc.
Dehydrated fruit

New favorite greek yogurt, so yummy!
Greek yogurt

More on what I make for dinner after this little rundown, but my motto when serving three children dinner without my parenting partner? Whatever works, keep it simple, and make it as fast as humanly possible. The natives get very restless and nobody can function when hungry, during the witching hour, after a long day. So: easy and fast always win in my book!

We usually sit down to eat around 5:30 and I'll begin by spoon-feeding Porter either his favorite Greek yogurt, or perhaps one of the baby food purees he deems acceptable. He totally prefers all finger food but he also needs a super full belly so I don't mind feeding him part of his meals, too. I'll alternate between feeding him in the high chair, feeding myself, hoisting Cecelia up and down from my lap as she prefers to sit on top of me at dinner, and asking the big kids to please sit down and eat and STOP GETTING UP TO GRAB TOYS/RUN AROUND!

I have come to realize on these solo parenting evening hours (witching hours) that my children have an internal clock. They can happily feed themselves and sit relatively still for approximately 10 to 15 minutes and after that? Totally a battle to get them to focus on dinner, perhaps because they are full or perhaps because they are over sitting down at the table. If this was a true family dinner with Nate present, it would be more feasible to really push for a longer time at the table. But because he isn't home for dinner four out of the five week nights? Whatever works! If the kids are hungry they will eat and if not, they know they won't get anything else before bed (unless I cave and provide a granola bar or something later, in the name of preventing starvation).

Anyway, dinnertime is getting better on work nights now that I honestly don't care if the big kids finish their meals. If they *do* clean their plates then they can pick a small dessert but it's their choice if they want to eat everything or not. And it's my choice if I want to get all worked up over them not sitting at the table for longer than 15 minutes at a time.

For all of the chaos that dinnertime with three kids and one parent brings, there are a lot of really fun moments, too. This is the time of day when we really get to discuss what each of us did while we were apart. Truman will tell us about his favorite parts of school (library day? learning center? fifth grade buddy day?) and about what he and Tony did (played soccer, went to the hardware store, played in the basement, etc). Cecelia tells us about Lori's and Porter just squeaks and tries to add his two cents where appropriate. The big kids usually get very into potty talk at the dinner table and I used to ask them to save it for later but a little poo-poo-pee-pee discussions never hurt anyone. Plus, Cecelia and Truman both have the most amazing belly laughs that usually emerge when a 'booger butt' comes flying out of the other's mouth. So yeah, it's hard not to chuckle at their 3 and 5 year old humor sometimes;)

I usually start cleaning up from dinner by 6:15 and then we head upstairs for bath time. All three kids get a triple bath on Mondays and Wednesdays but that will probably change now that the big kids have soccer on Mondays. Porter could actually use a bath every day but meh, two or three times per week seems like enough for my dirty bird.

I'll take Porter out of the bath first around 6:45, to end his love affair with violently splashing the entire bathroom. He gets his jammies and starts his bedtime bottle while laying on Truman and Cecelia's rug. Then the big kids come in and get dressed, entertaining their baby brother further by getting all of their remaining energy out for the day. Porter sometimes stays up a bit after his bottle if he's in a good mood, so that the baby can see his daddy before he passes out for the night. (Porter, not Nate).

Usually I lay Porter down around 7 or 7:15 and usually Nate texts me to say he's leaving work around 7:15-7:30. Occasionally he doesn't get home until 8pm on these nights (Fridays are actually closer to 6pm) but luckily it's more like 7:30 when Nate typically comes home after his late Mondays and Wednesdays. It's always been like this---his latest nights are also my work days. But he will have new summer hours starting next week and things are going to change a bit! See what I mean about things changing as soon as you feel settled in a routine?

Once Nate is home around 7:30 or 8 Truman is usually nearly passing out from exhaustion and CC isn't too far behind, but it's not a question: they have to wait up for daddy to do bedtime. If Porter happens to be awake he may sneak in on the action, but more than likely he is already asleep. Nate takes over bedtime responsibilities and does 3 books, teeth brushing, and 3 songs. I come in and make up 2 stories for the big kids, take CC to the bathroom one more time, and kiss them both goodnight.

Then from about 8:30-10:30 we have the post-kids-bedtime glory of watching Lost, loving on the internet, and actually conversing as husband and wife.

It should be noted that as I'm typing this up, we had a 'wild card' night when things derailed quickly. Everything was awesome and happy and LALALA EVENINGS ARE FINE when all of a sudden, everything fell apart. I'll blame it on bath time, because the kids were splashing an absurd amount and I was scared Porter was going to tip over and I yelled too much and ended up cutting bath time short because it was ridiculous. Then the big kids turned off their ears and weren't listening to me, which was fantastic, and Porter vomited all over me to the point that it was literally the most puke I've ever had the pleasure of wearing. And that includes my college years, so you know this was bad. Cecelia got a few time outs, voices were raised, and yeah--just a tough evening when everyone was cranky and we all apologized to each other at the end, so that's good. Thankful there is always tomorrow to make amends. Also thankful for wine.

Therein concludes my mini-DITL, otherwise known as 'what do you do all day?'

But I also wanted to touch on a few meal ideas in the same vein of doing whatever works, as quickly as possible, to keep everyone fed while in survival mode with three kids and one parent. Holy cow, I am literally the opposite of a food blogger and I doubt anything I can write here will be particularly inspiring but maybe some of you would like a few simple recipes/ideas, too?

First and foremost, meal planning works very well for our family. Nate and I stand in the kitchen on Saturdays and go through the fridge, and decide what we want to eat for the week. We also make a running list on our phones (the 'Reminders' app) throughout the week for groceries that are running low. So if I grab the last gallon of milk from the downstairs fridge, I immediately add 'milk' to our list. Same for anything else that runs out mid-week, so that when we meal plan we are really only adding to the list of basics we already need.

Since I returned to work after Porter, we have been relying heavily on our freezer meal stash. See my freezer meals post for details, but it's bee awesome to pull at least one meal per week from the basement freezer. I hope to continue a few big batches of freezer meals throughout the spring and summer.

Our meals for the week usually consist of one freezer meal, one leftover/fend for yourself meal, and always pizza on Friday nights. Remember, Nate is not home for dinner Monday through Thursday right now and even pizza on Fridays can be iffy if he gets off late so EASY is key for me!

Also, really should have thought about this post more than a day in advance so I could actually have pictures to correspond with each meal but OH WELL.

This week:
Mon-Hot Ham and Cheese on a pretzel bun. Seriously obsessed with this one lately. Pretzel buns make everything amazing, we get nice deli ham each week anyway, and then we use provolone cheese. Heat it all up in the oven, add mustard, and voila! I usually make a side salad with this one, or else fruit or something. No picture but you can imagine that it's very tasty, yes? I will show you one of the mixed bagged salads that we really like a lot---prefer the ones that come with dressing and croutons but this was good, too!

Dole salad blend

Tues-Chicken Fajitas. Really good, fairly easy. Nate got home abnormally early this night so I had him grill the chicken breasts I was thawing on our gas grill. I do *not* man the grill alone, totally not my thing, so I will use the Foreman if needed. But the big grill makes the meat taste so much better so this was a bonus! I also had the forethought to quickly defrost even more chicken breast, and asked Nate to grill it for the next night's dinner. We sliced up bell peppers and onions, used flour tortillas, made guacamole on the side, and seasoned the meat with our Penzey's 'fajita' seasoning. Loved it, will probably make these a lot this spring/summer. Served with chips and guac. Truman even tried the chicken breast and deemed it 'gross'. Typical.

I had two of them, but forgot I was trying to take pictures of dinners and ate one before I remembered. ;)
Chicken fajitas

Wed- BBQ Chicken Quinoa Salad. One of our favorite summery meals, haven't made it in forever but we remembered it randomly last weekend when meal planning. My original pin on Pinterest had been removed (!!) so I had to scramble and found something similar. But really, you can add anything to this and it will still be good. We used grilled chicken breasts from the night before, and I also made the quinoa the night before. Then the night of this dinner, I pulled out canned corn, canned black beans, chopped up some tomatoes and avocado, added mozzarella cheese, and also BBQ sauce. DONE. We used to also have ranch dressing in there with the old recipe but I went without and it was awesome. The little kids actually did eat some of this, too.

Bbq chicken quinoa

Thurs-pizza. Usually frozen pizza, no shame. We have a small size cheese for the kids and then Nate and I split a bigger 'fancier' one with leftovers for lunches on the weekend. Also have a side salad and beer, duh.

Friday-traveling this week, but usually would do pizza here and leftovers Thursday night.

The week before:

Mon-Chicken enchiladas from the freezer stash with avocado and sour cream, chips. Love these so much, never gets old.

Tues-Hot Ham and Cheese with fruit and chips. Apparently this is becoming a weekly thing.

Wed-Falafels. We like the frozen kind from Trader Joes, I make Tzatziki sauce (cucumbers and dill with plain yogurt), add feta cheese, hummus, and avocado all wrapped up in a tortilla. Sometimes we will splurge and buy sprouts but they go bad so quickly. And recently I decided falafels always feel like something is missing, thus the addition of feta, hummus, AND avocado. Really like this version. Serve with fruit. Would have been a very nice picture for you, huh?

Thurs--Tilapia, frozen kind from Target. I got wild and wanted to bread it and it turned out alright with breadcrumbs and an egg to help them stick. Pan fried was the method of cooking but we also like to bake our fish. Steamed fresh  asparagus with garlic and parmesean, and frozen scalloped potatoes from Trader Joes were our sides. This was a night when I waited to eat with Nate when he got home, so we made this together around 8pm once the kids were asleep. Very good with red wine even though I know white is supposed to pair with fish. Love me some red wine!

Friday-frozen pizza

Other go-to favorites:

-Chicken Stir Fry--soy sauce, mmmmmm.

-Au Jus on pretzel buns--roast beef is so freaking good. And I love sandwiches, obvi.

-Nachos-beef with taco seasoning, avocado, black beans, tomatoes, cheese, sour cream.

-Burritos or Tacos--usually one Mexican meal per week around here.

-'Big Fat Salads'--spinach, lettuce and/or kale as a base. Or perhaps one of the bagged salad blends as a base. Then carrots, cucumber, tomatoes, sunflower seeds, feta cheese, avocado, bacon, hard boiled egg, and my favorite poppyseed dressing.

-Breakfast for dinner--can't go wrong, might have overdosed on this for awhile there.

-Grilled cheese and tomato soup--another winter classic.

-BLTs--anything bacon = yes. We try to keep bacon frozen for whenever the mood strikes.

-Cheeseburgers--on a pretzel bun, of course! Prefer from Nate's grill instead of my Foreman.

-Brats--we are in Wisconsin, after all. Good from the Foreman, too. Usually have frozen brats as a go-to throughout the year.

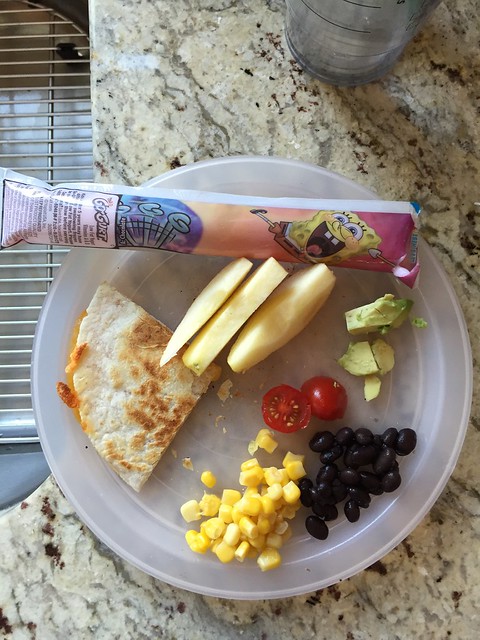
Meals for the kids: Porter gets his yogurt and/or baby food plus anything off my plate. Tonight he had avocado, black beans, and corn plus a small cheese quesadilla. Cecelia likes to steal my food off my plate, the exact same food provided to her on her own plate is not as good as mine I guess. I usually make Truman and Cecelia a kid meal that sometimes overlaps with the adult meal and sometimes not. Tonight they each had a part of a cheese quesadilla, yogurt, apples, and Cecelia had some of my quinoa salad. I would love to have all three of our children eat the exact same meal as Nate and I, but Truman is just so picky and I'm just so not up for the challenge of changing that right now. So we blend what they eat with what we eat and it works!

Dinner for CC tonight (Truman's very similar, no way in HELL he would eat a tomato though):
Kids dinner

Truman's lunch the other day:
Trumans lunch

Porter at dinner, a big fan of quesadillas. Also, his diapers tomorrow are sure to be AWESOME!
Porter at dinner

Some of their favorite meals: all beef hotdogs, chicken nuggets, grilled cheese, cheese quesadillas, PBJ, turkey breast, breakfast (waffles or pancakes), and cheese pizza. I usually try to get a fruit (bananas, apples, strawberries, and pears are their ultimate favorites) and some added protein served in there as sides to their 'main dish.' And again, Cecelia really will eat the adult meal without issue and so will Porter for that matter. Truman is getting there but he sure does have his routine set on a few different foods----sounds a lot like me as a kid (and as an adult!)

Really like these hot dogs lately!
Beef hot dogs

My lunch the other day when I realized I wanted to do a post like this. Very informative, yes?
J lunch

There is a reason why blackberries are not my favorite fruit for Porter.
Porter loves blackberries

Thus concludes my final mini-DiTL and a food post for you. Very much 'real life' and the opposite of elaborate food blogger, I know!

Stocking Up on Freezer Meals

freezer meals: My Life in Transition

Let me admit something to you in this post: I really don't love to cook. Maybe it's just because in this season of our lives, dinner time is hectic and not exactly 'fun' at all. Especially on the nights when Nate doesn't get home until 7:30 pm, dinnertime is just freaking rough. It usually involves me trying to throw together whatever we have on the meal plan while two out of three children are crying/need me to hold them. Since have the meals planned ahead of time it always *seems* like a super doable recipe, but once it's crunch time I find that chopping anything, manning the oven, or opening any jars proves to be way too much for me to handle. Yes, I have tried wearing my baby. Yes, I have tried prepping during nap time and keeping the recipes simple. But there are always constant interruptions of Porter needing to nurse/be changed/crying, and Cecelia needing all of my attention as well.

During my maternity leave, I started to realize that on Nate's late nights, which are Mondays, Wednesdays, and sometimes Fridays, I needed to revamp our routine a bit. It just wasn't working to make anything with fresh produce---although we love our veggies and fresh fruits. Name of the game: survival mode. Our family needs to eat but it cannot be at the expense of my mental sanity and dinner time and it cannot take me 3 hours to complete.  And so? Enter in freezer meals. If I'm feeling especially energetic I can always try to throw together a side salad or fruit in a bowl, but I cannot promise anything on those 'solo parenting/dinner/bathtime' nights!

When mom was visiting us, she suggested that we team up and assemble a ton of freezer meals together before I returned to work. I can then use this stash on Mondays and Wednesdays, and when Nate is home on the other nights we can do more fresh and elaborate dishes. (Note: by elaborate I mean grilling burgers, making a giant spinach salad, or doing anything that takes longer than 5 minutes. That is elaborate to me!)

I will also admit that I don't have a super-refined palate by any means, and I'm pretty boring with my food choices. Nothing spicier than ketchup will touch my lips and I really just love chicken or beef with various amounts of cheese and veggies. So my meal choices are not fancy or special, but they work for us! And since our kids don't usually eat much of our 'adult' meals, I planned these portions to suit just Nate and I. This is a separate issue, I realize, and no---I'm not a 'short order cook' for my children. But I would rather make them something that I know they will eat, then encourage them to try a bite of OUR dish as well, to keep dinner time as pleasant as possible. Again, I realize this is a debatable topic on the internets but that is what works for our family! And: survival mode does not include constant food battles at the dinner table, especially when I'm alone with three kids during the hardest hours of the day. I just cannot right now.

I figured that I should document our little journey through seven different freezer meal recipes in case we do this again in the future, but also because it might be really helpful to anyone else out there who wants a supply of ready-to-go meals in their freezer. I'm hoping we can always have a few meals like this on hand because it's just so nice to have them! Planning it all out and making the grocery list was half of the work, so I will try to save you some time here.

SO. I made this post with a grocery list, all of my recipes and tips/explanations of each meal, and then the general procedure we followed. I hope this helps someone!

----------------------------------------------------------------------------------------------------------------
Grocery list for all seven recipes:
*Note--I did not include the spices or items we already had in this list. So eggs, butter, milk, olive oil, flour, etc were all in our kitchen already and possibly yours, too. But I figured it might be helpful to see a grocery list that we used to purchase the other items for these recipes. Definitely read all of the specific recipes first to make your own shopping list, but this part did take me awhile to organize so I wanted to share it with you. Hopefully it helps! Our grocery bill was $200 for this but that also included other weekly staples like deli turkey meat, milk, eggs, bread, etc. Not too bad for 23 meals!

Meats:
-one 6 pound 'bone-in' pork shoulder (for the pulled pork recipe)
-8 chicken breasts (for enchiladas, quinoa casserole, and the white chicken chili)
-2 pounds of beef chunks for stew (beer beef stew)
-3.5 pounds of ground beef (lasagna and the beef chili)
-1 pound of breakfast sausage (lasagna)
-1 pound of bacon (for the beef chili, special addition for fun)

Canned products:
-2 cans of black beans (enchiladas)
-2 cans of white beans (white chili)
-2 cans of kidney beans (beef chili)
-2 cans red beans (beef chili)
-2 cans mild chili beans (beef chili)
-2 cans diced tomatoes (beef chili)
-2 cans whole tomatoes (lasagna)
-2 cans tomato paste (lasagna)
-2 cans green enchilada sauce--or one large 28 oz can (enchiladas)
-1 can of tomatoes with green chilis, like Rotel (beer beef stew)

Dairy:
-1 package of cream cheese (enchiladas)
-2 bags of shredded Monterrey and Colby cheese mix (enchiladas)
-2 big bags of flour tortillas (enchiladas)
-1 bag of shredded sharp cheddar cheese (quinoa casserole)
-1 tub of cottage cheese (lasagna)
-parmesean grated cheese-2 cups from our big can (lasagna)
-1 block of mozzarella cheese to slice accordingly (lasagna)

Produce:
-1 medium onion (white chili)
-2 celery stalks (beer beef stew)
-2 large carrots (beer beef stew)
-1 pound of potatoes (beer beef stew)
-1 head of broccoli (quinoa casserole)
-2 shallots (quinoa casserole)

Other:
-BBQ sauce (pulled pork)
-1.5 cups of quinoa
-1 package of no-boil lasagna noodles
-disposable 8x8 pans-we used nine of them

------------------------------------------------------------------------------------------------
RECIPE 1:
Lasagna: my version inspired by the Pioneer Woman

{Made three 8x8 pans} {Took me 1 hour to assemble and store}

Ingredients:

Camera Roll-472

-1.5 lbs ground beef
-1 lb breakfast sausage
-2 cloves of minced garlic
-2 cans (14.5 oz each) of whole tomatoes
-2 cans (6 oz each) of tomato paste
-2 T dried parsley
-2 T dried basil
-2 T dried oregano
-1 t salt
-2 cups (one big container) of cottage cheese
-2 beaten eggs
-1/2 cup grated parmesan cheese
-1 block of mozzarella cheese, sliced up
-1 package of no boil lasagna noodles

-Pre-cook the beef and sausage.

-To make the meat/tomato sauce: in a big skillet, add the tomatoes and tomato paste, 2 T of parsley, 2 T of basil, and a bit of salt. Then add your meat and let this whole thing simmer for a bit.

-To make cheese sauce: mix the cottage cheese, beaten eggs, grated parmesan, 2 T of oregano, 2 T of basil and some salt. Set aside.

-Layering: put a bit of your meat sauce down first, then noodles, then cheese sauce, then sliced mozzarella cheese, and more meat sauce. Keep going until you run out of room. I had two layers of this concoction in each of my pans. Then stop with a lot of grated parmesan, cover with foil, and store frozen. Will probably take at least an hour to bake with the noodles uncooked and with the dish frozen solid.


Camera Roll-475

Camera Roll-478

Camera Roll-479


*This was the first time I've made this recipe and I sort of changed it around from that link above. Apparently one large tub of cottage cheese is just a bit over 2 cups and I actually needed 3 cups. Oh well, it didn't seem to matter that I used less. I also used oregano and basil instead of the parsley for the cheese mixture. I fried the meat ahead of time then used it in a skillet with the tomato products to make a sauce later, which isn't exactly how PW did it. I didn't love using whole tomatoes and really tried to smash them up for the sauce, so I'd probably use diced tomatoes next time. Then our noodles were 'no boil' and a little oddly shaped, but they did fit perfectly inside our 8x8 pans. I doubt the ratio of meat to cheese to noodles matters *that* much anyway since I don't think you can go wrong with lasagna! This made three 8x8 pans for us and since I used no boil noodles, I will plan to bake this for a really long time since it will be frozen and noodles uncooked. It took about an hour to put this all together, wearing Porter on my chest.

Camera Roll-474


RECIPE 2:
Cream Cheese Enchiladas: my version inspired by Pearls, Handcuffs, and Happy Hour

{Made four 8x8 pans, 5-6 enchiladas in each pan} {Took about an hour to assemble and store}

Ingredients:
Camera Roll-457

-3 boiled chicken breasts, shredded
-one 8oz package of cream cheese
-two 10 oz cans of green enchilada sauce, mild
-2 cans of black beans, drained and rinsed (original recipe calls for one can)
-4 cups of cooked rice (original recipe calls for 2 cups)
-2 bags of flour enchilada tortillas, the smaller size
-1 bag of shredded monterrey/colby cheese (original recipe calls for 1-2 cups)

-Boil chicken and shred. Make rice.

-Make your filling: chicken, cream cheese, and 1 can of enchilada sauce.

-Pour a bit of enchilada sauce into your pan. Start making your enchiladas by layering rice, black beans, and your filling mixture. Place these bad boys seam down into your pan and keep going until it's full. Top with a bit more enchilada sauce and shredded cheese. Cover with foil and store. Will bake at 375 for about 25 minutes once it's thawed.

Camera Roll-459

Camera Roll-463

Camera Roll-462

*This is one of my favorite tried and true recipes that I love to make for friends with new babies AND for us:) It always seems to make a TON of extra filling when I follow the recipe portions, and then I run out of tortilla wraps, rice and beans to make more than just a 9x13 pan plus a few random extra enchiladas for a separate 8x8 pan. So this time I decided my goal was to make four 8x8 pans, using one pan for a 'meal' for Nate and I. The above recipe is what I used this time but you can visit the link for the original version if you'd like. Our children are not big fans of enchiladas so I didn't have to worry about feeding four mouths with each pan---I eat 2-3 enchiladas for a meal and Nate gets 3. Easy peasy.

I doubled my black beans to two cans, doubled my rice to 4 cups, I got two big bags of the small sized enchilada tortillas, and two bags of shredded cheese. But I kept the amount of filling (chicken, cream cheese, and enchilada sauce) the same to see if that would get me to four small 8x8 pans instead of one large 9x13 plus a few extra. Doubling everything except for the filling worked out well and I could fit 5-6 of the small sized enchiladas in one 8x8 pan, making four pans total. Therefore this gave us a total of 21 wrapped enchiladas (three pans of five, one pan of six).

Also, the enchilada sauce is VERY important in this one. We have tried red sauce and hated it so the green sauce is a must for us. Plus, since I suck and hate anything remotely spicy, we always stick to the mild green sauce which is sort of hard to find but worth it to me!

Camera Roll-458


RECIPE 3:
Cheesy Broccoli Quinoa Casserole: Made to freeze from Annie's Eats recipe
 {Made two 8x8 pans} {Took 45 minutes to assemble and store}

Ingredients:
Camera Roll-502

-1.5 cups of dry quinoa
-1 head of broccoli, cut into small florets
-3 T butter
-3 T flour
-2 shallots, diced
-2 cups of milk
-1/4 tsp. garlic powder
-1/4 tsp. dry mustard
-1/4 tsp. cayenne pepper
-1 8 oz bag of shredded sharp cheddar cheese
-2 cups of shredded, cooked chicken

-Cook quinoa according to package. Boil chicken (probably about 2 chicken breasts or so?).

-Steam broccoli in a skillet with a bit of water, covering it as it boils then removing from heat once it's bright green.

-Make cheese sauce: melt 3T of butter in a saucepan over medium heat. Make a bowl full of the following: flour, shallots, garlic powder, dry mustard, and cayenne pepper. Then add this bowl to your butter, whisking until it's light brown for a few minutes. Then add in your milk, stirring frequently, and let it simmer for about 5 minutes. Finally, whisk in the cheddar cheese until it's nice and thick and pull it off the heat. Season with salt and pepper as you want.

-Put the quinoa, chicken, and broccoli together in a huge bowl. Then add your cheese sauce and stir it all up so it's nicely coated. Place this mixture in two 8x8 pans, cover with foil, and freeze. Will probably take about 30 minutes to reheat once thawed.

Camera Roll-505

Camera Roll-508

Camera Roll-507

*This was one where I followed the recipe directly, without any changes on my end, except I made it specifically to be frozen. It was pretty easy to make especially since I cooked the quinoa and chicken the day before. It very easily filled two of my 8x8 tins and hopefully it will cook from frozen nicely. I might even add breadcrumbs to the top before baking. It took me 45 minutes to put this all together, not including the quinoa and chicken cook times.


RECIPE 4:
White Chicken Chili: Mom made this one for us before and we loved it, so it went back on the 'master list' for the big haul.

{Made 3 quart sized bags} {Took 20 minutes to assemble and store}

Ingredients:

-2T. Olive Oil
-1T corn starch
-1 medium onion, chopped
-1 can chopped green chilis, drained
-2 cans white beans, drained
-2t cumin
-2t chili powder
-1 lb boiled, shredded chicken
-2 cups chicken stock (for later, when cooking)
-1t salt
-1t pepper

-Place all ingredients except chicken stock in large freezer bag, toss to coat and freeze. When ready, place ingredients in slow cooker, add chicken stock, cook on low for 4-5 hours. Remove chicken, shred and return to crockpot.

*For all of the meals that went into quart freezer bags instead of 8x8 pans, I figure that one quart bag is probably a good guess at two serving sizes. So one bag for Nate and I at dinner, especially if we have something else on the side like bread or crackers or grilled cheese to go with our soups/chili. We will see if I have to use one quart bag per person when super hungry. That will totally throw off my numbers! No pictures of this one yet.


RECIPE 5:
Beef and Bean (and BACON) Chili: this is my personal concoction that I make as someone who HATES anything remotely spicy. 

{Made four quart sized freezer bags full of chili} (Took 20 minutes to assemble and store)

Ingredients:
Camera Roll-510

-2lb ground beef
-1 lb bacon
-2 cans red beans
-2 can chili beans
-2 can kidney beans
-2 can diced tomatoes
-chili powder seasoning, garlic, salt and pepper

-For this freezer meal session, we cooked the beef and bacon ahead of time. I added the eight cans of beans and tomatoes right to my giant stock pot, and did not drain them. I added in the two meats and a bunch of seasoning, stirred it up and then divided it into ziplock bags. I'll use the crockpot or stove top when we're ready to eat this, and I'm thinking a quart sized bag will give us about 2-3 hefty bowls of chili total. Excellent served with shredded cheese. Love it with grilled cheese sandwiches. Took me a total of 20 minutes to add everything together, stir it up, and divide it into bags.

Camera Roll-511

Camera Roll-513

*I randomly wanted to try it with bacon this time just for fun, too, but usually I just use beef, three kinds of beans, and diced tomatoes plus seasoning. I am not a super-fancy chili person and both Nate and I really like this ultra-simple version. It might not have enough kick for everyone, so obviously change it as you want. Sometimes Nate will add extra hot seasoning to his personal bowl to compensate for me being a huge wuss with heat.


RECIPE 6:
Beer Beef Stew: This was one mom made for us before and it was a hit!

{Made four quart sized bags} {Took about 30 minutes to assemble and store, meat stays raw here}

Ingredients:

-2lbs chopped stew beef chunks
-2T olive oil
-2T butter
-2 celery stalks chopped
-2 large carrots chopped
-1lb potatoes chopped
-2 garlic cloves chopped
-2 bay leaves
-1T parsley
-1 cup dark beer
-1 cup beef stock
-1 can tomatoes with green chilis
-2t salt
-1t pepper

-Season beef with salt and pepper but do not cook. Place all ingredients in large freezer bag (or quart bags) except beer and beef stock. When ready, place stew mixture in crockpot, add beer and beef stock, cooking on low for 6-8 hours.

Camera Roll-555

*Again, hoping that one quart bag will feed Nate and I for dinner. This is the only meal I made that has raw meat in it, so it will definitely have longer crock pot times than the others that just need to be re-heated.


RECIPE 7:
Crockpot Pulled Pork: my version inspired by The Way the Cookie Crumbles

{Made 4 quart sized bags} {Took 5 minutes to prep/rub, then 8 hours in crock pot to cook}

Ingredients:

Camera Roll-584

-Penzey's 'BBQ 3001' rub
-bone-in pork shoulder, 6 lbs
-BBQ sauce

-We used our favorite Penzey's rub instead of making one out of other spices, like the recipe said to do. I just rubbed it all over (gross), wrapped up the meat in plastic wrap, and let it sit in the fridge over night. Then the next day we put it in our large crockpot on low with 1/4 cup of water. After about 8 hours, we shredded the pork, added BBQ sauce, and put it back on low for one more hour.

Camera Roll-637

*Ate this one the same night we did the crock pot all day. BIG HIT. Super yummy and moist, which is something that I usually cannot achieve with a crock pot. We plan to eat this with BBQ sauce on buns and Nate likes to add cole slaw to his pulled pork sandwiches. The meat was so good we could even eat it by itself with a side or two. I'm thinking that once it's frozen and then thawed out, I might have to add a bit more sauce but we will see.


The Procedure:

After the big grocery shopping trip, we got right to cooking all of the meat. So we fried the bacon and put it aside. Fried the breakfast sausage and put it aside. Fried all of the ground beef with just salt, pepper, and garlic instead of trying to divide up the stuff for the chili with chili seasoning and the stuff for the lasagna without it. Nate was very concerned about not using any seasoning at all on the ground beef but I figured that it's going to be 'marinating' with the dishes for long enough before we eat it, and would be fine. We also boiled 8 chicken breasts with chicken stock and set it aside, then shredded it. All of this took maybe an hour to cook and store it away.

After the meat was cooked (because the beef stew uses raw chunks, and the pulled pork is sort of a separate deal), I cooked the rice for the enchiladas and the quinoa for the casserole. This took about 30 minutes.

Then I made all four pans of enchiladas and packed them away. This took about an hour. The next day I made the lasagna in an hour. Then I took a nursing break and made the quinoa casserole in 45 minutes. Then I combined everything for the beef and bacon chili in 20 minutes. Took a break, then Mom took over for the white chicken chili, which took 20 minutes. Then her beer beef stew took about 30 minutes for her. I did the pork rub over night, then cooked it in the crock pot the next day. So all together, we did this over three days mostly during naps and after bedtime. It cost roughly $200 and we should have about 23 meals for two out of these seven recipes. Not bad!

I will add pictures of the cooked meals once we eat them and can update this as needed, if we find a dish we love/hate/etc.  Let me know if you have other great freezer meal recipes or tips!

Aug 17: How To Make a Double Shot at Home

I have mentioned before that I am obsessed with the Starbucks Double Shots they make in their stores. Not the bottled stuff, it's totally not the same. But the handmade version? Divine when they make it correctly but it's usually $3.60ish for a grande. Eesh.

So Nate and I have begun to make a version of this delightfulness at home. I figured I should share in this fun little recipe in case anyone else wants to pretend to be a barista with us.

A Starbucks DS has espresso, 2% milk, classic sweetener, and ice. I don't know why it tastes like heaven with such simple ingredients, but it does. We like to get half and half instead of the milk and the number of espresso shots depends on what size drink you choose.

At home, we do have a tiny espresso maker kind of like this one but we don't use it much because it's kind of a beast to clean. However, we also have a small 'Aeropress' from a local coffee store here in Milwaukee and we love this baby so much. I also found one just like ours here on Amazon if you want to give it a go at home.

Do you know the difference between coffee and espresso? I don't think I did until recently, and figured that espresso was just stronger coffee somehow. But my coffee-snobby-husband informed me that coffee is made when you drip the water through a filter and espresso is when you force the water through somehow. So this little Aeropress can make espresso because you push air down through this tube on top of coffee grounds and hot water. Very fancy, I know. I used to make my other favorite 'hard core' drink from SBux with our Aeropress all the time: an Americano. That is just espresso and water and I like mine hot and straight up black. It's still my 'go to' drink, actually, but every now and then a Double Shot calls my name.

Here is how we make our own version of our favorite SB drink:

2013-08-09_0025

1. Make simple syrup. That's one part water and one part sugar over medium heat for about 3-5 minutes until all sugar is dissolved, stirring a lot so you don't burn your concoction. We store the simple syrup in a tupperware container in our fridge to use for this drink and any alcoholic drink that calls for simple syrup (ie Mojitos!) and we usually use 1 cup water and 1 cup sugar. It's also funny that I'm saying 'we' here since Nate is always the one that makes this for me. Truth: he actually makes these drinks 90% of the time and I have only recently started making my own. I'm spoiled, I know.

2. Put three fairly big spoonfuls of simple syrup in the bottom of your cup. SBux uses 3 pumps in a grande DS, so that's why we wanted to use 3 spoonfuls at home. Then we add ice to the cup.

3. Make your espresso. If you have an Aeropress, it means you will grind 2 big scoops of coffee beans (maybe equivalent to about 4 tablespoons?) and heat up some water. Then you put the coffee in the bottom of the tube with a filter, put it right on top of your cup, then pour 3 cups of hot water into the tube. You stir the grounds in the water for 10 seconds. Then you slowly push the top of the press down into the grounds, making it take about 30 seconds to push all the way through. Be careful here since you are pushing right into your cup and if you tip it over during this manual labor you are screwed!
2013-08-09_0026
4. Add however much half and half you like. Or milk, I suppose, but the fatty stuff is way better. Add more ice since you probably just melted the other stuff with your coffee. Then, if you want to be super authentic, hand shake your drink to let it mix gently. Wait a bit for it to cool off and then...

2013-08-09_0027

5. Enjoy.

(this one was a lot prettier than the one above, actually. Love when the cream does that!)
Untitled


Remember, we always make half caff coffee at home because we like so much of it, so often and that let's us feel less addicted ;) But the full caff version is great, too, just a lot stronger (duh). You can play around with how much coffee you use depending on how strong you like it. But that's how we are playing SBux baristas at home this summer. Not quite the same but the fact that ours isn't nearly $4 a pop makes it taste a little better somehow.
Related Posts Plugin for WordPress, Blogger...