Showing posts with label nursery. Show all posts

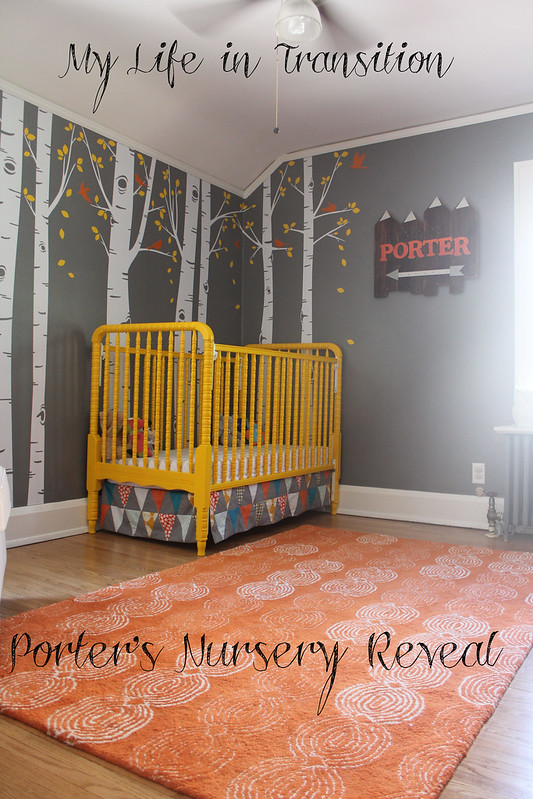
Porter's Nursery Reveal | My Take on the Woodland Theme

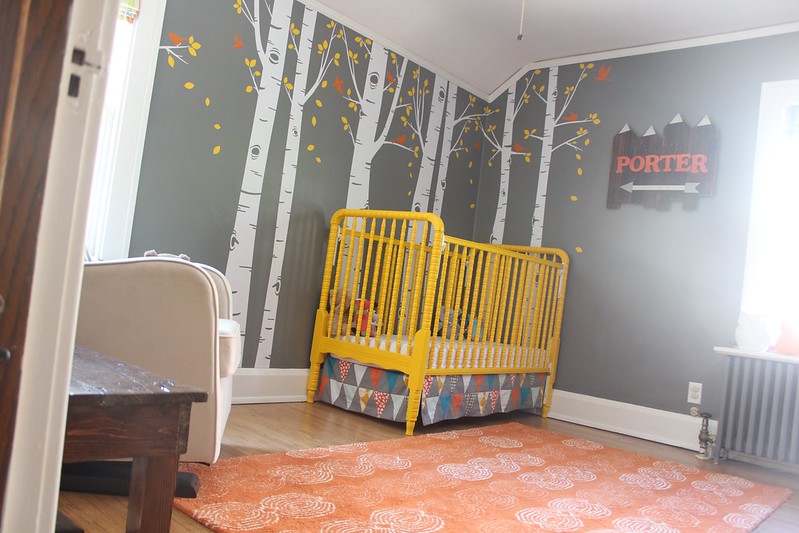
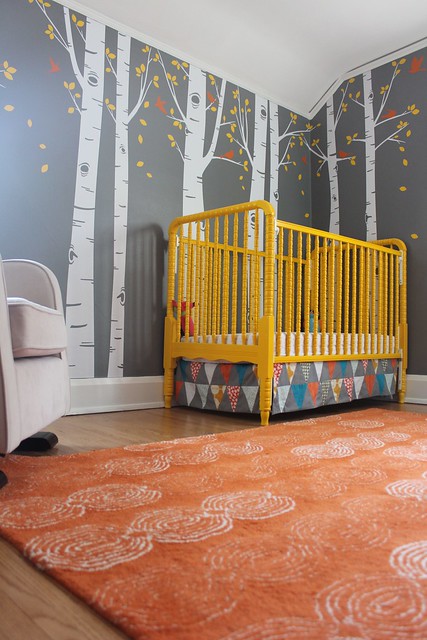
I'm so excited to FINALLY share Porter's finished nursery with you guys today! I love decorating nurseries for my kids (here was Cecelia's and here was Truman's) and this one is my favorite room yet. Something about the color scheme and my first real attempt at a loose 'theme' makes me extra happy when I'm sitting in our glider, taking in all of the details. I'll do a source list at the end along with the other links from posts I've done about this room along the way.

PortersReveal

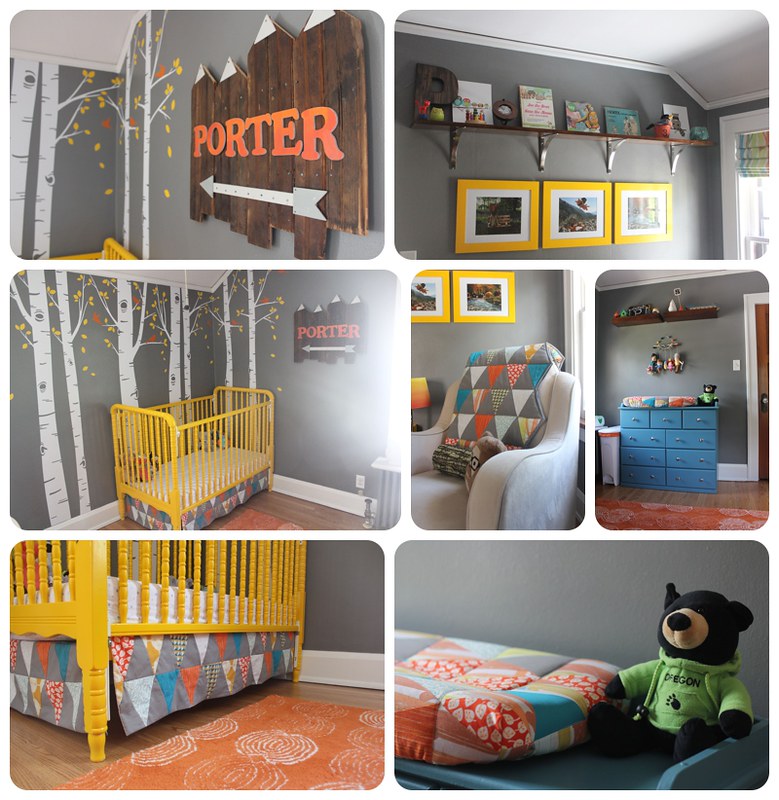
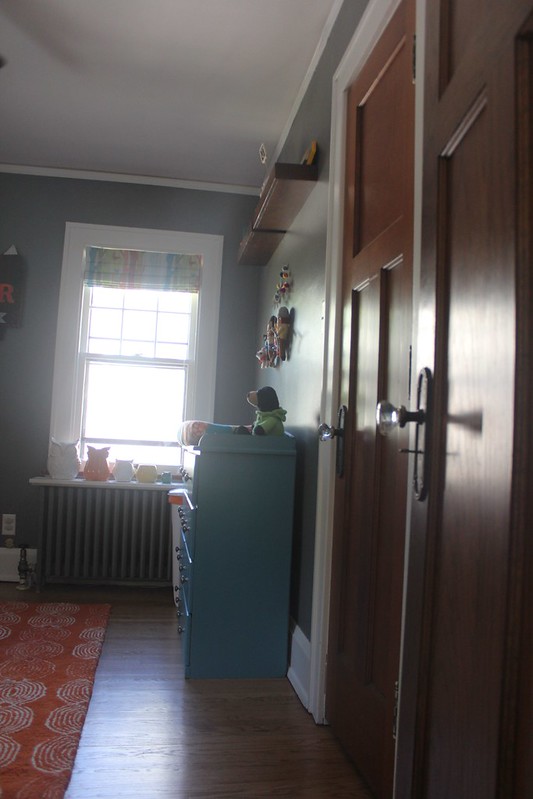
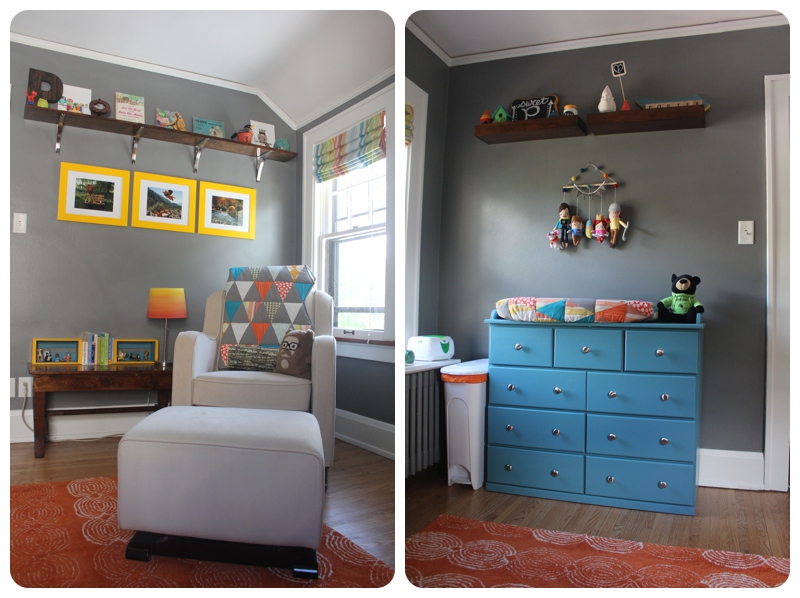
Let's take a full tour of Mister P-man's room (that he has yet to truly use for anything other than diaper changes and rocking in the glider. Ha!) :

Come on in...
IMG_1757

IMG_1758

IMG_1745

IMG_1752


And now for a few details:

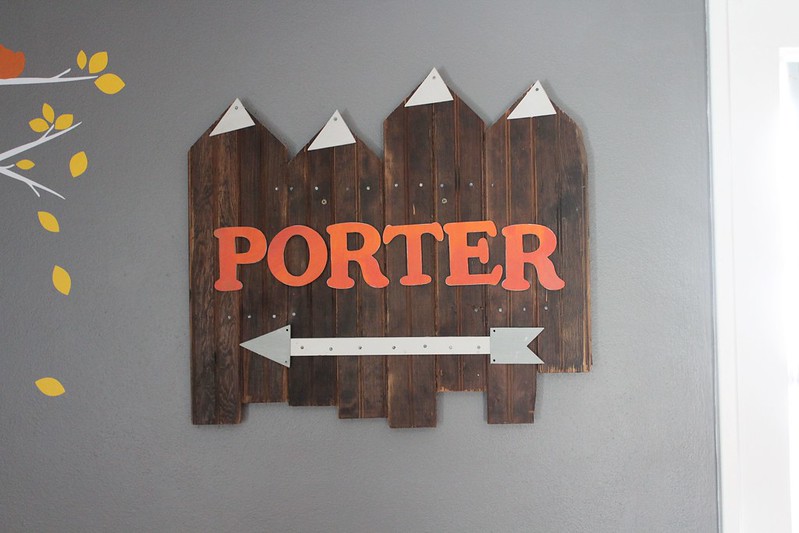
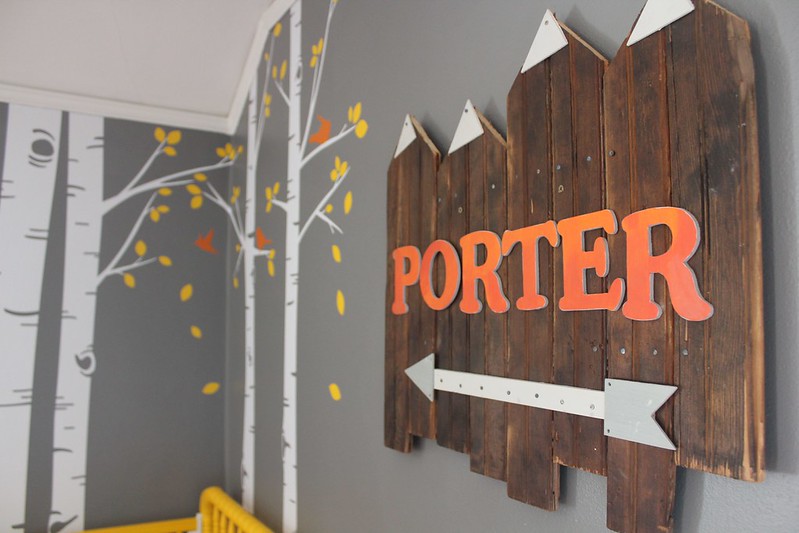
I made this wooden name sign for our boy using random old wood I found in our attic.
IMG_1763

I have no idea how old the wood is, but Tony thought it might be close to original to the house, so 1925-ish? I had to clean it off in the bathtub, sanded it down, and stained it. Then I had Nate cut each piece to make the points like little mountains and glued it all together. I added nails for good measure and to add to the rugged look. Then I bought wooden letters and shapes at Michaels, painted them with acrylic paints, and glued them all together. Nate hung this for me on the wall and immediately it became one of my favorite focal points of the room during my pregnancy. Something about seeing his name on the wall made me slightly giddy with excitement to meet our boy.
IMG_1761

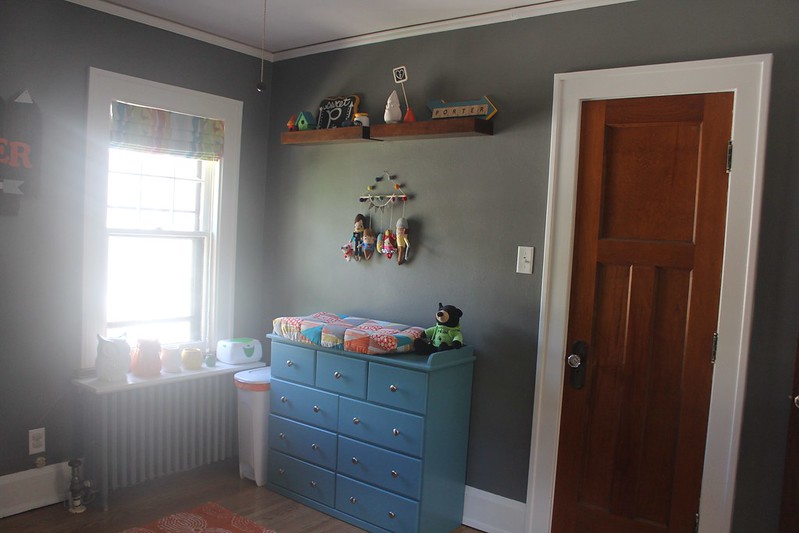
And then on the wall above our changing table...
IMG_1751

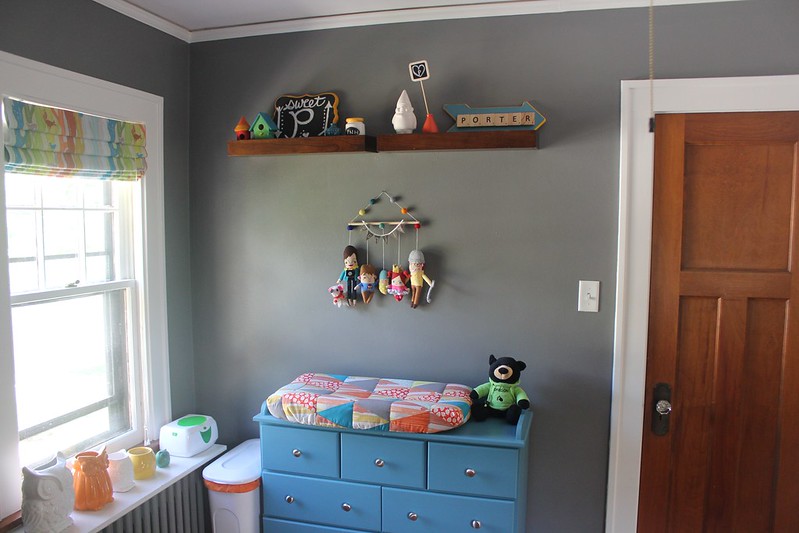
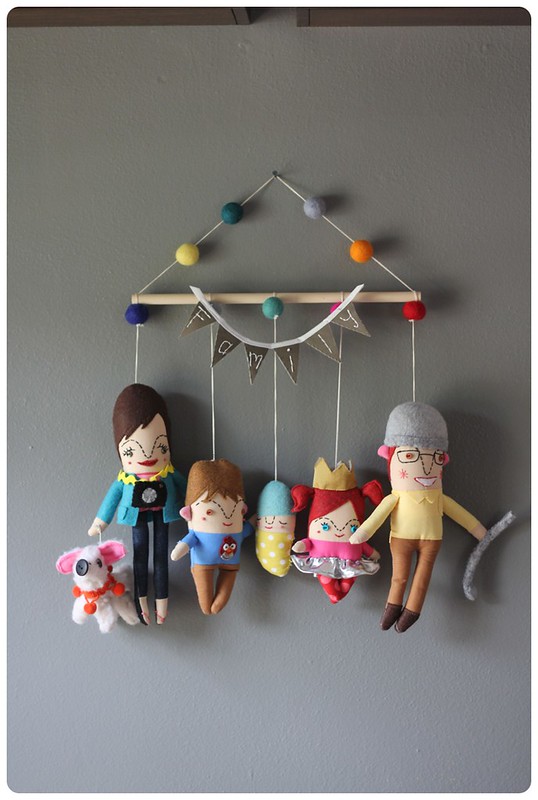
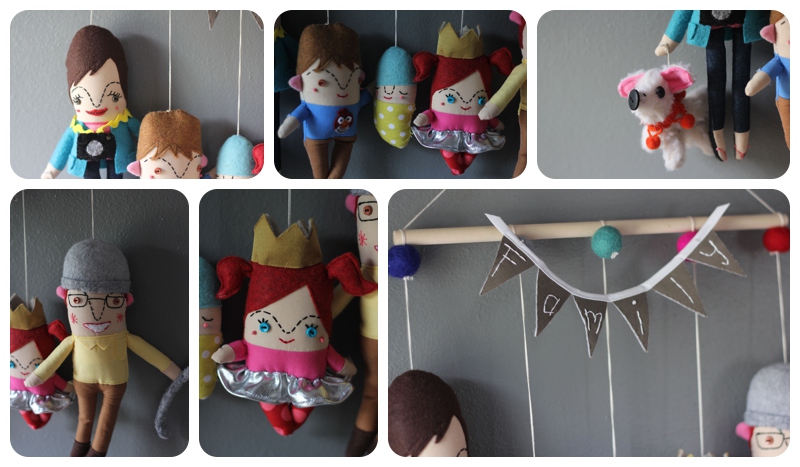
This wall hanging is my most favorite part of Porter's nursery, for sure. Our little family of five (plus Henry!) captured with tiny fabric characters? Yes.
2014-07-10_0007

My friend Hannah sent me the link to this wall hanging when I was about 30 weeks pregnant. I fell in love and HAD to have one for myself. Etsy seller Pink Cheeks Studio was a breeze to work with, and the owner Nichol was also pregnant at the same time as me so we were able to commiserate a bit with messages back and forth. I couldn't decide if I wanted a true mobile for Porter's room or this wall hanging, but went with this version so that it's no so 'babyish' and maybe I can move it to other rooms of the house someday (i.e. Playroom? Basement?). I provided some guidance for outfit choices, hair color, eye color, etc and then sent her a picture of our family so that Nichol could work her magic. I could not be happier with the results and almost cried when she sent me the first picture of her masterpiece.

I mean...Henry's little collar? My camera around my neck with my favorite tank/cardigan/skinny jeans outfit? Truman's Angry Birds tee shirt? Cecelia's crown and silver tutu, and Nate's golf club and ski hat? I love it all. It's us and it's even more adorable in person. Totally worth the ten week wait to have this made custom for Porter's room and I cannot sing Pink Cheeks' praises enough.
2014-07-10_0008

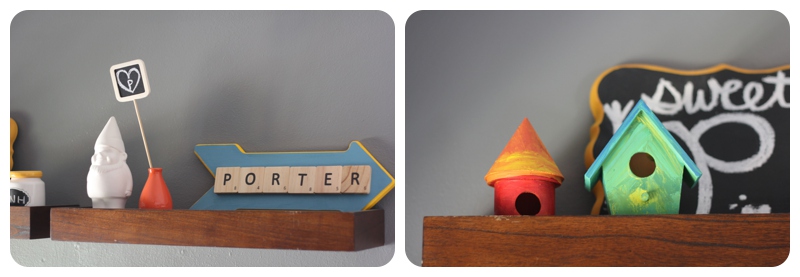
And then the shelves above the wall hanging have lots of fun little items to share. The shelves themselves were a wedding gift from Crate and Barrel:
2014-07-10_0012

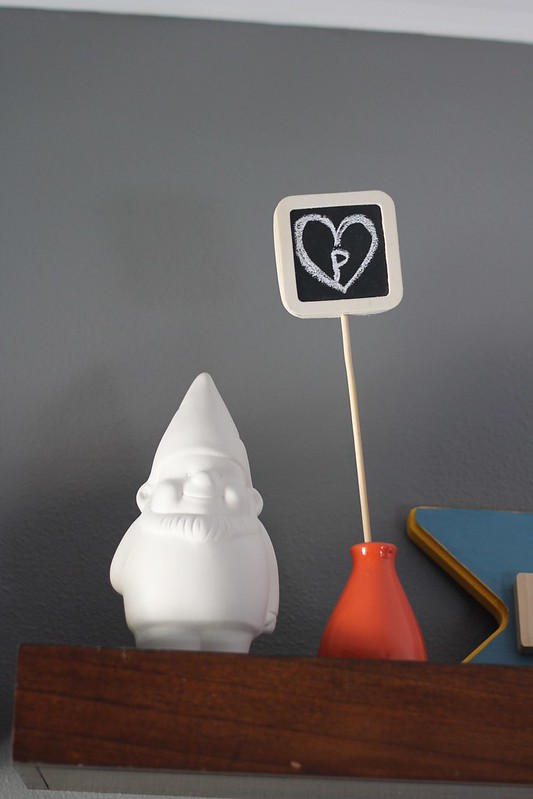
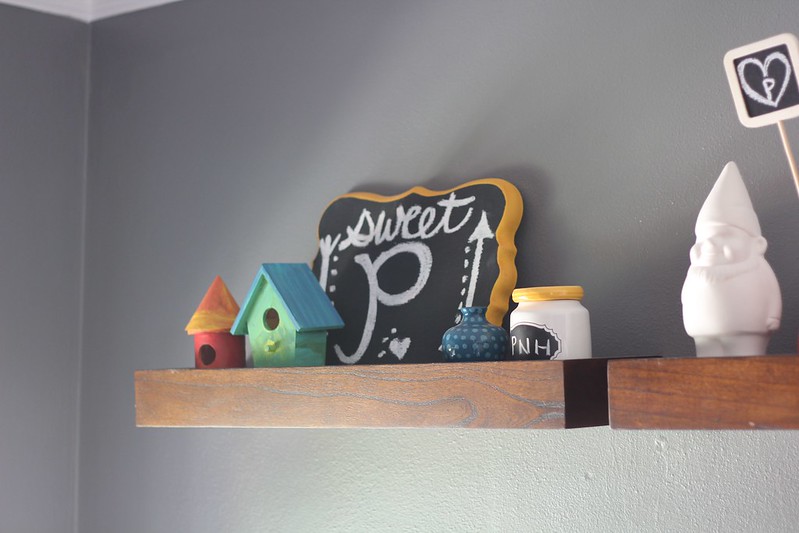
I found a lot of fun wooden 'plaques' at Michaels and painted the big arrow and the bracket plaques. I turned the bracket into a chalkboard with leftover paint from the back hall project, and then added fun Scrabble letters to the arrow (again, found the letters at Michaels.). The little white gnome is probably supposed to be painted but I loved how the white looked against the gray walls. Little vases and these cute chalkboard 'signs' made the shelves complete.
IMG_1742

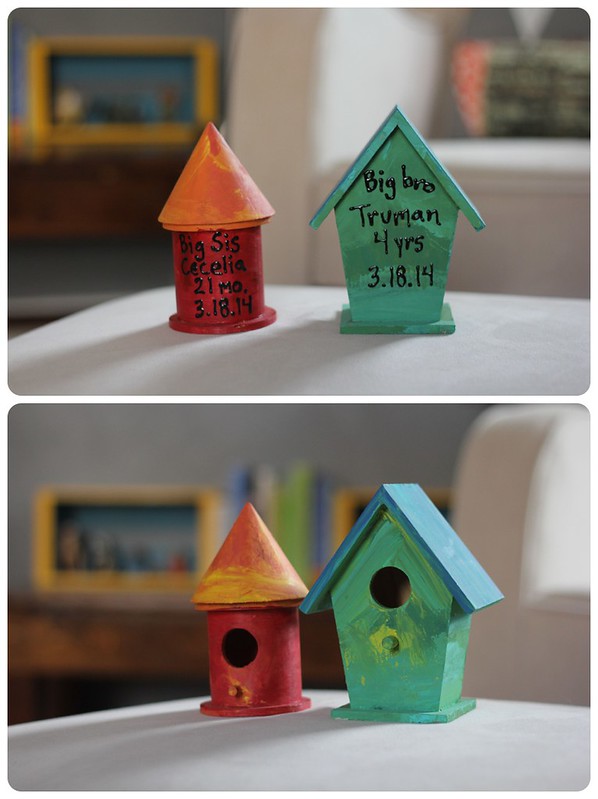
And the birdhouses! Another Michaels find.
IMG_1720

I saw this idea on Pinterest and had Truman and Cecelia paint these for their little brother. They did a GREAT job and I only had to clean up a few giant globs of paint at the end, but otherwise it's all them.
2014-07-10_0013

So many shelves in this room and I love it.
2014-07-10_0018
Moving on...

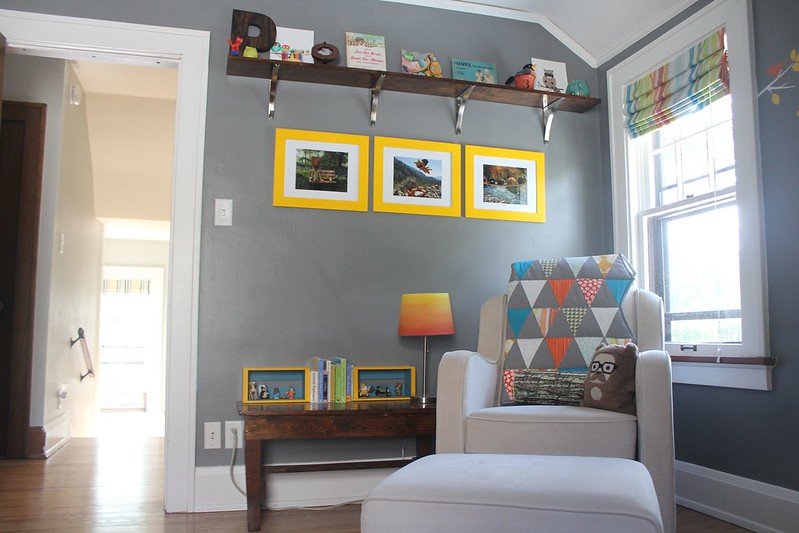
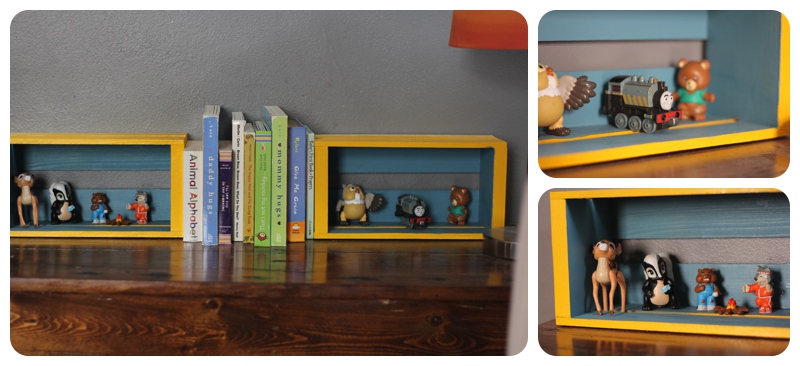
On the wall by the glider, I have these little painted wooden boxes full of fun toys. I bought the boxes at Michaels (sense a theme here?) and painted them with acrylic paint.
2014-07-10_0010

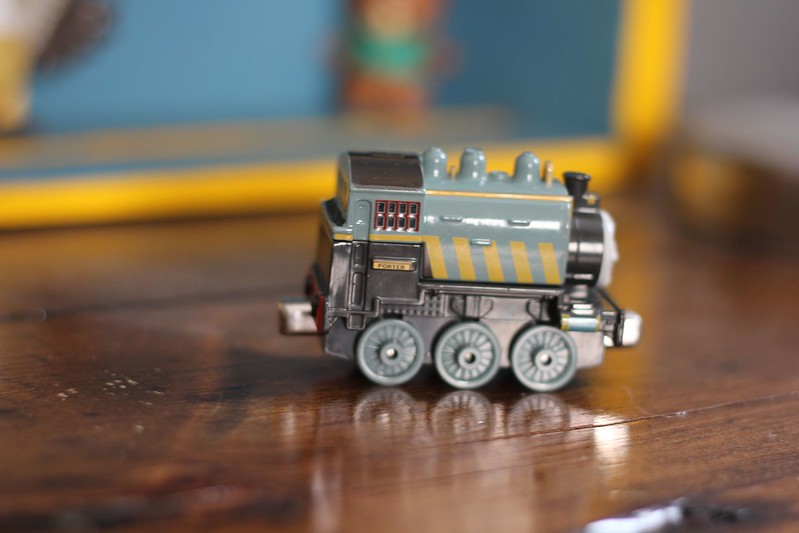
Most of the toys are vintage McDonald's Happy Meal toys that Lois had saved from Nate's childhood. There is also one new Thomas and Friends train. His name is 'Porter' and seeing this train at Target is how I discovered our boy's name. Yep, Truman is especially happy about Porter's name choice given that it's a Thomas name! I remember seeing the train before our 20 week ultrasound and it kind of just hit me that 'if this is a boy, he has to be Porter.' I mentioned it to Nate that night, afraid he would shoot it down, and he said, 'I love that one.' And so Porter is named after a train!
IMG_1707

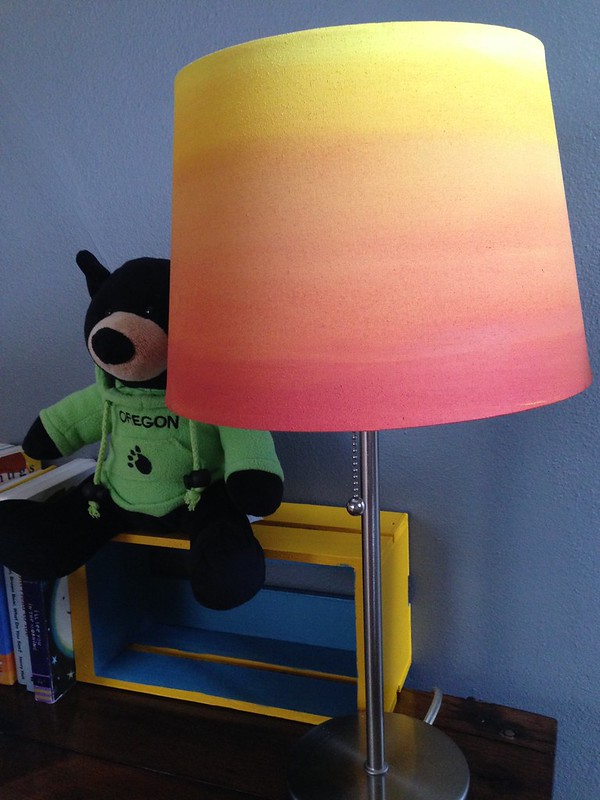
And my ombre lampshade that I tackled with acrylic paint turned out better than I thought.
Camera Roll-304

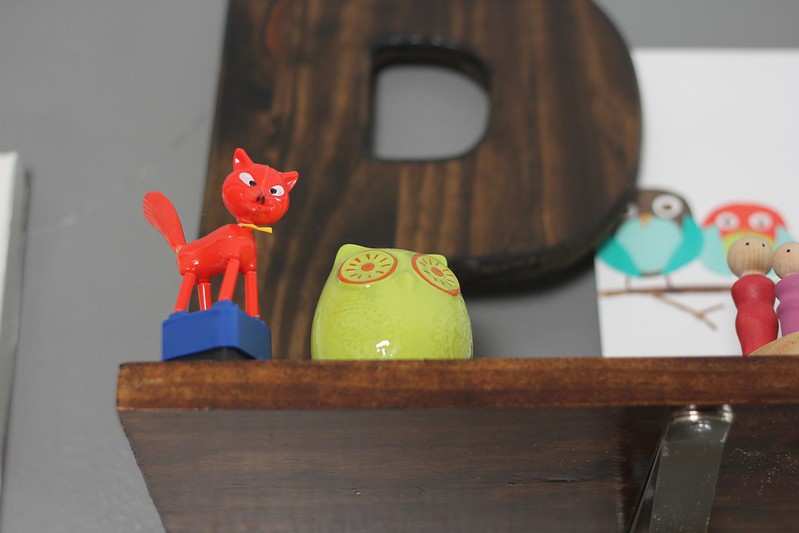
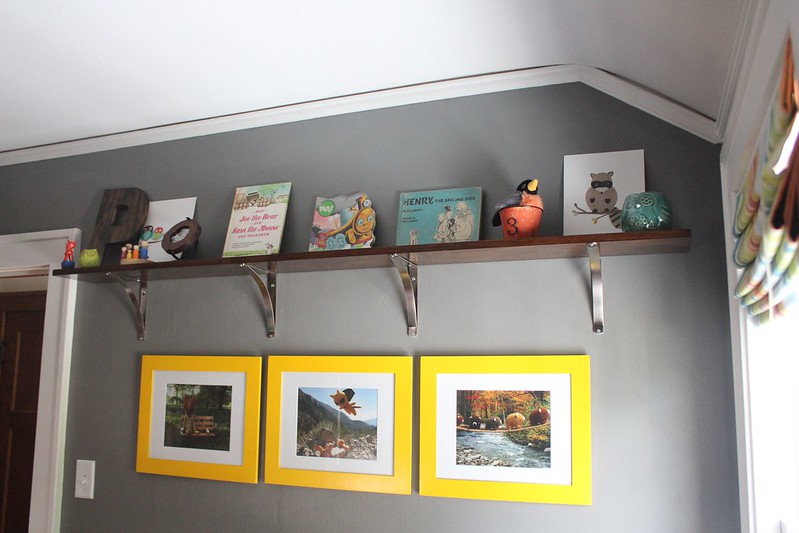
On top of the shelf that we made from a simple Home Depot board that I stained and polyurethaned, are a few other little gems.
IMG_1768

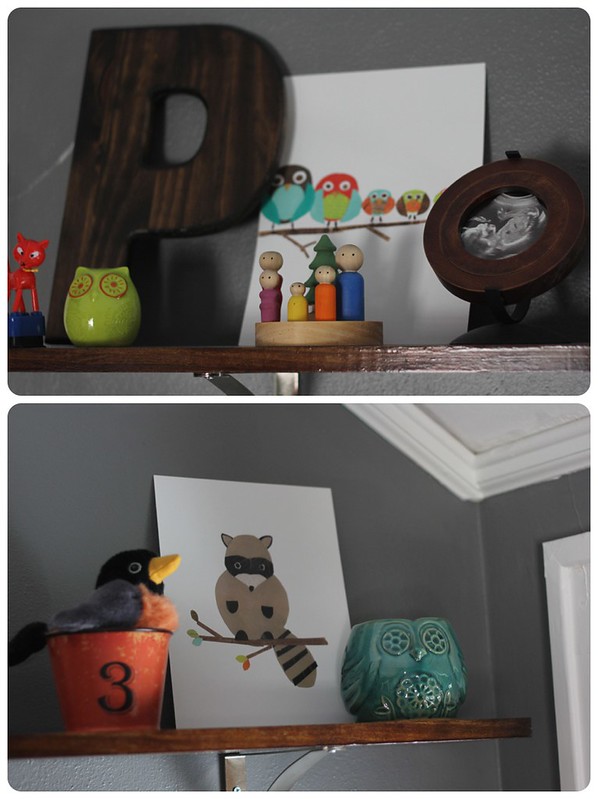
I bought the letter P at Michaels and stained it, used an old round frame for an US pic, and a sweet blog reader gifted me her owl and raccoon prints after seeing me pin them on Pinterest. The little wooden peg people were an Etsy find from seller 2HeartsDesire
2014-07-10_0011

IMG_1712

All of the books are classic ones given to us by Memaw. Someday I might move the books and place one of Porter's birth announcements there instead. We will see.

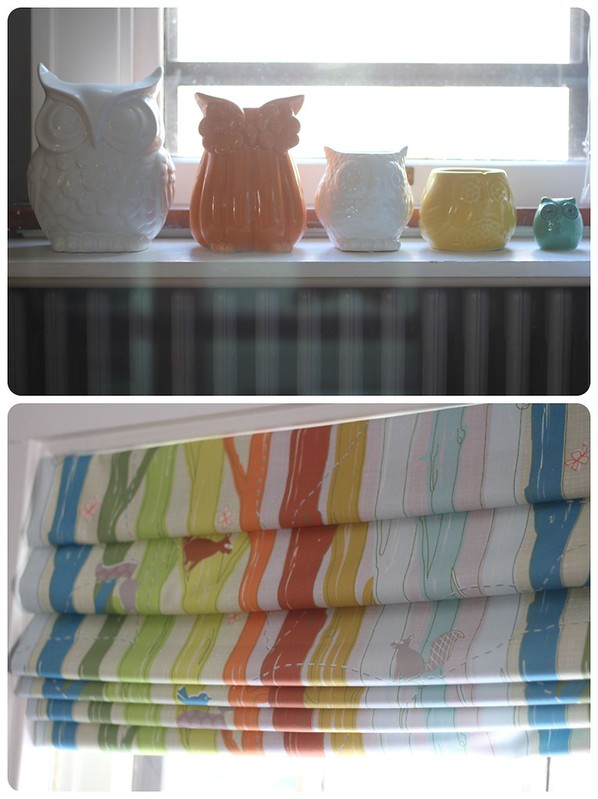
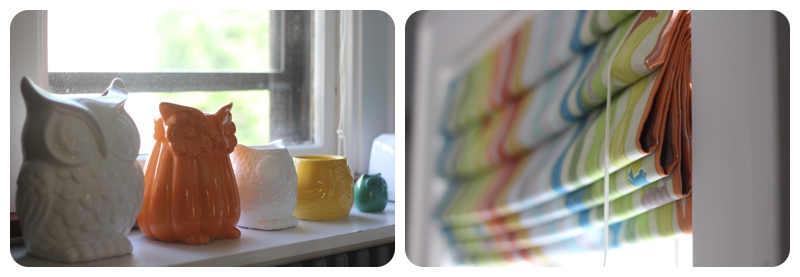
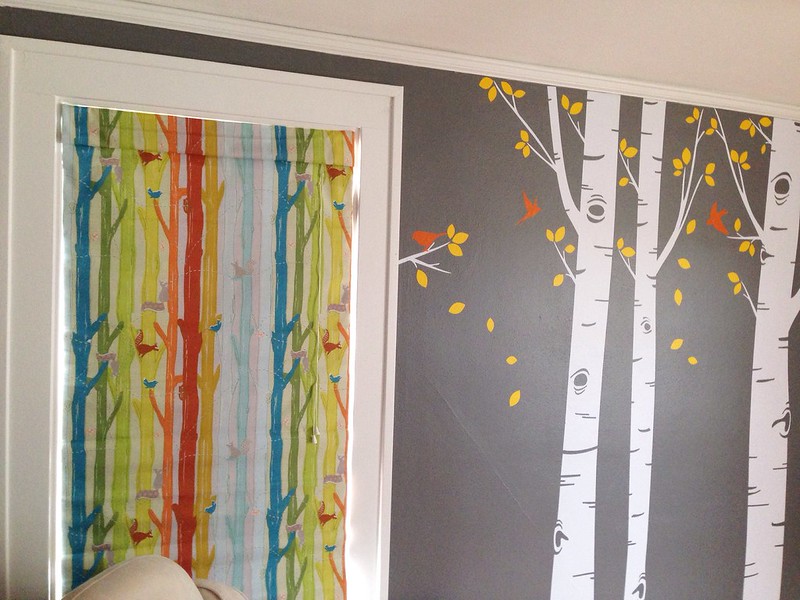
I also collected ceramic owls throughout the pregnancy and put these five on top of our radiator. And then there are the awesome Roman Shades my mom made for the room.
2014-07-10_0015

Camera Roll-190

2014-07-10_0016

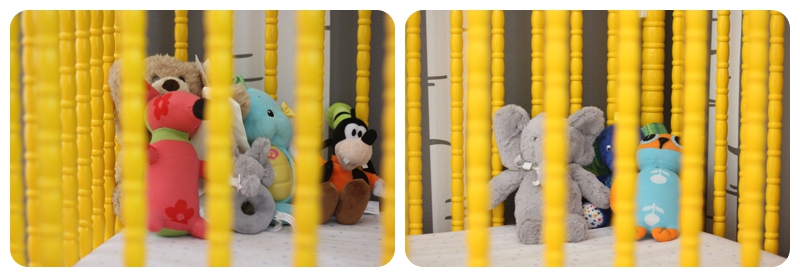
In the crib it seems like stuffed animals are rapidly accumulating. These won't stay there once Porter sleeps in the crib but for now they are cute!
2014-07-10_0014

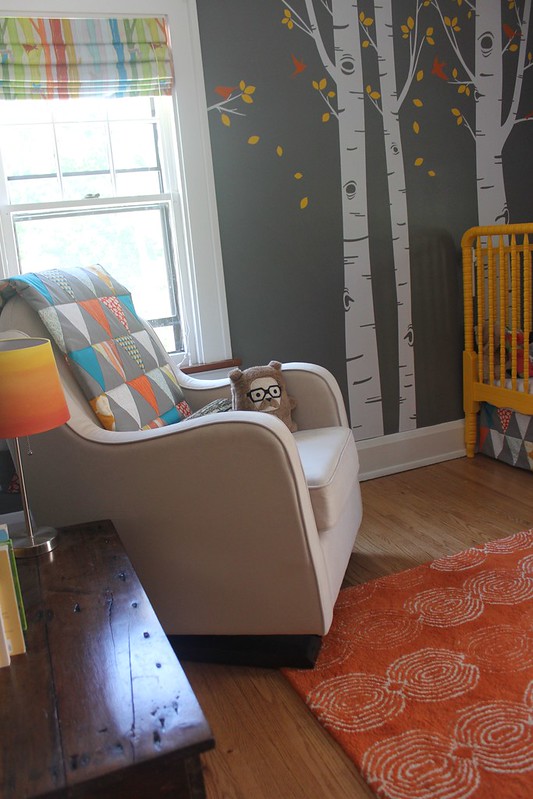
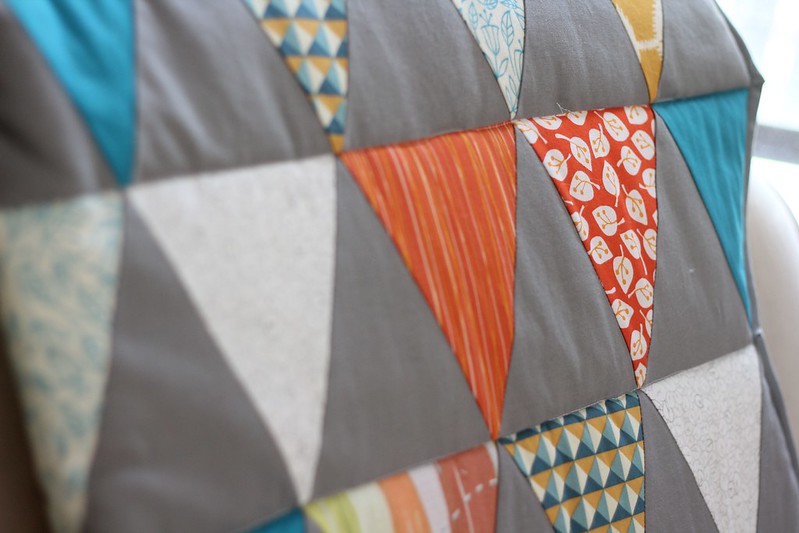
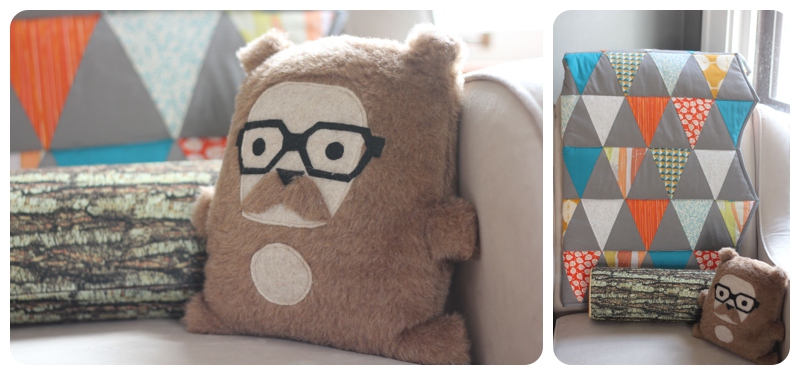
And my mom made Porter his own baby quilt, just like she did for the other kids. Truman's is full of rectangles, Cecelia's is chevron, and Porter's has triangles. LOVE. And also, this random monster dude with glasses? Nate and Truman picked it out on their own one day when they went to the local farmer's market. The log pillow mom got from Etsy. This glider is styling for it's second debut in a nursery and I'm still SO glad we splurged on an expensive glider for Cecelia's nursery.
IMG_1784

2014-07-10_0009

IMG_1759

All together:
2014-07-10_0024

Other links for Porter's nursery:

How I applied our wall decals

How I repainted the dresser and refinished the wooden bench

Making that long shelf and all about the awesome prints in yellow frames

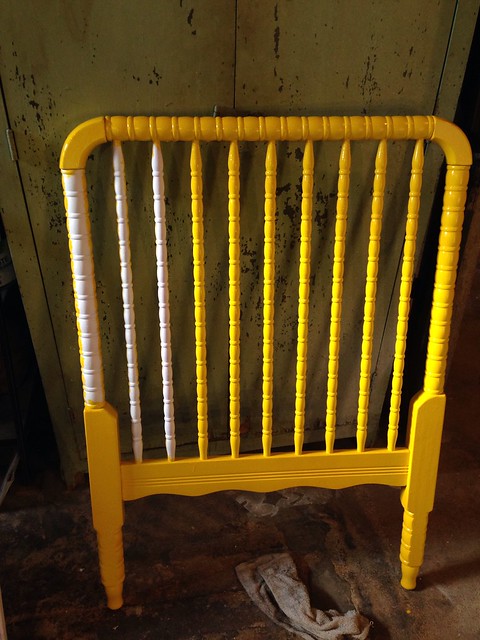
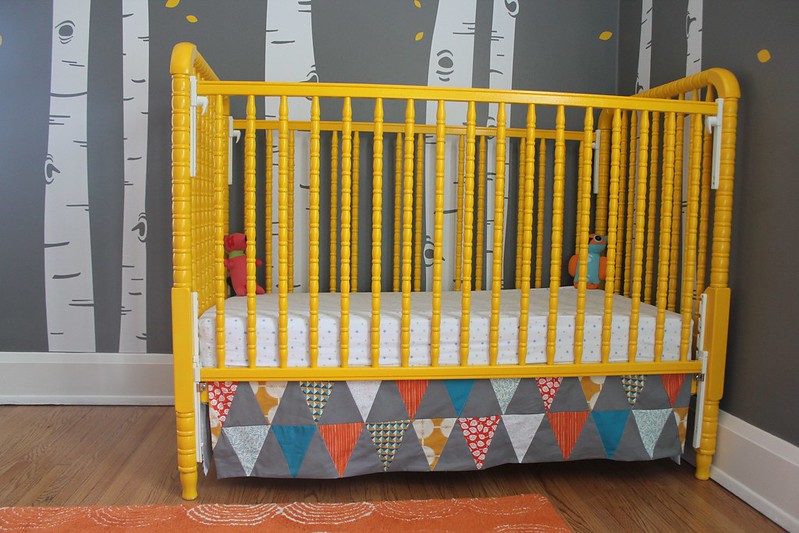
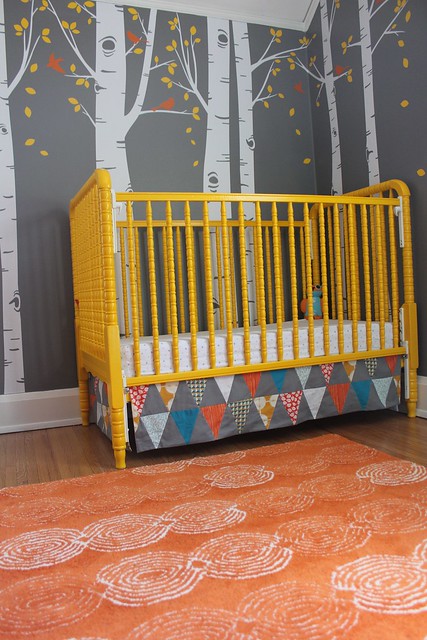
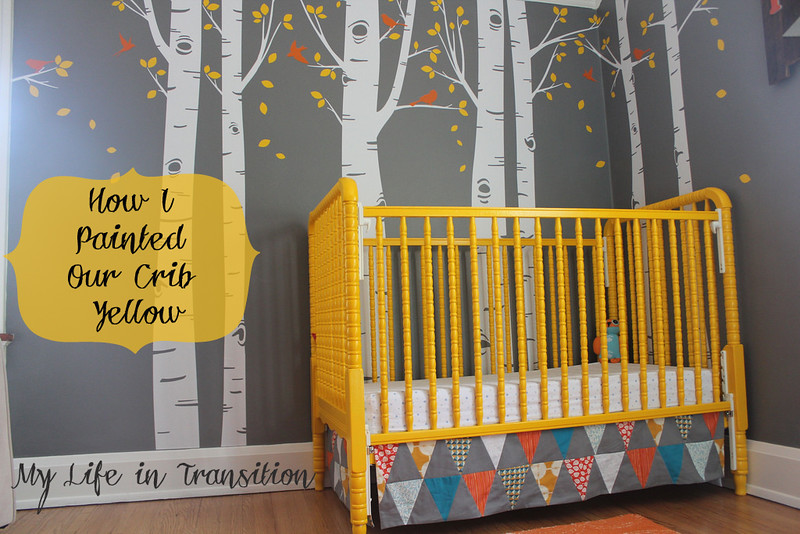
How I repainted our crib YELLOW


Source List:

Wall color: Glidden's 'Seal Gray' in satin finish, Home Depot
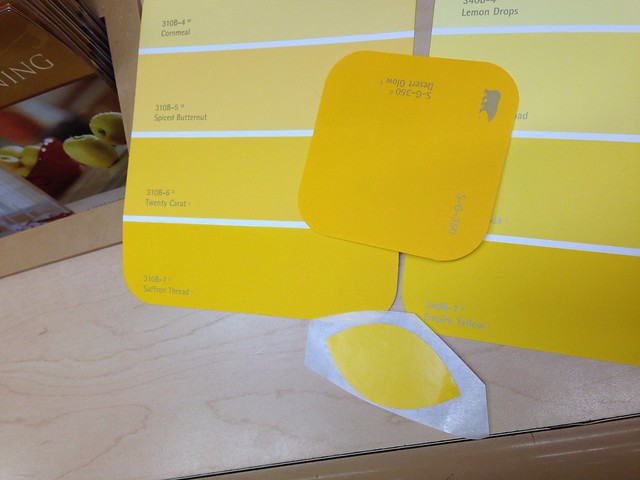
Crib paint color: Behr's 'Saffron Thread' in semi-gloss finish, Home Depot
Rug: RugsUSA Tuscan VS88 Orange rug 5x8
Fabric for Roman Shades: Squirrathalon by trcreative, Spoonflower
Wall Decals: InAnInstantArt on Etsy
Wooden Peg People: 2HeartsDesire on Etsy
Custom Family of Five wall hanging: Pink Cheeks Studio on Etsy
Prints in yellow frames (DIY painted white frames from Michaels): TADAsRevolution on Etsy
Stuffed Sock Animals in crib: supersockmonkeys on Etsy
Brackets for DIY long shelf: Target
Crib skirt and changing pad, Roman Shades, quilt: made with love by GoGo ;)
Crib: Craigslist find, DIY paint job
Changing table/dresser: Craigslist find, DIY paint job
Glider and Ottoman: from My Urban Child, the Baby Letto Nara Glider and Kyoto Ottoman in Ecru
Bench: found in our basement, DIY refinishing
Shelves: DIY and Crate and Barrel


Baby Boy Nursery | How I Repainted the Crib YELLOW!

It's time to officially show you the yellow crib! I think this will be my last nursery update before baby boy is born, and then I can really give you a tour. Still trying to be strategic about showing photos without his name in them;)

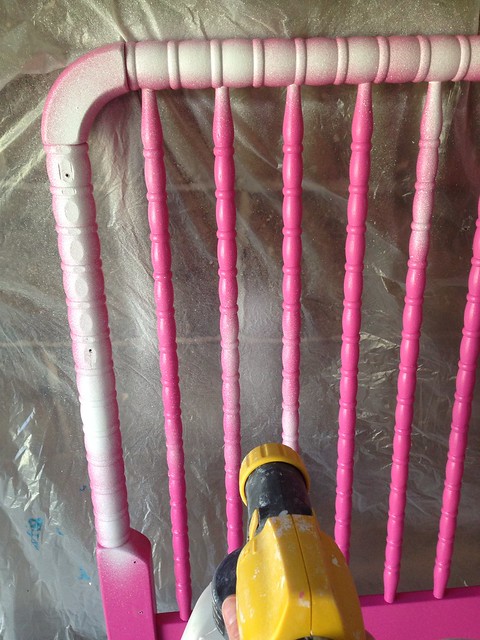
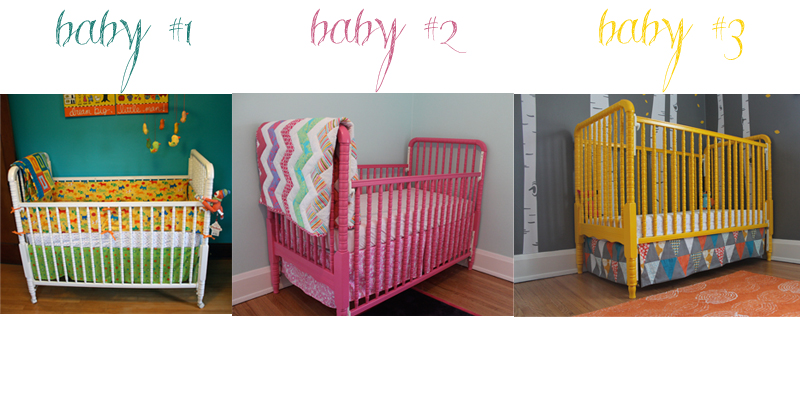
As a reminder: we found this (originally) white Jenny-Lind style crib on Craigslist for $40, back in 2009 when I was pregnant with Truman. He used the crib for almost two years while it was white. Then Cecelia got to use the crib after I spent many-an-hour painting it pink. And now? Same crib, third time around, but I went with a bright yellow for mister man. Something about using the same crib for every baby, but making it a little different each time makes me abnormally happy.

And of course, I have Pinterest to thank/blame for my love of painting all things in a nursery.

Here we go!
YellowCrib

As I'm typing out this 'How To' post, I'm reading back over my 'pink crib' post. It still boggles my mind to see the stats on that particular post---over 40,000 views? Talk about some pressure to write this in a way that makes sense and is just as helpful. I will have a few tips/tidbits/thoughts at the end.

THE SUPPLIES:
-sandpaper
-multi-purpose, every day cleaner
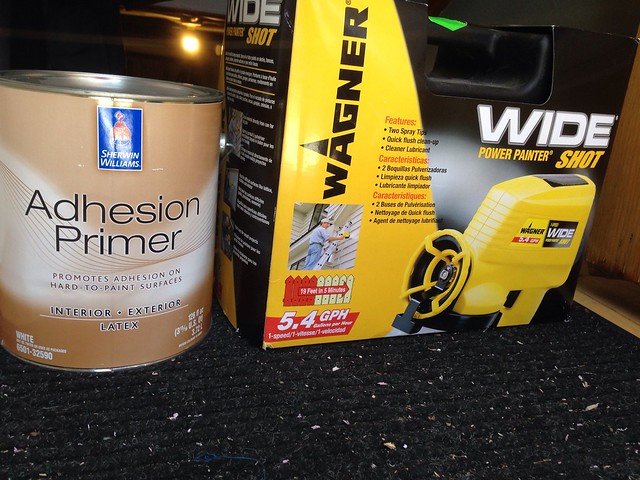
-Adhesion Primer from Sherwin Williams
-Wagner HVLP paint gun
-Behr semi-gloss wall paint (Saffron Thread color), paint brushes, and patience
-Water based MinWax polyurethane, paint brush, and more patience
-drill or a handy husband


1. The crib was already taken apart this time around, but I had Nate remove all of the hardware. Instead of taking pictures of all of the little pieces/screws to remember how they all fit together, I simply said, 'Make sure you can put it back together.' Spatial relations are beyond me. Thank you, husband.

2. I lightly sanded the pink paint and tried not to feel too sad about seeing it scuff up. It was in great condition and seriously did not chip at all when Cecelia used it. Then I cleaned the whole crib with regular Green Works multi-purpose cleaner. I didn't spend as much prep time this second time around because the pink paint was in great shape compared to the original white paint before it. Plus, I knew that I was going to use my most favorite primer that requires no sanding which made me feel very lax about this prep part.

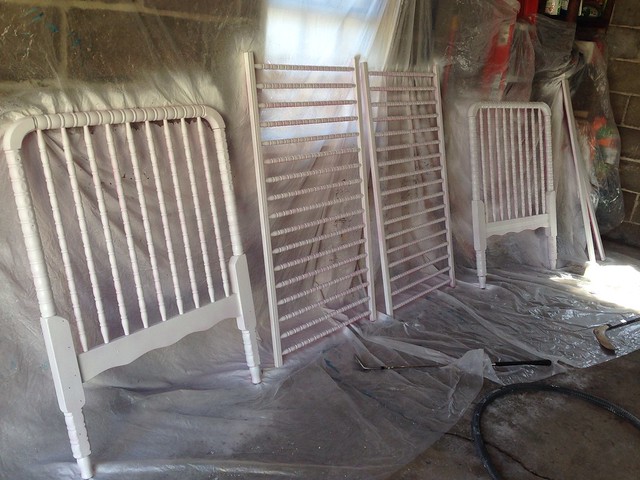
3. Primer time: I am seriously obsessed with the Adhesion Primer from Sherwin Williams. Unfortunately, they don't even make this can anymore but according to the guy at the store, people are really missing it because it's the best. It will stick to pretty much any clean surface and it's water based, so I didn't have to worry about questionable fumes for my pregnant self. (Side note: my OB has always said that painting with decent circulation in the room is totally fine). I wanted to use our Wagner spray gun for the entire process because it was so easy last time.
Camera Roll-559

Bye bye, PINK!
Camera Roll-560

Camera Roll-561

Camera Roll-568

4. In the middle of my first coat of primer, I had to switch out between one can of primer that was almost finished, to a brand new can I hadn't opened before during all of the wood-trim painting inside of our house. I should have taken the 2 year old can right to Sherwin Williams to have them shake it up for me but I was impatient, and just tried to stir the heck out of it. Well, as I continued on with the first coat of primer on the backside of the crib, I realized it was super watery and drippy. And not covering very well. And then the spray gun kept getting clogged and life was just not good.

So I finished up the first coat the best I could and once it dried, I knew I had a mess on my hands. BLECH. I took the can to SW and had him shake it up for me, and he assured me that although you usually only need one coat, in this case I could just do a fresh coat of primer on top of the watery stuff and I'd be good to go. So I tried to sand off a few of the bigger drips and then HAND PAINTED another coat of primer on the problem areas. This is when I decided I didn't trust my paint gun anymore since it was kind of a pain for the primer anyway. And thus, hand painting became my way.

Total: 1.5 coats of primer, first with a gun and the other 'half' by hand, just to cover up the thinner areas of primer from before.

5. FINALLY time to pick my yellow paint! I brought in a leaf decal to Home Depot and Truman helped me select the perfect shade. We went with Saffron Thread, and I got it in semi-gloss like I always do for furniture. Last time for the pink crib, I was told a quart would be enough. But since I used the paint gun, I was truly scraping paint out of the can by the end. So this time I splurged and got a full gallon but of course, didn't end up needing even 1/4 of it. Of course.
Camera Roll-182

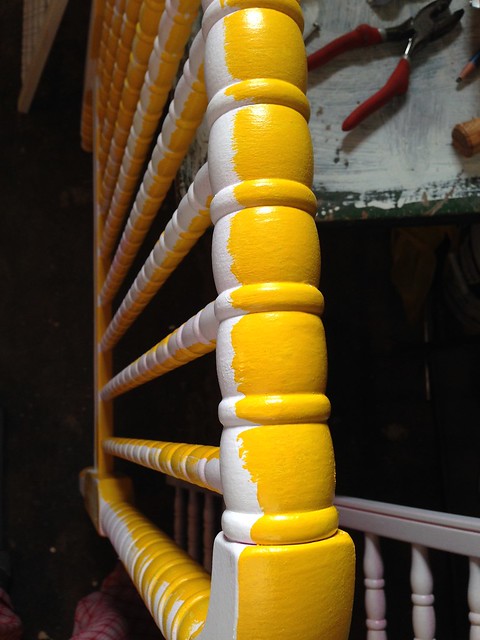
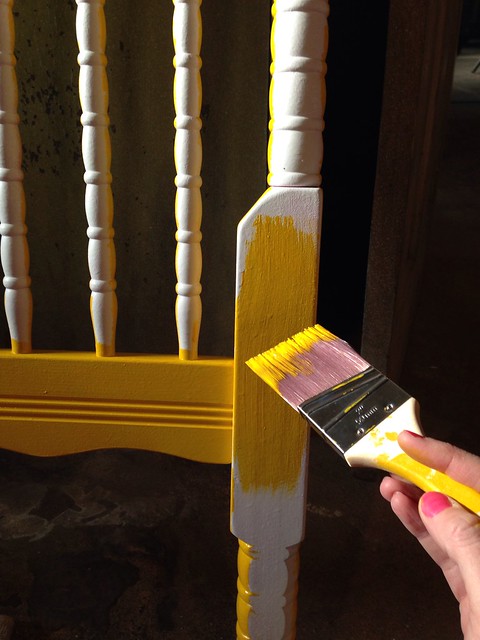
6. I could have tried the spray gun again but it just made me nervous and like I couldn't quite control the process as well. Plus it was too cold to be out in the garage, so I set up shop in the basement and started at this baby with a brush.

Camera Roll-301

Camera Roll-303

Camera Roll-307

I did two full coats of yellow paint by hand, and then a few extra touch ups after that. So I will say 2.5 coats of yellow paint;) So many nooks and crannies! It's beautiful but it really did suck and require substantial patience.

7. Polyurethane time. Haaaaaaaate this part so much, since this is when I just want to be totally finished. I actually had Nate reassemble the entire crib in the nursery first, without poly, to see if it looked shiny enough. It DID look great and maybe even better than the pink paint before it, but I could tell it needed the added protection of poly to really seal off the paint to prevent chips. I figured I should poly it to be extra safe even though none of my kids have ever chewed on this crib. I admit I only did one coat and called it 'good enough'. If baby boy ends up chewing the crib we will just have to do a rail protector or something. See more discussion below regarding the 'safety' of painting a crib.

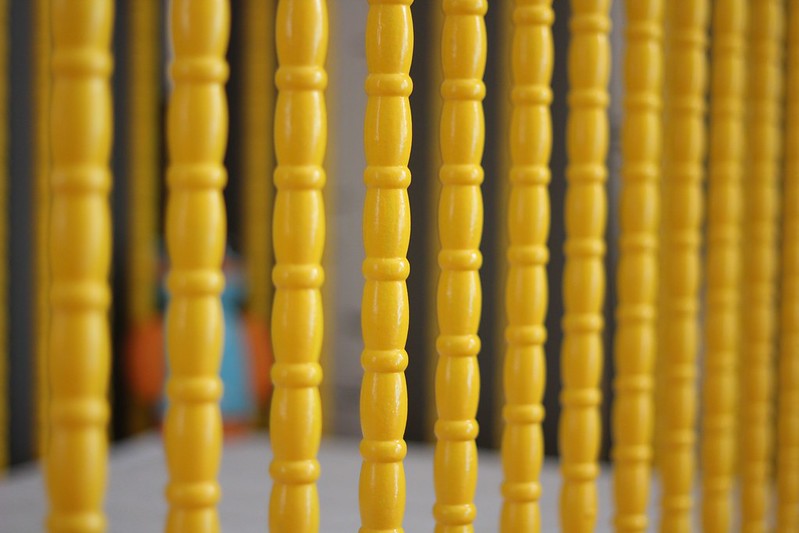
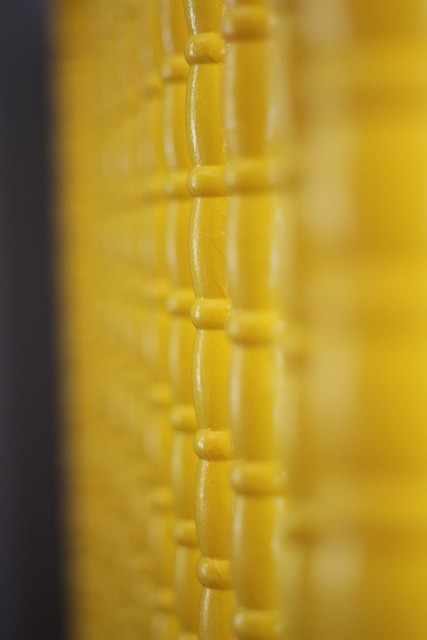
8. Final Results!! Nice and glossy and fairly smooth considering how many coats are on this baby now.
IMG_9933

IMG_9935

IMG_9939

IMG_9947

IMG_9942


So to review:
-pink crib=lots of cleaning to prep, yellow crib=not so much (pink was in better shape than original white)
-pink crib=1 coat of spray can primer, yellow crib=1.5 coats of Adhesion Primer with spray gun
-pink crib=2-3 coats of pink paint mostly with gun, yellow crib=2.5 coats of yellow paint all by hand
-pink crib=3 coats of Poly by hand, yellow crib=1 coat of poly by hand.

Total coats of new paint on pink crib=7 including poly (not including original white factory stuff)
Total coats of new paint on yellow crib=5 including poly. But that's on TOP of all of the pink and previous white! Lots of paint on this baby right now.

All of the cribs in each of the nurseries. Yes, we had a bumper for Truman until it was outlawed and then it came down. Actually I am not sure he ever slept in the crib with the bumper as it was more for show anyway and neither of the kids actually sleep in their own bed for many months. Plus those quilts were not on the crib when the babies slept there (third quilt on it's way from GoGo!). And yes, this is actually a drop side crib but we have added metal parts from the manufacturer to keep the sides from falling down. Scandalous, I know! I feel very scandalous in general with this post (a picture of a crib bumper, drop sides, and a toxic painted crib!)
allcribs


My take on the 'safety' of painting a crib, since that tends to be a hot topic on Pinterest: I used water based polyurethane to seal off and protect the water based wall paint underneath. I assume that is much better than using an oil based paint or poly, but it was also just safer for me to use while pregnant anyway. In my mind, as long as the paint doesn't chip off into the kid's mouth it is probably not the worst thing in the world for them to bite. So my goal was to make sure this paint job remains in tact, like the pink paint did so well for Cecelia.

Like I said before, neither of my kids has ever chewed on this crib. If this third baby is a chewer, we will have to use some sort of rail protector....or just move him into a big bed? Or get him out of the crib before he starts to gnaw? I don't know, I can't get too worked up about it. I figure that chewing on a 'factory painted' crib is probably just as bad as chewing on one that I painted myself. What is the difference, really? Are they using a completely non-toxic paint without any chemicals in the factory paint jobs? I doubt it unless you are paying big, big bucks for a environmentally friendly crib. Maybe I'm just not one to be overly concerned with chemicals, which may or may not be a good thing about me as a mom. Maybe you are concerned with chemicals and a painted crib, and that is fine, too!

That said, I have also seen comments on Pinterest about researching non-toxic, 'totally safe' paints for this project. I'm sure that would work just as well as long as they can get you the color you like! I just did it with the above steps because that is what worked for me in the past (with a few minor tweaks), but obviously there are many many ways to paint a crib.

I think most of them would be 100% easier if wine were involved, however. :)

Baby Boy Nursery | Shelves and Prints, and a Giveaway

Another sneak peek of the nursery today, including a fun giveaway for you, dear readers!

Revamping Cecelia's nursery to make it feel fresh and new for her baby brother meant that I wanted to rearrange all of the existing furniture a bit. So the glider is now in the opposite corner of the room, the changing table/dresser is where the glider used to be, and the crib is turned around against the other side of it's previous corner. It will make more sense when I show you every square inch of the nursery in a true reveal after he is born!

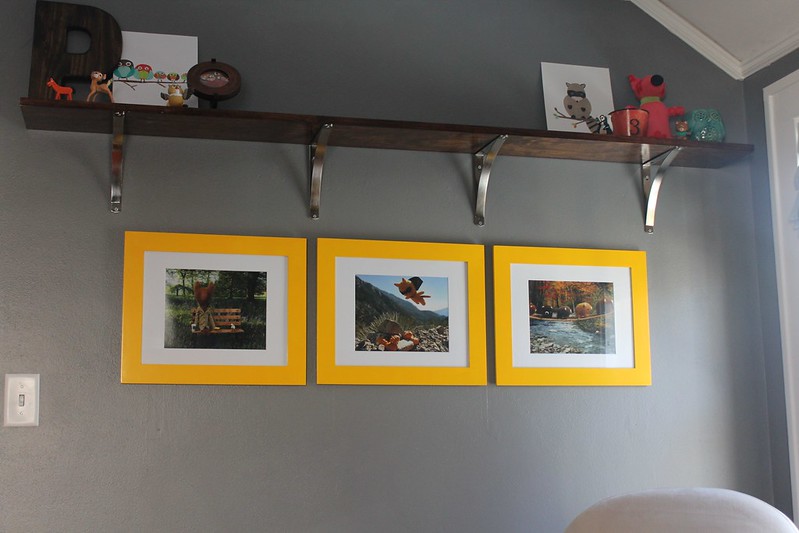
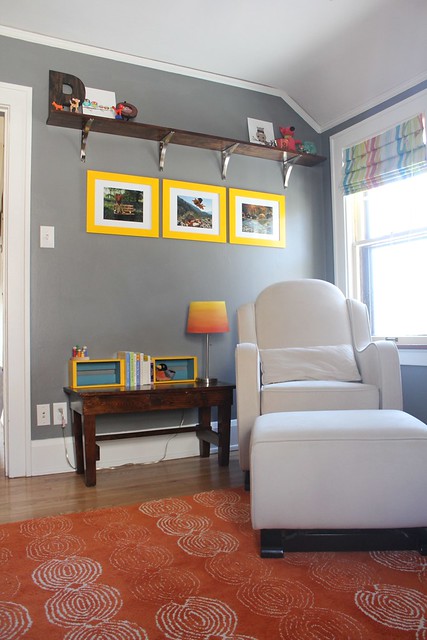
But today's feature is the 'big wall' that is behind the glider, right above my little re-finished wooden bench. I wanted a huge, high shelf at the top of the wall after spotting a few long shelves on Pinterest. I found two shelves at Target, that were each three feet long but $25 a pop....and they were kind of crappy/fake wood. I showed them to Nate one day and he said, 'We could just make one six foot shelf for $15.' And I was sold! I bought the four brackets you see below for $10 a pair, Nate bought a six foot long board from the hardware store, and I stained/polyurethaned it. Easy enough!

I love how it turned out! I haven't totally filled the shelf the way I envision but it's coming along. And yes, that is the first letter of his name up there. And if you try to guess his name in the comments, I will ignore them;)
IMG_9543

Cute, right? A few of the little 'vintage' figurines are from Nate's childhood McDonald's toy collection! Cannot believe Lois kept all of the boys' Happy Meal toys, but love the forest theme/animal ones. The two unframed prints on the shelf are from a blog reader who didn't need them anymore (!!) and I want to get a few more 8x10 prints up there. I like prints, duh. And speaking of...did you wonder about those adorable framed prints on the wall yet?
IMG_9595

Let's talk more about the three prints in the yellow frames, shall we?

First, I hand-painted the white frames that Cecelia had in this room with the crib paint. Super easy project, love how it turned out.

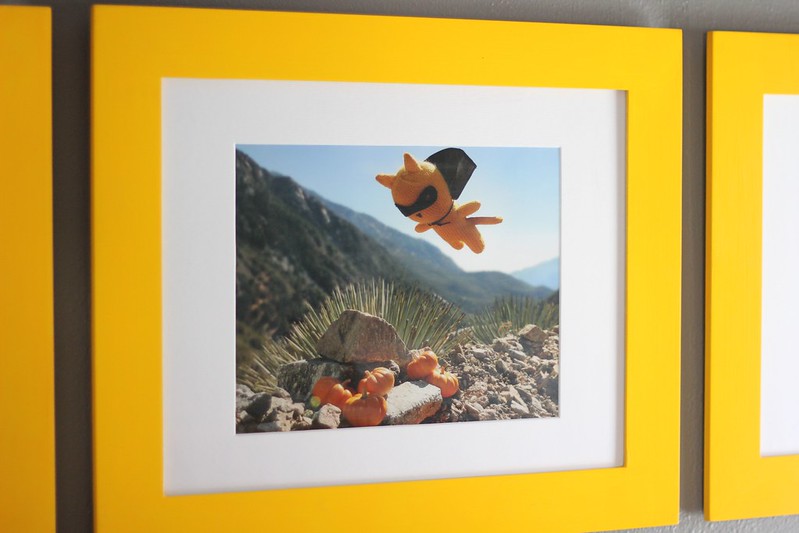
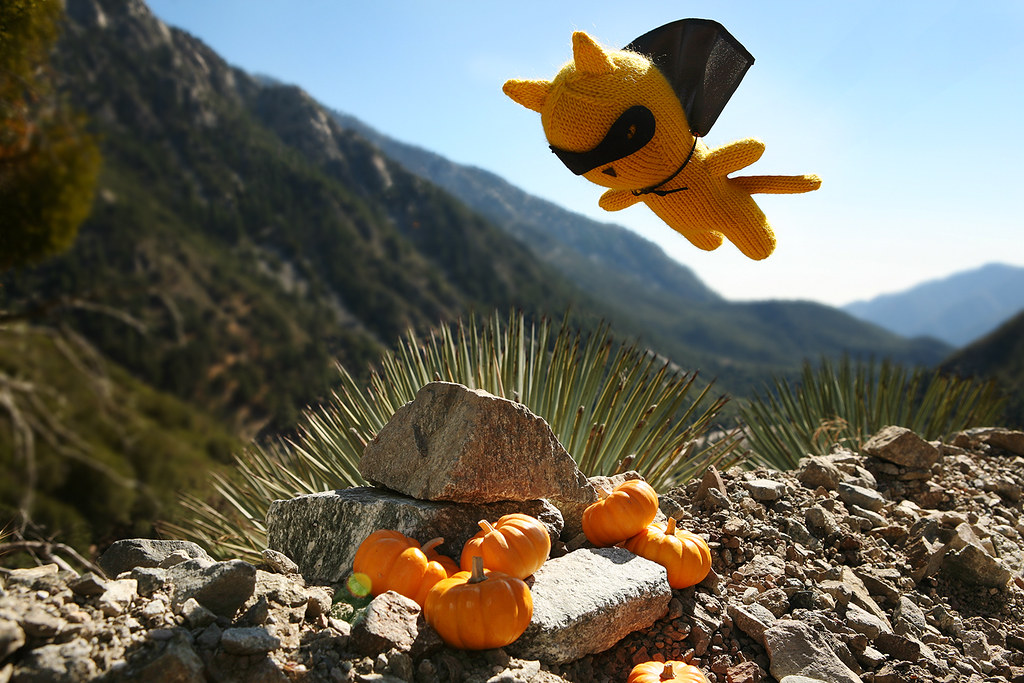
Then I randomly discovered TADA's Revolution on Etsy, while spending countless hours searching for nursery prints. I really wanted to find prints that are slightly different, unexpected and quirky for this nursery. When I found TR's work, I immediately loved her images. I mean, they all make me smile, make me happy, and are pretty freaking hilarious...maybe just a little bit 'odd' in the best way possible. Nate definitely raised his eyebrows when I showed him my new-found loves but he likes them now that they are hung in the room. I love the three prints I chose, and here is my favorite. It's called Poisson Descends Upon Cromwell's Pumpkin Patch. HILARIOUS! Each print has a story behind it!
IMG_9536

I mean, are you kidding me with the cuteness? A tiny stuffed animal is flying over pumpkins with a cape and mask, and mountains are in the background. So 'weird' and awesome, all rolled into one print.

Here are my favorite images on the TR Flickr site, and I would have purchased them all if I had room for these beauts.

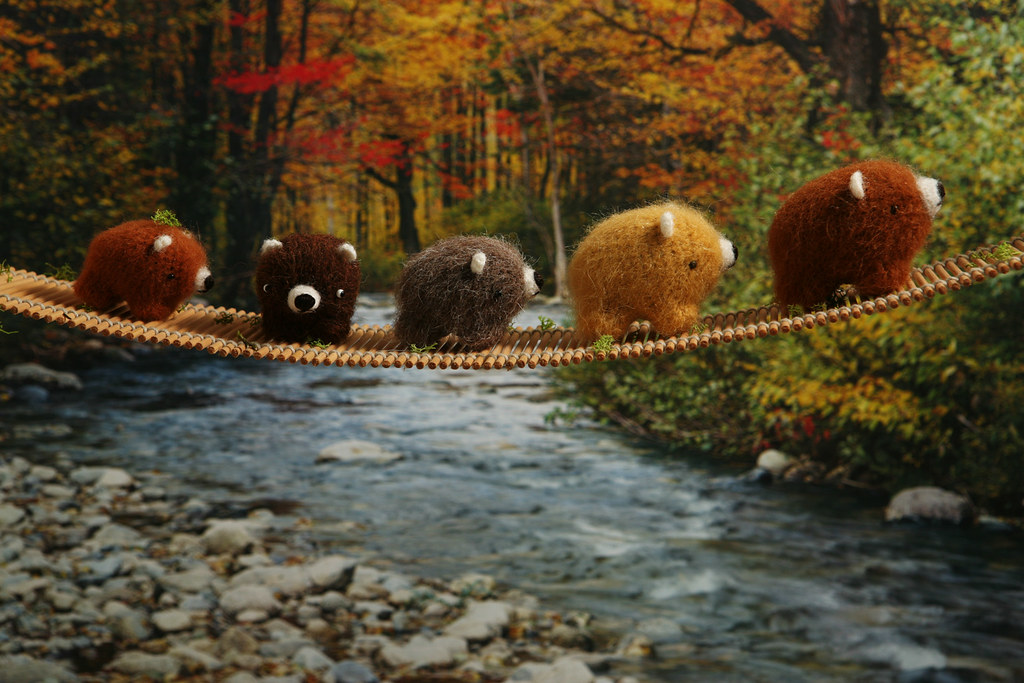
I got this one because, duh, a family of five little bears crossing a bridge together? Yes. It's called 'Bears Over Troubled Waters'.
Bears over troubled water

Here's my favorite Poisson guy!
Poisson descends upon Cromwell's pumpkin patch

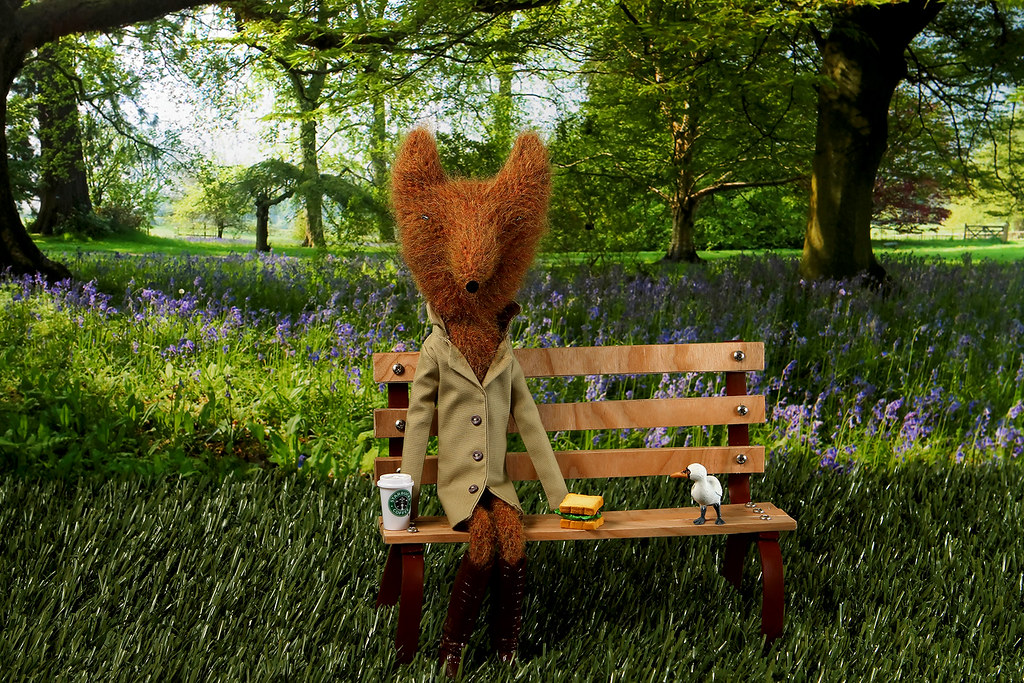
And the third print I got? This hilarious fox in a trench coat, sitting on a bench and drinking Starbucks. YES! Now this is using the fox/woodland theme of the nursery in a way I didn't expect and I love it. The title? 'Out of the corner of his left eye, Fabian spies something succulent and delicious'. Hahahaha!!
Out of the corner of his left eye, Fabian spies something succulent and delicious

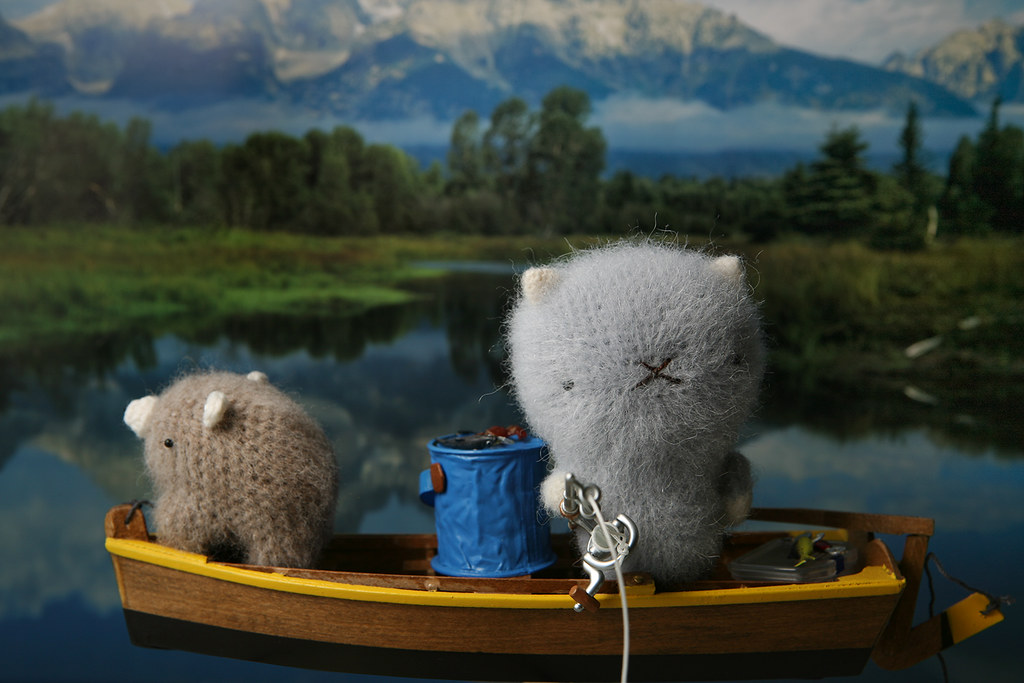
I didn't get this one, but 'Helix and Proto go fishing' is seriously cute.
Helix and Proto B go fishing

And what about this one, called 'Which rabbit would you pick?'
Which rabbit would you pick?

Then this guy with a giant head, on a laptop with a coffee mug? Love him. It's called 'It says here that there is a wild bear on the loose...'
It says here that there is a wild grizzly bear on the loose...

I immediately spent way too much time on TADA Revolution's Flickr site when I finally settled on just three prints for my nursery. And then I was so excited about finding something so unique and FUN, like nothing I've seen before, I asked Susan (the owner of TR) if she would consider doing a giveaway for my readers. This is VERY unlike me, since I usually get something gifted to me with most giveaways and the companies usually contact me first. (#SpoiledBlogger) I actually bought my own prints from TR and am the one who suggested this little treat for my readers (aren't I proud of myself on this one?). I just think her prints are so cool and special and think you will, too;)

These images would totally work in other rooms of the house besides a nursery, too. Which means I sort of want a few of my other favorites and will figure out where to put them later. They just make me happy and I think they'd be great conversation pieces for the home.

Susan happily agreed to write up a little blurb about how her company began and you guys, she freaking MAKES most of her little characters! Each image is like a tiny work of art if you ask me. I don't know why I'm so into this little company but I am, so forgive me!
Susan on the set of "Public Service"

From Susan:

TADA’s Revolution began in 2008 when Susan Chi, a former chemical engineer traded in her safety goggles and lab coat, for a set of crochet hooks, and a digital SLR camera in pursuit of a lifelong dream.

Susan is completely self-taught, and has learned to crochet, knit, sew, and work with polymer clay and wood to build the characters, miniature scenes and dioramas of the Revolution. Susan’s specialties are amigurumi crocheted animals, 1:6 scale furniture, and ultra miniature 1:24 scale designs. 

Susan started posting her photo stories on Flickr (www.flickr.com/photos/tadasrevolution) in 2008. In 2013, in response to overwhelming demand, TADA’s Revolution began releasing art prints and miniatures for purchase on her Etsy Store (www.etsy.com/shop/TADAsRevolution). 

Susan photographs the secret life of toys, from everyday experience to the mischievous and dark. Each story is told over one or two panels, which are immersive, meticulously detailed, and powerful enough to communicate the emotions, irony, and humor. TADA’s Revolution has a devoted following which spans the world, and TADA’s Revolution’s photos have been viewed more than 700,000 times on Flickr. Who could resist Susan’s big headed furry animals with shifty eyes who get into all sorts of trouble? TADA’s Revolution photos and characters have appeared on calendar covers, books, and star in two stop-motion videos. 


TR Flickr
www.flickr.com/photos/tadasrevolution

TR Facebook Page
www.facebook.com/TadasRevolution

Official TR Website
www.tadasrevolution.com

TR Etsy
www.etsy.com/shop/TADAsRevolution

Now for the giveaway information:

To enter the drawing for one free TADA's Revolution 8x10 print of your choice, you follow TR on Facebook or Flickr. Then comment below saying you followed, and tell us what your favorite image is from the site. You get one entry into the drawing for each 'follow', so divide up your comments accordingly.

I will randomly select up to five winners, depending on how many comments we get, on Wednesday May 7. Have fun looking at all of the miniature animals causing trouble!
Related Posts Plugin for WordPress, Blogger...