But I digress.
Her party was Saturday and it was SO awesome. And I'm sad that it's over after all of the planning and over-thinking and anticipating. But it was fab and therefore I must pull it together and blog about it.
I posted a few of my decorations/craft projects for Cecelia's party in this post, but now I have a lot more completed projects to share. And then I will give you a break before I bombard you with more pictures of the party itself in a different post. My poor camera has not seen this much action in the past few months combined compared to the past week! Love it.
Mantel decor:
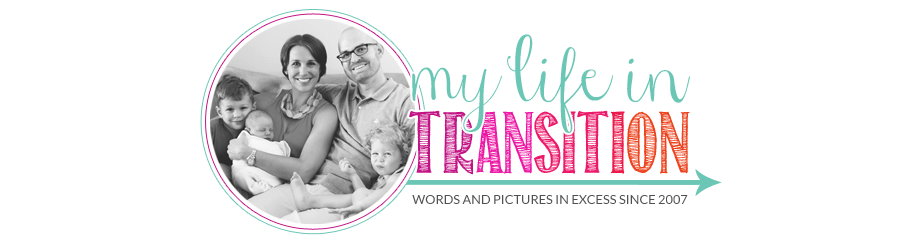
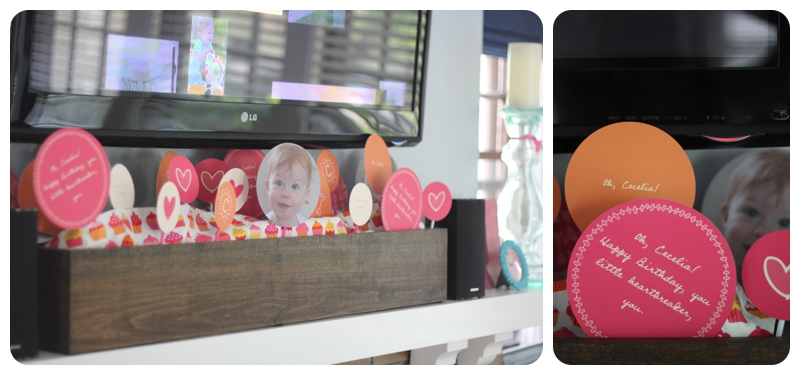
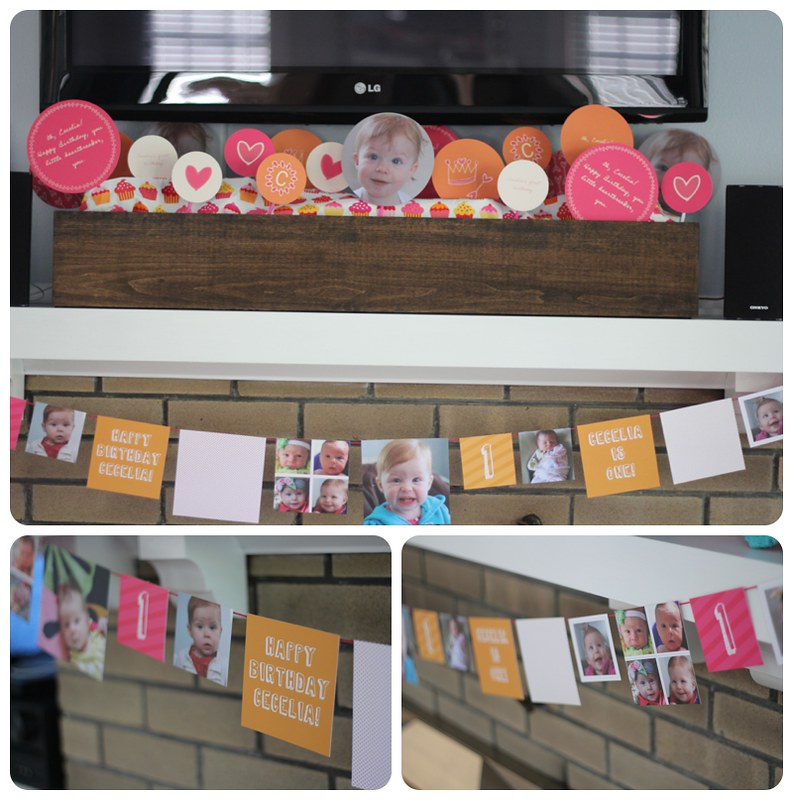
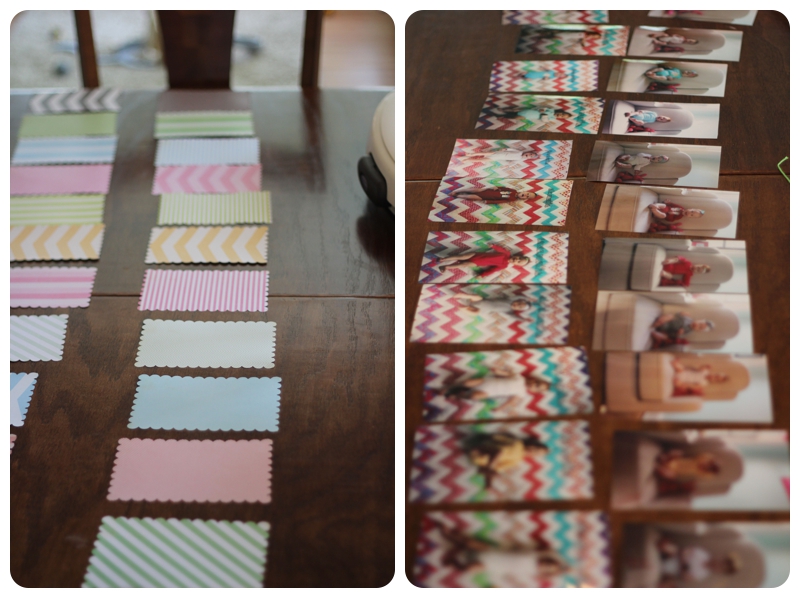
When I was brainstorming this party, I wasn't sure what I would do for our fireplace and mantel area. Then Pear Tree Greetings contacted me and offered to let me try out some of their kids party decorations. Um, YES! I spent way too much time going through their website going over my options and then finally decided on a set of the 'Crown Me Princess' giant table confetti. I loved the round shape of the cards and knew I could come up with something fun for our wooden box on the mantel. Then I found this 'Colliding Collage' set and was obsessed with the ability to include lots of different pictures, so that was my second pick. I uploaded my pictures, customized my colors and fonts, and got really pumped when they arrived in the mail. So many possibilities, so little time!
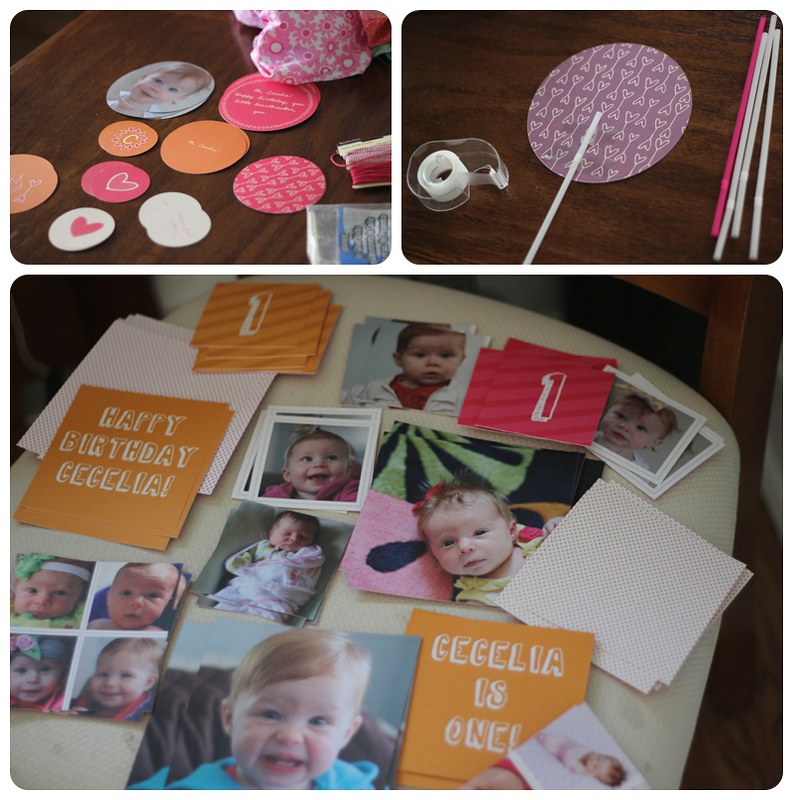
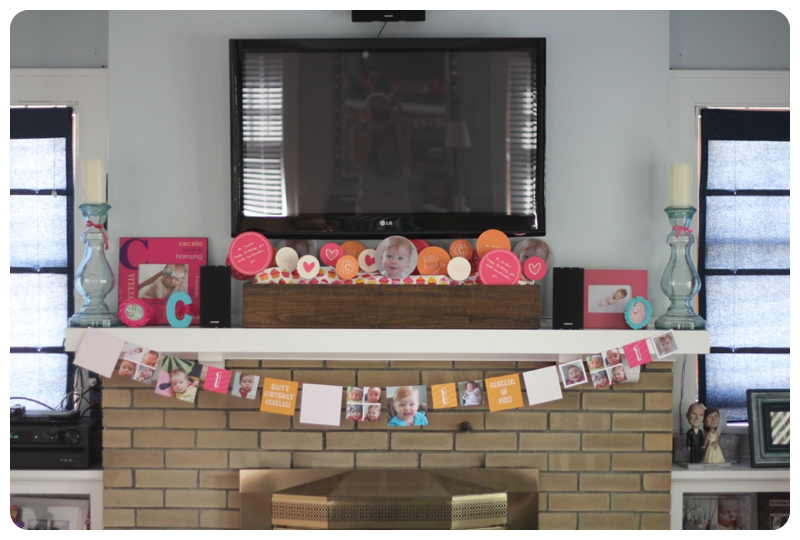
I decided to tape the round cards to straws (classy, I know!), then put a bunch of plastic grocery bags in our wooden box, and covered them with strips of leftover nursery fabric. I stuck the straws in the folds of the bags and voila! A little 'garden' of sorts full of pinks, oranges, sweet sayings, and my baby girl.

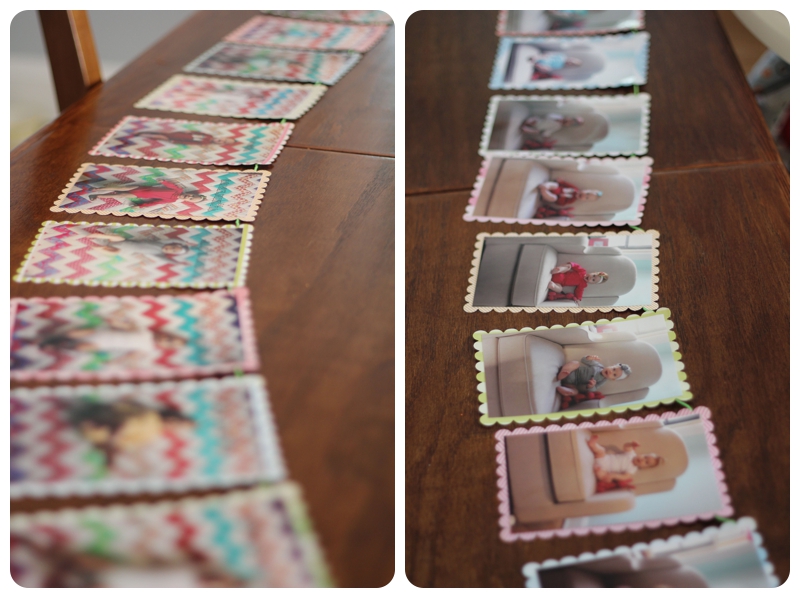
And then I used the square cards to create banners---just hot glued the cards to some twine. I'm obsessed with all of the pictures on these cards and am considering hanging one in her bedroom for awhile. Love how it all turned out!
close up:
I pulled a few frames from the nursery and bought a few tiny ones from Michaels (which are still empty in these pictures, but were filled by the party).

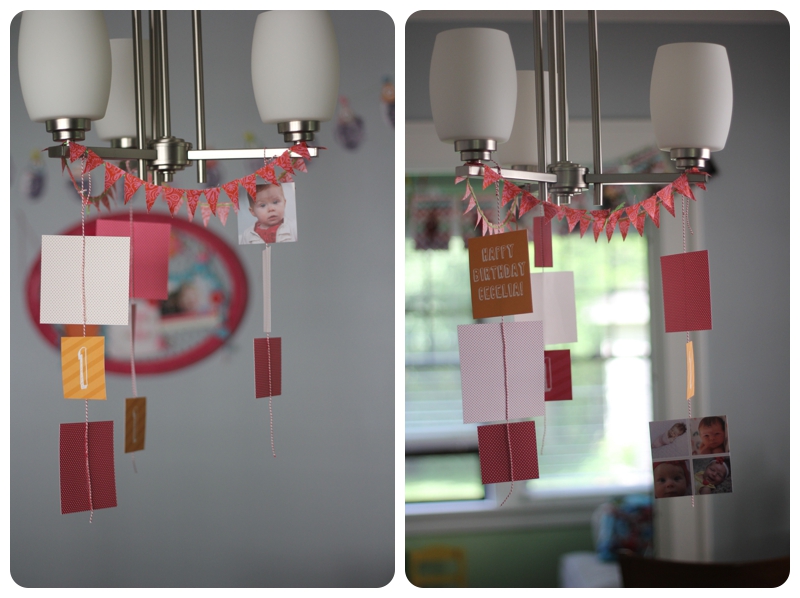
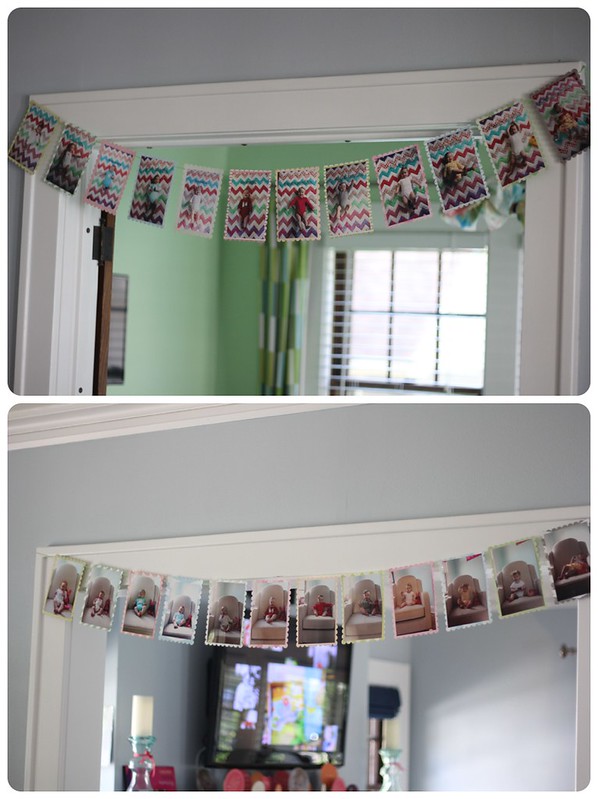
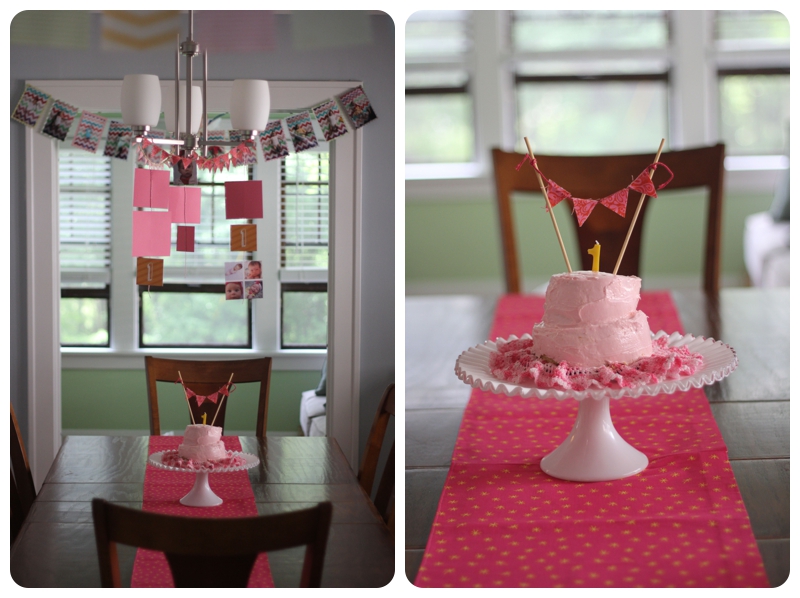
I used a few of the square cards for decor on the light fixture above our table, too. I liked how they would spin around and could be visible from lots of spots in the dining room. I made a small pennant banner and hung it all up together on our lights--haven't taken this down yet either.
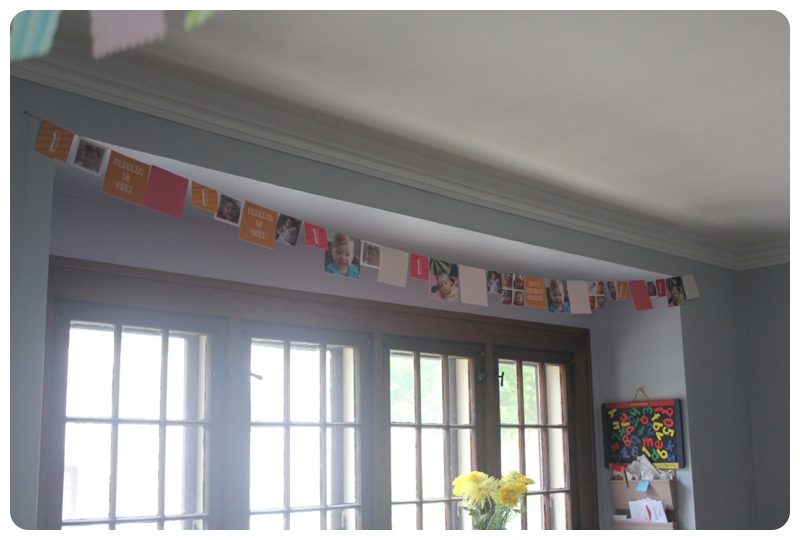
I had another long banner hung above our buffet, too.
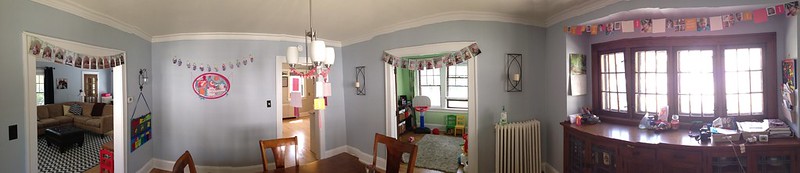
And I attempted to use the panoramic function on my iPhone to get a feel for the whole room though, which was really fun (time waster) and you can kind of see it here, I guess. Who loves banners? This girl!
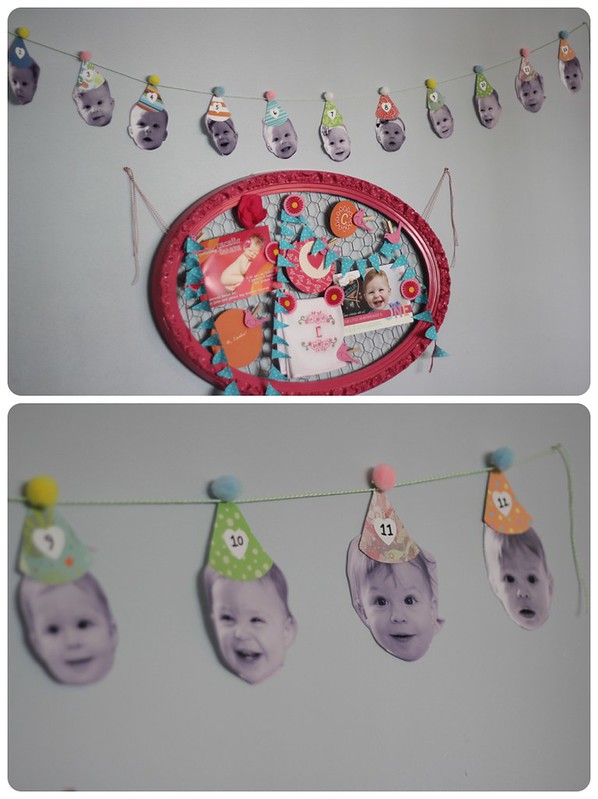
Monthly Banners:
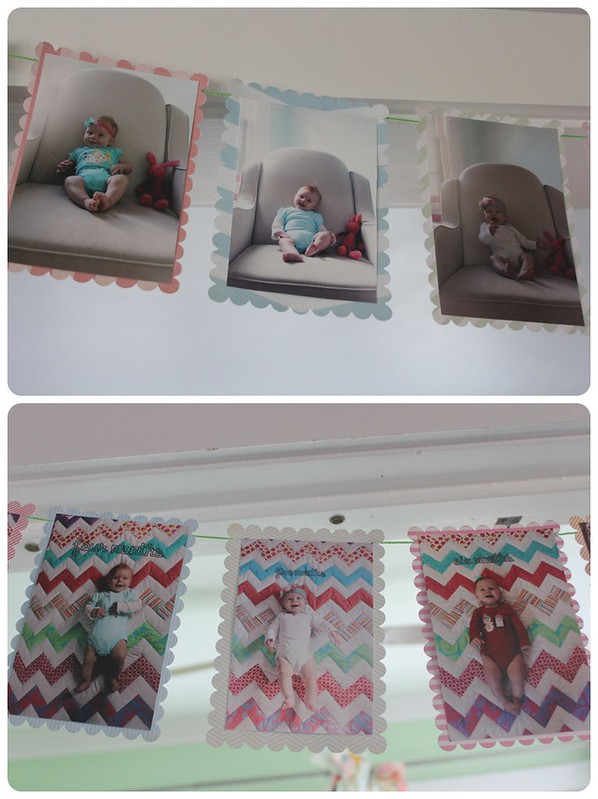
After sweating my butt off taking these dreaded monthly shots on the quilt and on the chair, I knew I had to make banners to properly appreciate the effort;) I ended up just printing the images at Walgreens, and they were pretty inconsistent and horrible for a few of the shots---so I reprinted a few on our Canon photo printer downstairs, too. Annoying, but whatever. I found this pack of scalloped papers at Michaels on sale and just put one photo on each paper, hot glued the twine to the backs and was done!
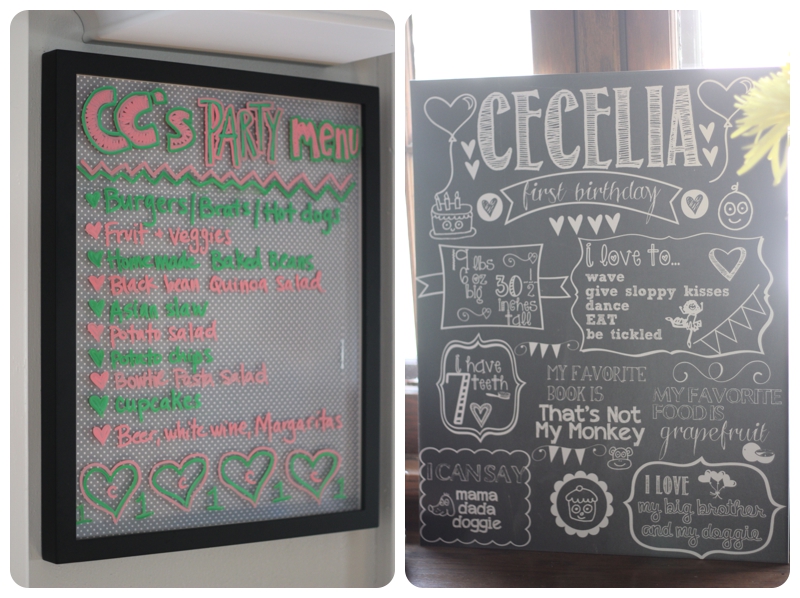
Chalkboard print and menu board:
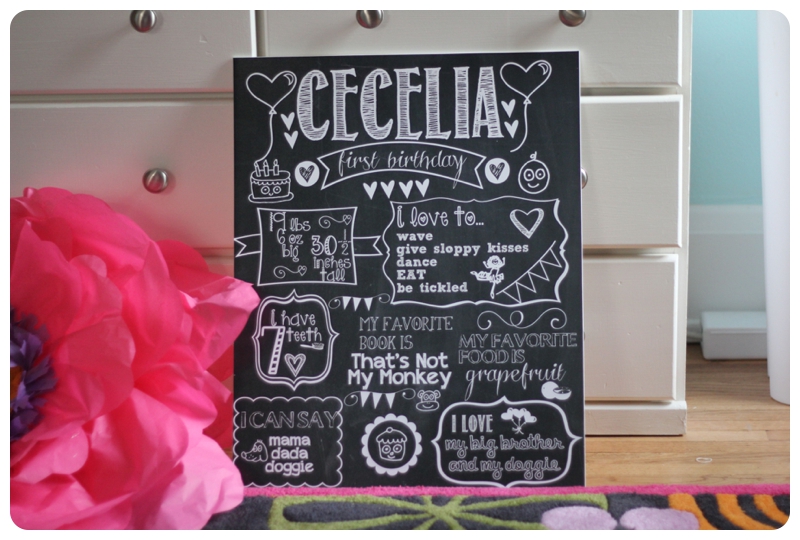
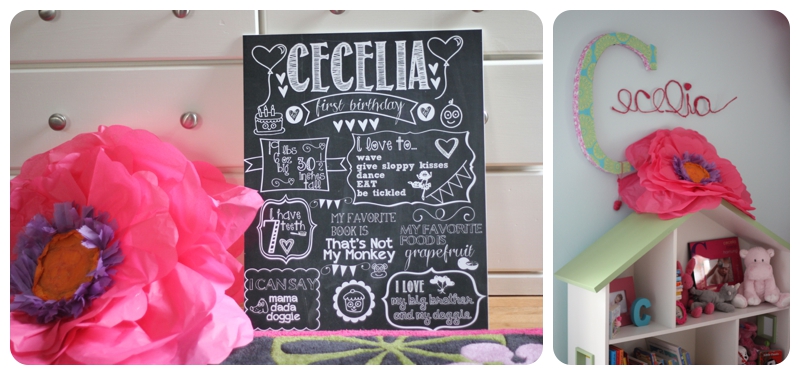
I think I'm most proud of my chalkboard print I designed in Photoshop for CC's party. These are all over Pinterest, of course, and it was fun to play around with different chalkboard fonts. I had it printed in a 16x20 size and mounted on double weight backboard through my photographer friend's printing company. It turned out so nice and I'm absolutely going to put this in her room or hang onto it for the future. And then there is our menu board we use each week---just a regular frame with scrapbooking paper behind the glass, writing on it with dry erase markers. Big menu for a little girl!
Had to show more pictures of just the chalkboard print;)
Nate's artsy Aunt made Cecelia this giant tissue paper flower, and brought it to the party. SO cute, right? Fits in perfectly in her nursery, too.
Outside:
We hung the wreath outside of our front door and then went with pink helium balloons. Super windy day and those poor balloons got beat up more than I expected, but oh well! They were also a lot more expensive than I expected so we had to make them work....and the kids had a fun time playing with them the day after the party, too.

Crown and hair bow:
GoGo saves the day with a few special crafts of her own! She made Cecelia a felt crown with removable numbers, so that she can wear it for years to come. You can kind of see the high chair banner I made from the Pear Tree Greetings round cards, too;)

And her hair bow? Obsessed. More felt and she even made little felt balls somehow. That GoGo!

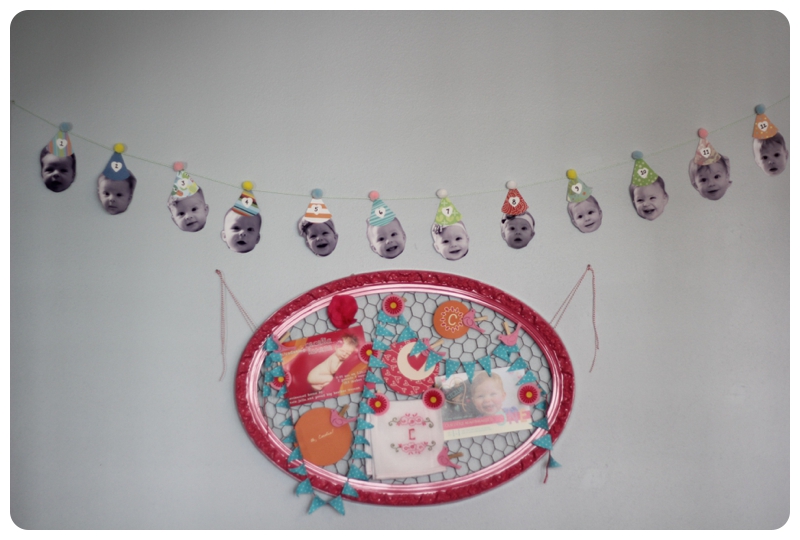
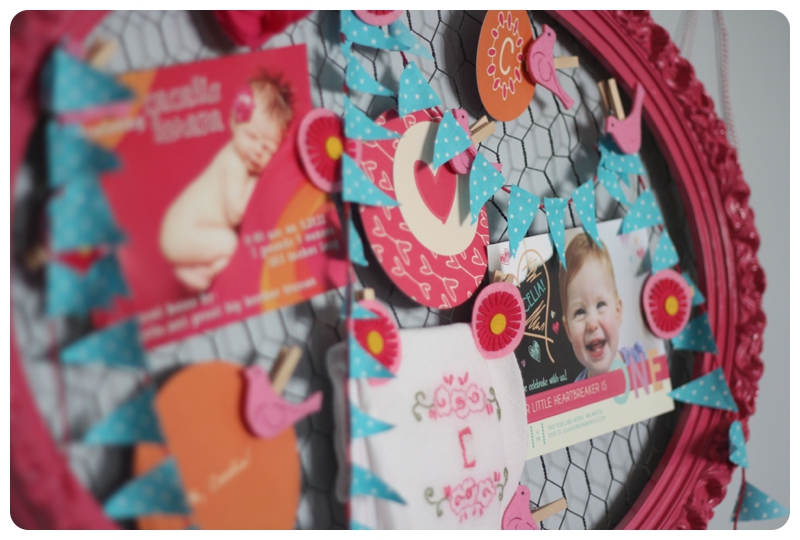
Bulletin board and monthly heads:
I posted about both of these before, but here they are totally finished!
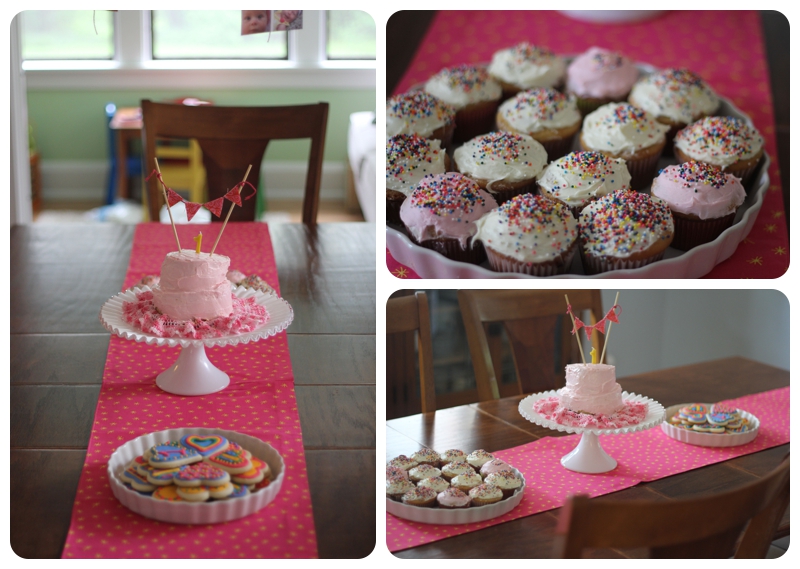
Desserts:
Yes, I know that food is not really a craft or 'project' but I'm including them here because they were on my list of things to complete (instead of Nate's, or my in-laws') .
I wanted to make Cecelia a smash cake like you see on Pinterest---sort of smallish, on a pretty cake plate, with fun topper. Lois had a vintage cake plate, so that part was easy. I wanted the icing to be pink so we bought strawberry frosting in a can, and made a yellow cake from a box (fancy!). Then I got creative with round cookie cutters and SHOULD have paid attention to where I cut the big cake. Because obviously, it was a little wonky and uneven. Also, my canned icing was WAY too thick and I almost threw it all away in a fit of rage. But Memaw saved the cake by adding a tiny bit of milk to the frosting can. Much smoother and easier to spread compared to the original stuff that totally shredded the cake. Funny stuff looking back---not at the moment. This is why I don't love projects in the kitchen!

I used this pink doilie (how in the heck do you spell it?) that Nate's patient made for us randomly, simply because it was round the right colors. I had to put the cake down on something anyway, so it worked! Then I made the little pennant banner out of fabric scraps and we had ourselves a smash cake.
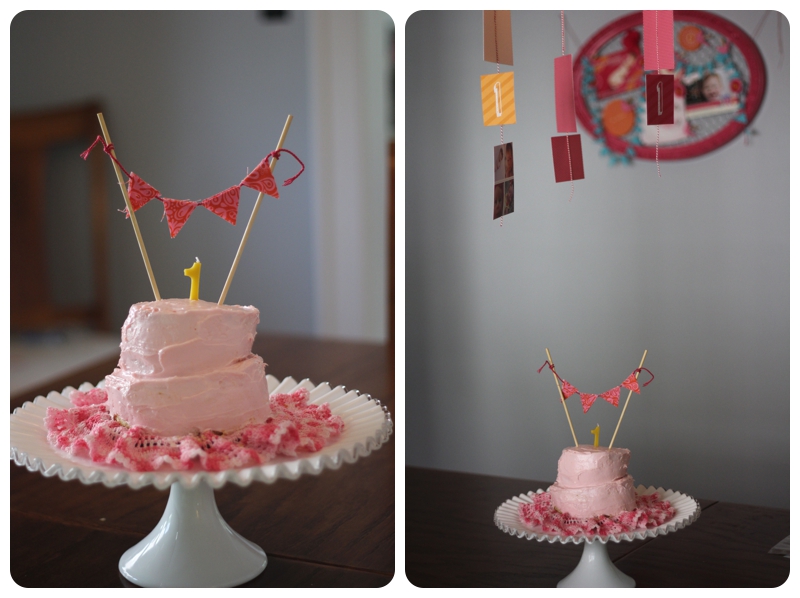
And with the cake on the pretty pink table runner that Lois sewed from nursery fabric scraps? This die hard pink fan is in love.
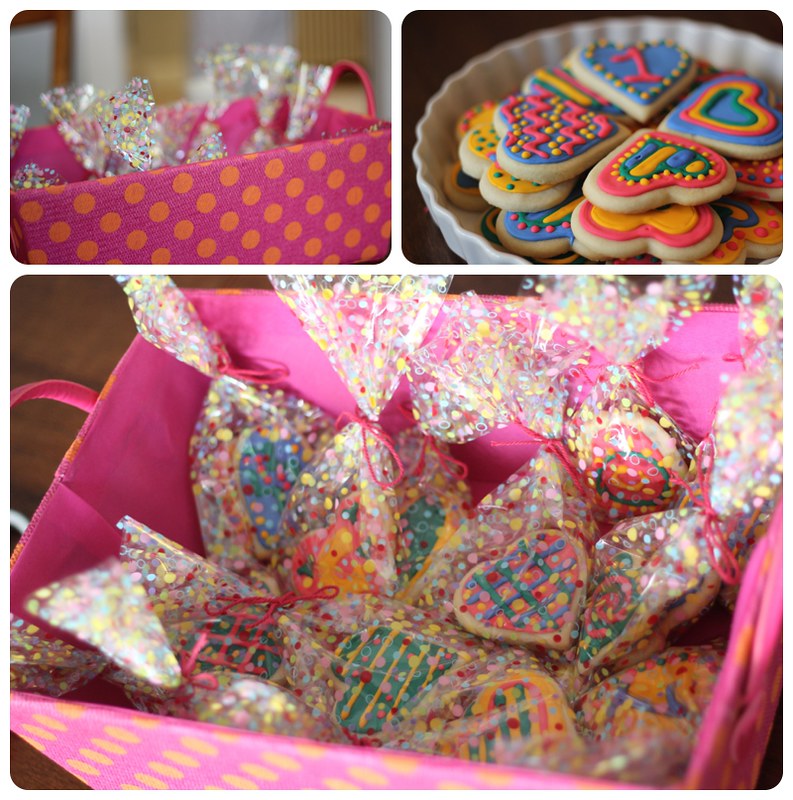
We did cupcakes for the rest of our guests and I made royal icing cookies---putting all of the desserts on the main table was a fun idea in theory but it only meant that kids went nuts on the cookies from the first minute of the party. Whatever goes at a birthday party!
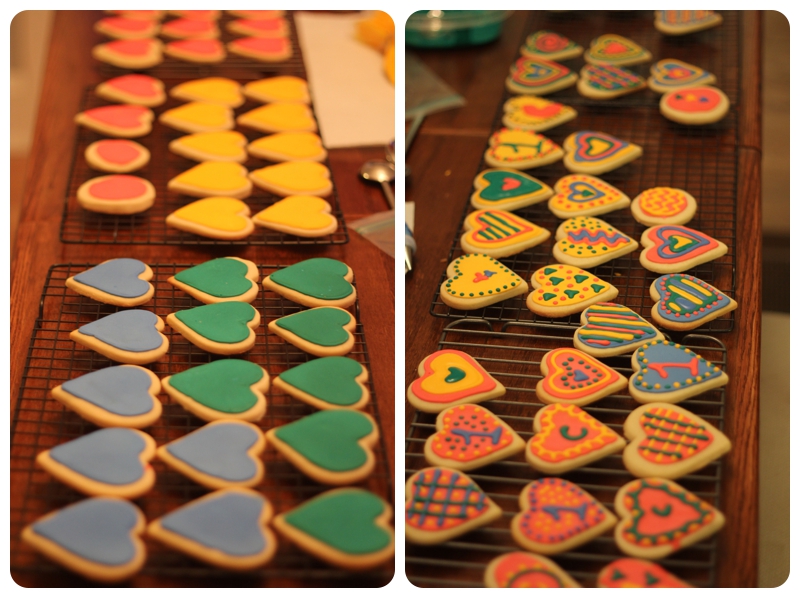
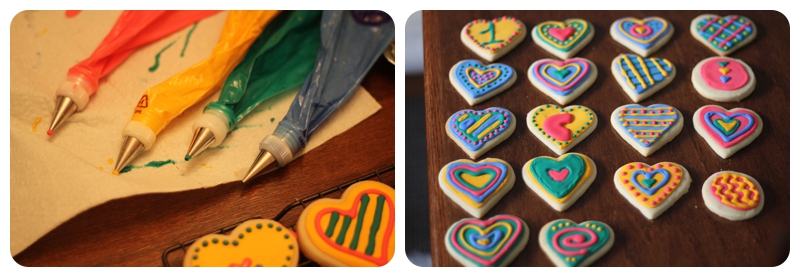
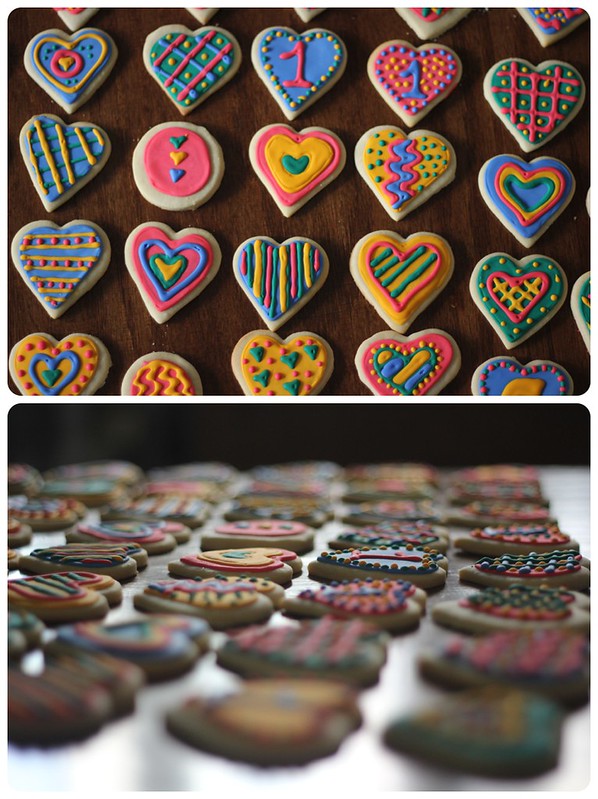
Re: the royal icing cookies--I've gotten a lot of questions about these on Instagram, so I'll talk about them here, too. This was my fourth time ever making these cookies and it definitely gets easier each time. But it's tedious and putsy---which is something right up my alley when it comes to 'projects', so I don't mind the whole process. I'm a total newbie and really have no clue what I'm doing, so it's laughable that I'm even sharing my 'technique' here. But I just like to play around with bright colors and designs on cookies, so this is a fun one for me.
It takes about three days for me to make these cookies: one day to bake the cut out sugar cookies and let them cool; one day to mix up the icing and do the base layer; and one day to do the top layer of decorating. My friend Hannah is really good at these and she taught me her method, which she got from Annie's Eats. Again, I am NOT an expert and it's a learning process but it just takes practice, it seems.
I went with heart-shaped cut out cookies because of our loose theme of 'heartbreaker' for Cecelia's party. Then I used hot pink, made a golden-yellow shade, I tried to make a turquoise but it was a lot daker than expected, and somehow made a periwinkle color, too. Four colors, about 36 cookies and lots of time;)
First step versus second step:

Oh, it's so much fun and so many photo ops with these pretties.
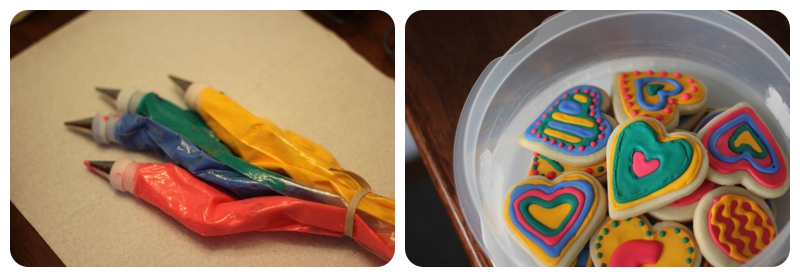

I bagged about half of these and put them in a new pink and orange storage box that I got. I thought about making all of these cookies into favors that were bagged up, but then I decided that I kind of wanted to show them off during the party, too. Didn't even get one myself!
I think that's it as far as projects and decorations. Now onto writing the post about the party itself....because it wasn't ONLY about decorations and crafts;)


The chalkboard print and the cookies are my favorites, but I love it all!!
ReplyDeleteAmazing! Any chance you can give a tutorial on how you made the chalkboard print? Everything is adorable!
ReplyDeleteAhh, best party EVER!! :) I remember at Annie's first birthday, I forgot to even TELL people to take a cookie, so I had SO many left over and so many people didn't even see them. Oh so annoying, but my coworkers enjoyed them at least :)
ReplyDeleteI LOVE the chalkboard print so much!
So freakin cute. Love it!
ReplyDeleteYou did an amazing job with it all, Julia!! You should definitely pin this post on Pinterest and share your fabulousness. :)
ReplyDeleteHOLY. MOLY! Incredible- what a party! So cute :) And I agree- definitely pinterest worthY!
ReplyDeleteYou did SUCH an awesome job on all of the decor, Mama! So very cute! Love the chalkboard print (of course) and all of the banners. And the cookies. Ok, ok, I love it all!
ReplyDeleteThis comment has been removed by the author.
ReplyDeleteEverything looks amazing! I am going to try to make those cookies! They look fantastic!
ReplyDeleteHere's a couple of tips that I've learned over the past few years that I find invaluable.
1. When using store bought frosting, put it in your stand mixer with a whisk attachment for a couple of minutes until it is fluffy. It makes it far easier to work with, and it makes it fluffier, not so heavy.
2. For cupcakes, put the (whipped) frosting in a ziplock bag, cut the corner (no piping tip needed), and pipe the frosting. It is SO much faster and they look great.
This is beyond impressive. Have you ever thought about being a party planner?
ReplyDeleteHOLY COW - this is amazing! I love how you put the cards on straws for the mantel. I'm pinning that for a future idea. So smart.
ReplyDeleteAnd all the banners just slay me with cuteness. When I saw the party heads, I nearly had to add that to my list for Henry's party two days before. But, alas, I decided my sanity was more important. ;) Next year?
Love it all. You have such a touch with crafting and decorating. Just so creative.
If you haven't already, you should submit Cecelia's birthday extravaganza to On to Baby (http://www.ontobaby.com/submissions/). The party and all your projects are so creative and utterly adorable. This is exactly the kind of party I would love to see featured. I love their blog and I only recently discovered yours, but love it too!
ReplyDeleteYou are so inspiring with all of your crafting and decorating!
ReplyDeleteI could stare at those cookies for a long, long time...