

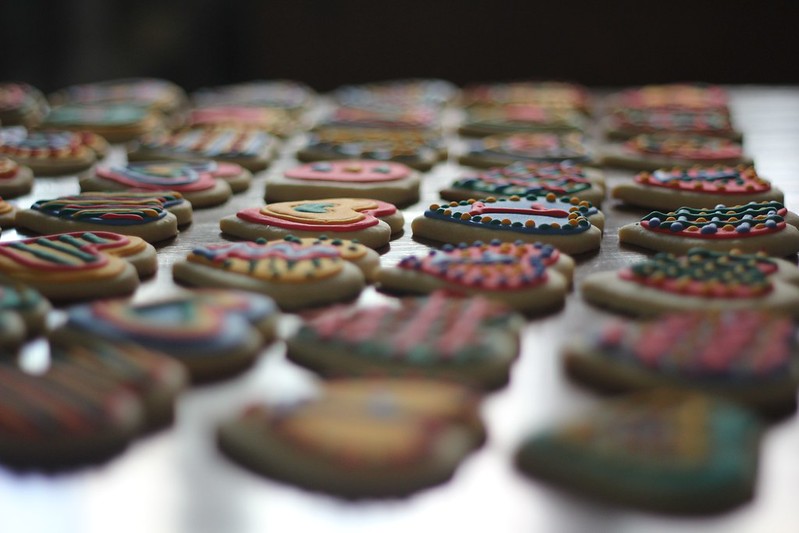


They weren't perfect, nor is any batch that I make. But I think I loved those 'first birthday' cookies because of the colors and because I really went wild with the decorating. And truly, it's not that difficult to make these babies.
But it's time consuming, dudes. Very putzy and tedious. Worth it, in my opinion, but it's basically a three day project for me when I make them. Lucky for me I enjoy these types of projects that require patience....and wine ;)
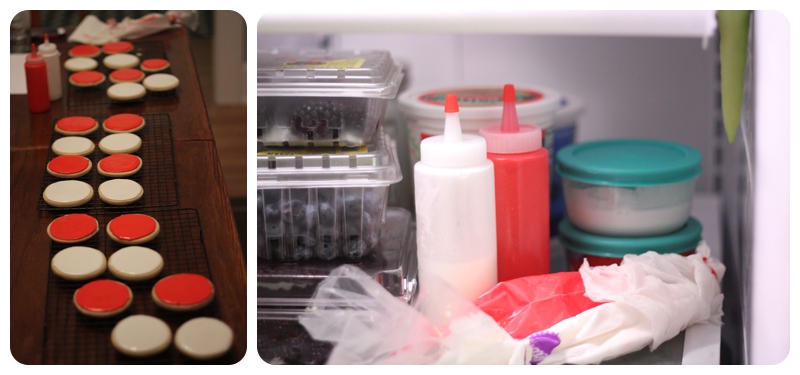
I decorated the red and white cookies you will see below for my first 'hired' cookie project---the client wanted chevrons in red and white, for her Christmas trunk show theme. Erin did the baking and transporting, I did the decorating and we split the profit. Let's just say I plan to keep these cookies as a 'fun' personal project and do not plan to make anymore for money in the future. Takes the fun out of it and for the amount of time one spends on these, you just don't get compensated that well. But still. Fun.
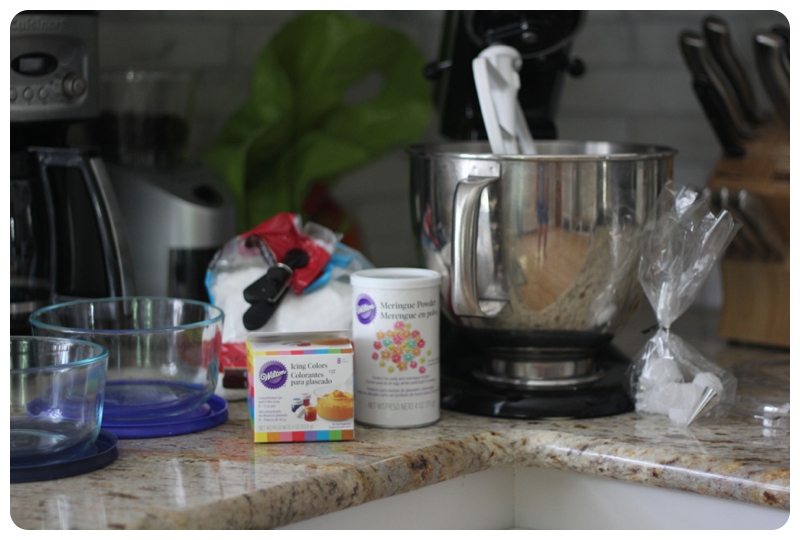
Supplies you will need to buy/have:
cookie cutters
powdered sugar (nearly a whole bag)
meringue powder
gel food coloring
cake decorating tips and connectors (I like size 2 for the tips)
disposable decorating bags
at least four air tight containers for storing your icing
(optional) squeeze bottles
about a billion forks and spoons---clean up for this is never ending!
Before we go on, let's get to the basics. I shall begin to call Royal Icing 'RI' because I'm lazy. I use the icing recipe from Annie's Eats. The link to Annie's Eats Royal Icing recipe is here. Her post on how to actually decorate with the icing is here. Honestly, you should probably just read those two posts and go from there. My post is not going to add much of anything, except that I'm a total newbie so maybe I have made more mistakes that you can learn from? I also like her sugar cookie recipe, FYI.
Also, I'm totally obsessed with Sweet Sugar Belle and could dive into the archives of her blog for hours (oops, just did that again) as she discusses her SUPER thick RI. Also, her cookies are mind-boggling-perfection. Seriously. I mean, what? Wow. And dude. Even as a perfectionist I know I will never, ever master the RI cookie like she has. Which is fine by me because I can just look at her website and drool instead.
So if you didn't just jump over to those two websites instead of reading my post here, hi! I shall tell you how I do it while I learn as I go.
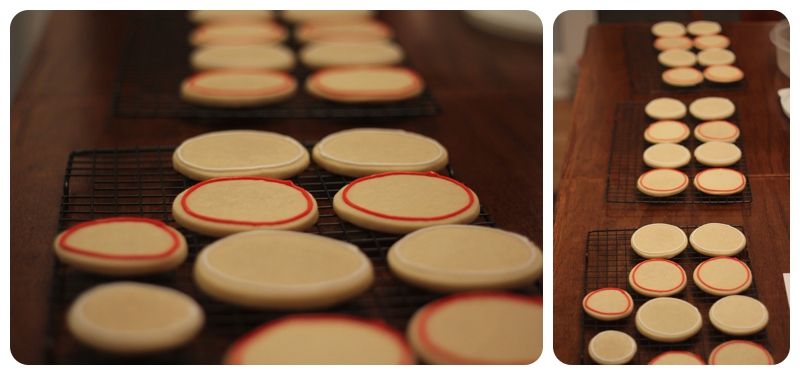
1. Make cut out sugar cookies. Let them cool completely. I like to store them in air tight containers if I'm not ready to ice them right away.
2. Make your icing using the Annie's Eats recipe above. It's 4 cups of powdered sugar, 2 tablespoons of meringue powder (I got mine at Michaels), and 5 tablespoons of water. I use my Kitchen Aid mixer now that I burned out the motor in our hand mixer making this stuff. Whoops. But apparently it's best to use a KA if you have one anyway, and the 'paddle attachment' is the white one I already had. Didn't know it was a 'paddle' until I researched a bit. I'm an excellent baker, obviously.
Also, have never sifted powdered sugar before. It's kind of cool when it balls up at the end!
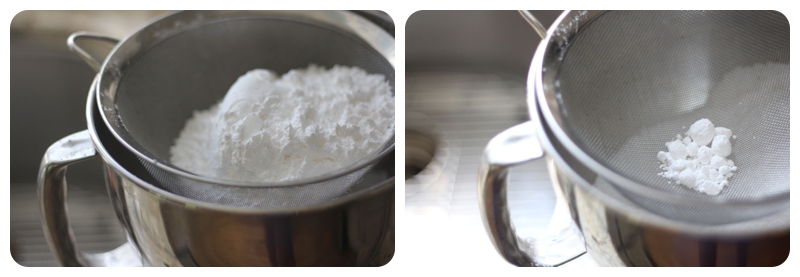
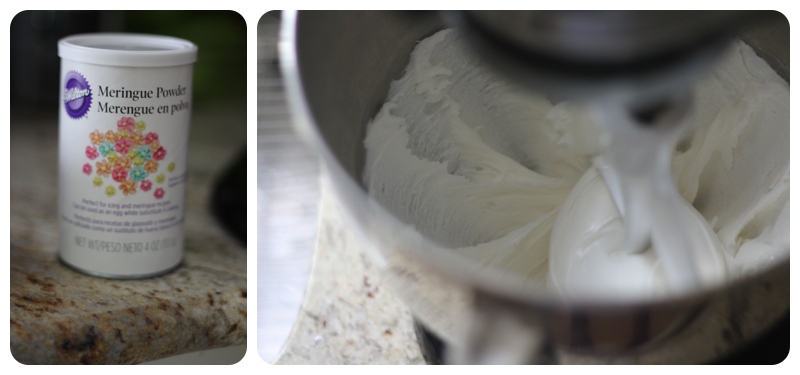
So you mix all of those ingredients into your mixer and let it go for 7-10 minutes. It's going to be really thick and kind of fluffy. It's difficult for me not to lick the paddle attachment clean because I love powdered sugar so much, for what it's worth.
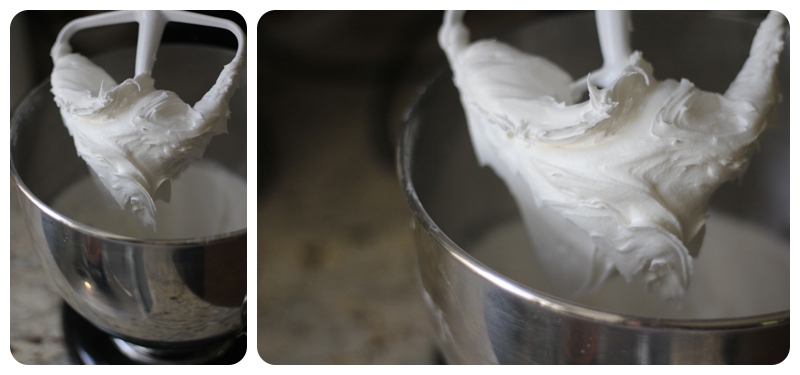
3. Now you have the base for your icing. But you cannot use it like this, it's way too stiff. You are going to need two different types of consistency for these cookies: piping icing, and flooding icing. The piping icing is thicker and is supposed to be like toothpaste consistency. The flooding icing is thinner and is more like body wash or honey consistency.
The base:

So what I do is decide how many colors I'm going to use for these cookies. I like to use four at a time, but you can do whatever. I divide up my 'base' icing into four air tight tupperware or glass containers and close off the ones I'm not using because this stuff dries out quickly. Remember, this stuff is super thick and kind of hard to transfer but that's alright. We will get it a little thinner in a bit.
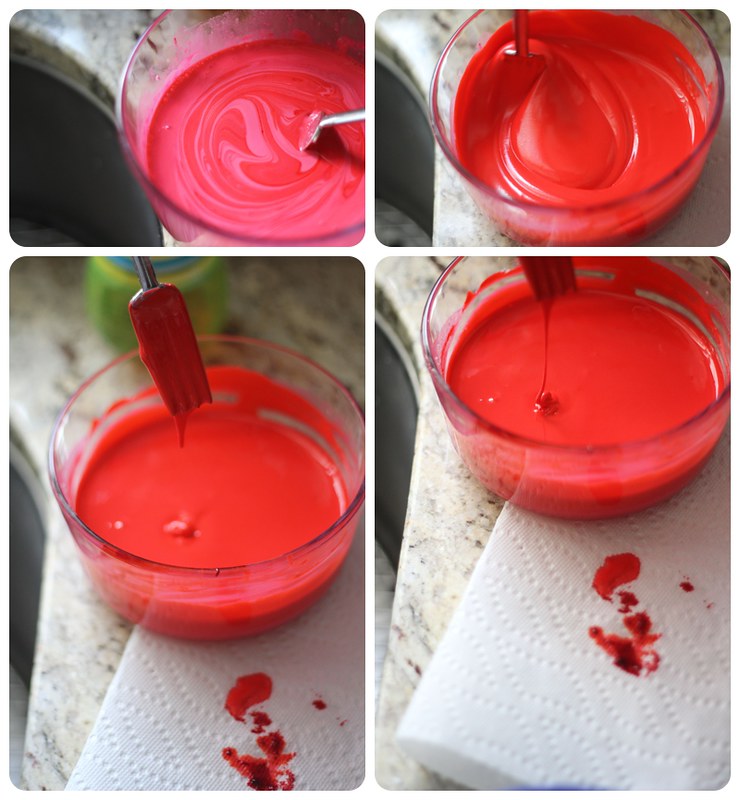
PIPING: go into each closed container and make your piping icing. I use gel food coloring because it's better than the regular drop stuff since it won't mess with your consistency as much. Even that little bit of water in the colored drops can make the icing too runny. And I got a pack of 8 gels in a box at Michaels. So pick your color, add a little bit of it to your first container, and then add a few DROPS of water and start mixing by hand. You will probably have to add a few more drops of water here and there, remembering 'toothpaste' for your piping, but it's super easy for me to add way too much water and then it's annoying to fix it. The way you fix it from being too thin, by the way, is just to add some more powdered sugar. But anyway, go easy on the water but you want enough to make it all mix together nicely while remaining pretty stiff. If you draw a line in your container of RI, you should see that the line disappears in about 10 seconds or so, but I always tend to make mine too runny so it's more like 7 seconds for me;)
This was WAY too much water for piping. Also, using the color red means you will use an entire container of the stuff to keep it from being pink. Annoying. But good to know.

Still pretty thin here.
Better with the white. Stored in containers once mixed.
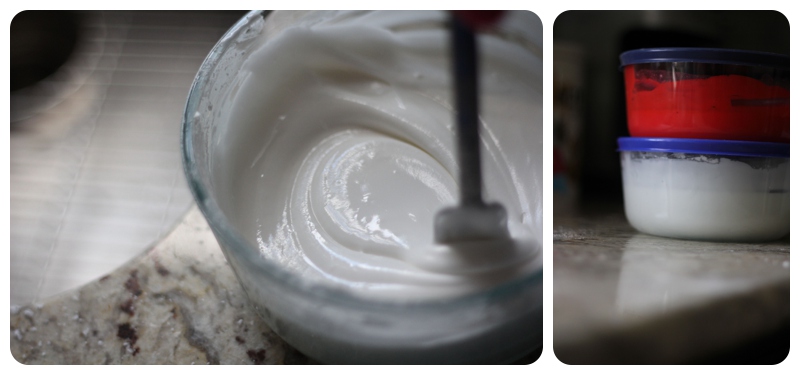
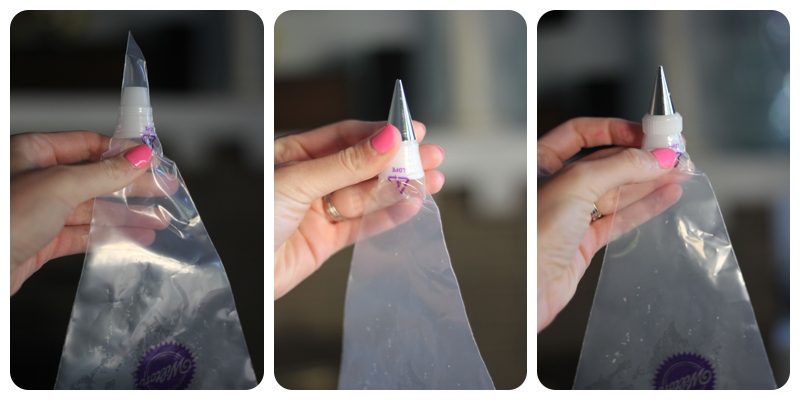
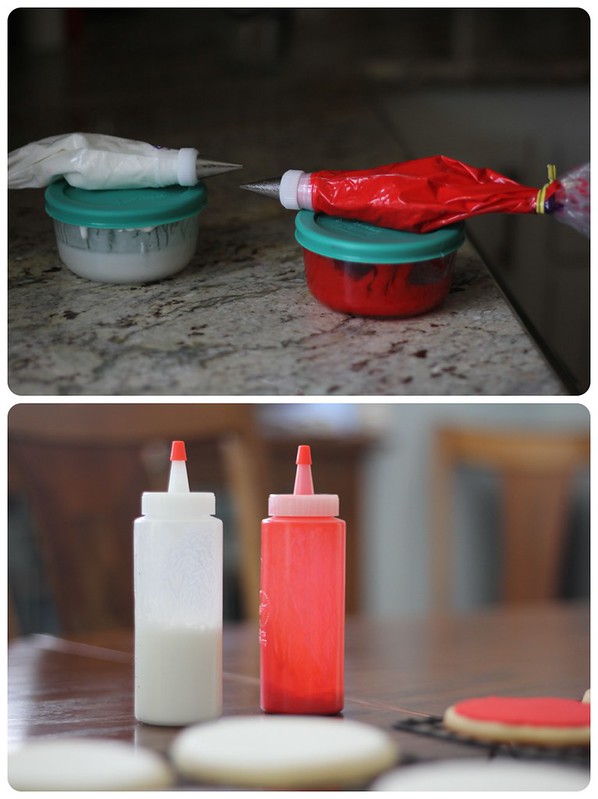
4. Fill your disposable bag with the piping icing. This is a little tricky and I had no idea you needed a 'coupler' for your tip at first. I just fold my bag back over and over again to get the tip exposed, then scrape the icing into that opening and pull the bag back up. Make sure to close up the containers of your leftover icing---it will dry out really fast, so always cover it up when you aren't using it.

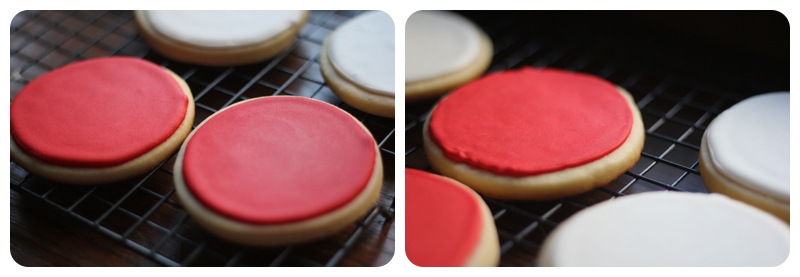
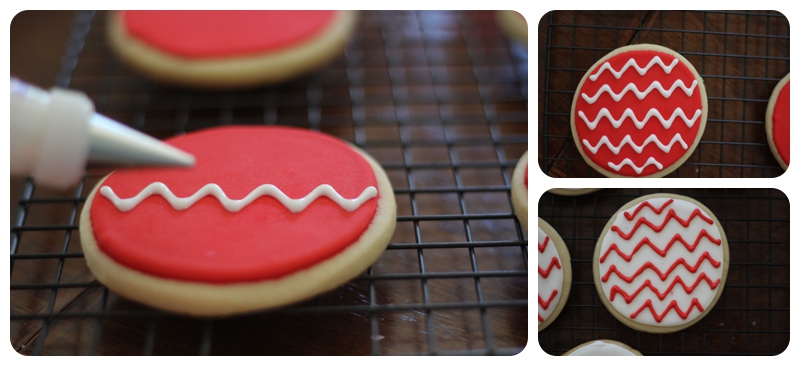
5. Outline the cookies with the piping. You don't put the tip right on top of the cookie, but let it hover above. The texture of the icing allows it to fall into place nicely. If your piping is too thick/dry, it will break and will be super hard to work with. This means you have to add more water. If it's running all over the place, you need to add more powdered sugar.
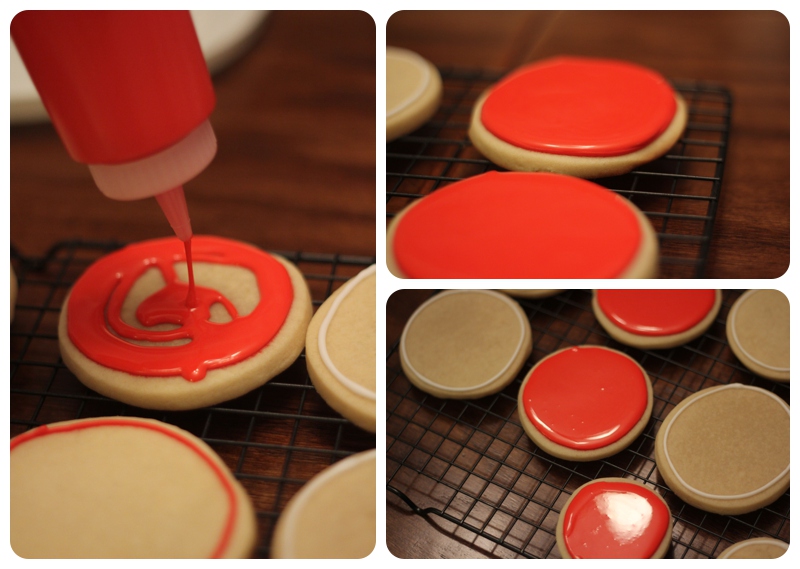
FLOODING: now it's time to create your second type of icing. This is what needs to be a little more runny compared to your piping, so you want it to run off the back of your spoon like a body wash consistency. If you watch the drip of icing disappear into the rest of the dish, you should see it vanish in about 5 seconds or so. The way you get it to be thinner? Add some more water but not too much. I will just add the water to my airtight container, making my left over piping icing into my flooding icing. Make sure you have plenty of stiffer piping icing in your decorating bag, though. You aren't quite done with it yet, so before you turn your remaining icing into flooding you might want to add a bit more piping to your decorating bag.
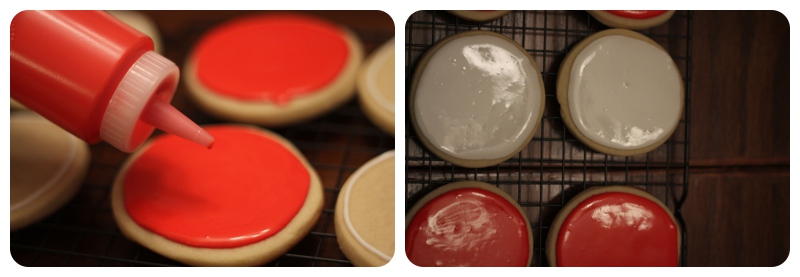
6. Flood the inside of your cookies. Meaning, take that thinner icing and spread it around inside the piping line you just made. I have always just used a spoon to scoop out the icing, then I smear it around to the edges with the back of the spoon, too. But just recently I bought two squeeze bottles to flood and I love them! So much easier! But either way, flooding is pretty fun. You want it to be very smooth and not lumpy. If air bubbles appear, pop them with a toothpick and you can also use that toothpick to get the icing all the way to the edges of the piping.
I even took a video of me flooding with a squeeze bottle, so you can see the awesome consistency of this icing. I love how it will slowly fill itself in.
7. Let this base layer of piping at the edges plus your flooding in the middle set over night (or at least 5-6 hours). You can store the icing in your airtight containers, even without refrigerating them. I also store my squeeze bottles and my decorating bags, but be careful that the tips don't dry out. I have put a wet paper towel over the tips of those bags with a rubber band and it seemed to work just fine. Apparently RI can last for up to a week? It always bothers me to leave it too long, though, since it gets a little separated and I feel like stirring it messes it up too much. But I have definitely stored it overnight before without issues.
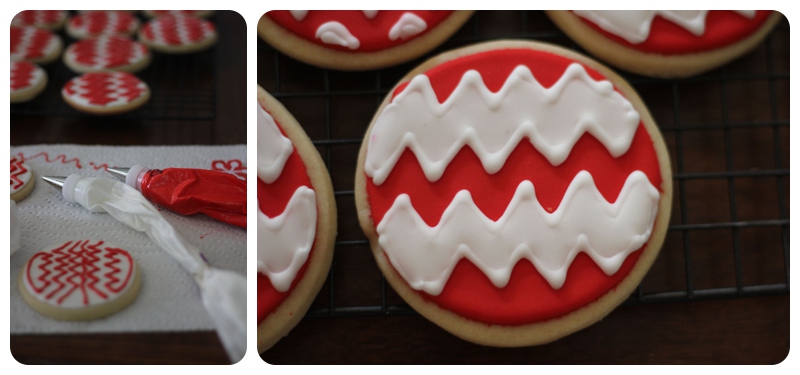
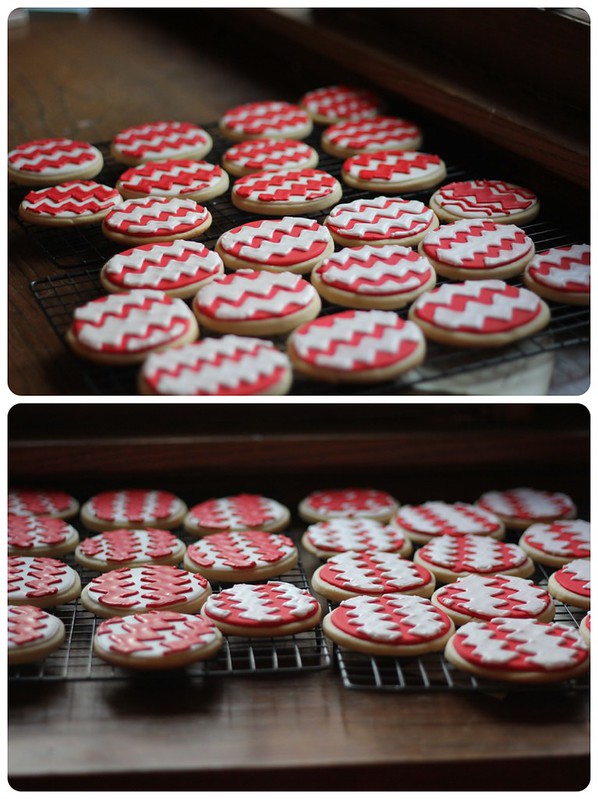
8. Time for the fun part! The actual decorating! All you are going to do now is pipe the tops of your cookies, then flood some more as needed. It totally depends on what patterns you are doing. For my birthday cookies, I never even flooded the top layer and only used piping in my bags for the decorative touches. For these red and white chevron cookies, I did pipe the outline and then flooded the middles of each chevron bar to make them wider. Total PITA, but worth it, I suppose. Same drill as before: piping with the bags for an outline, then flood the interior. I like to play with stripes, polka dots, letters, numbers, and totally random geometric shapes;) Pinterest and IG are your friends for inspiration.

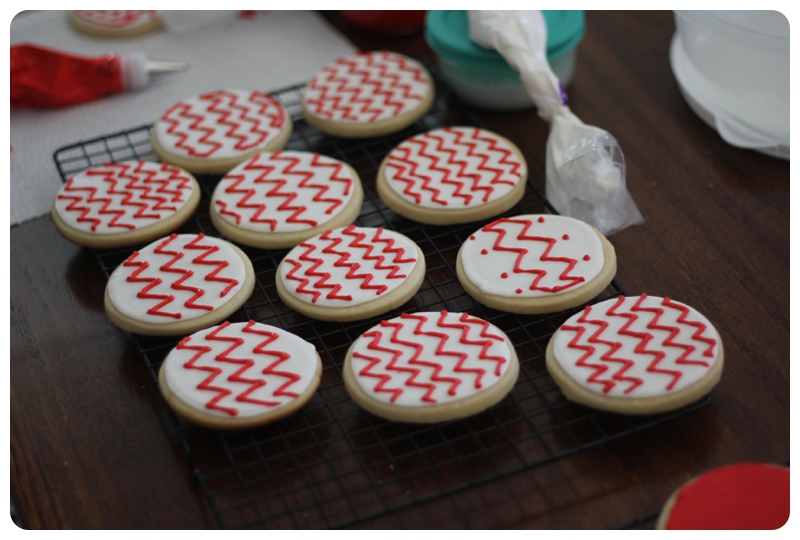
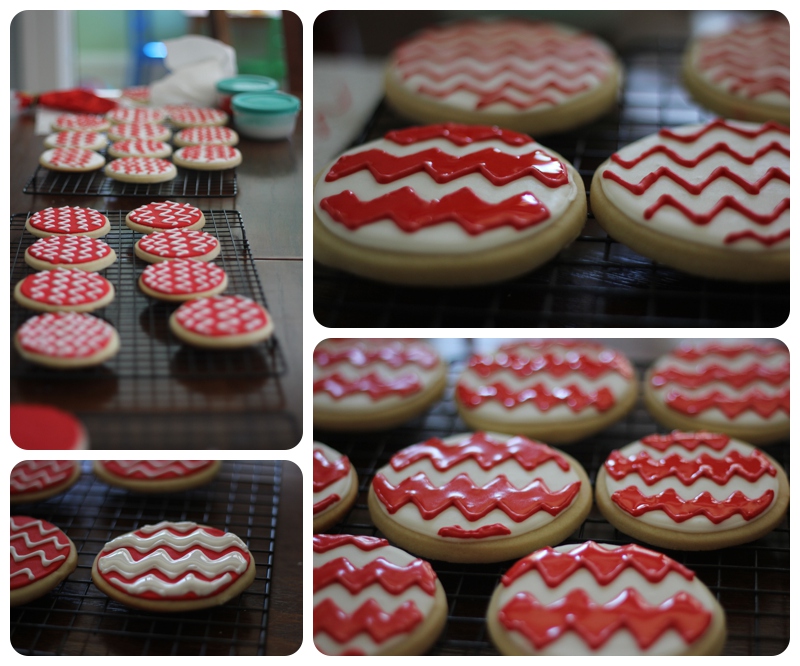
I did not use a template or anything for these babies, obviously. So they are all a bit different but turned out just fine (considering that chevrons are not easy especially on round cookies!)

Note my epic mess-up chevron cookie that got eaten by the decorator within minutes;)
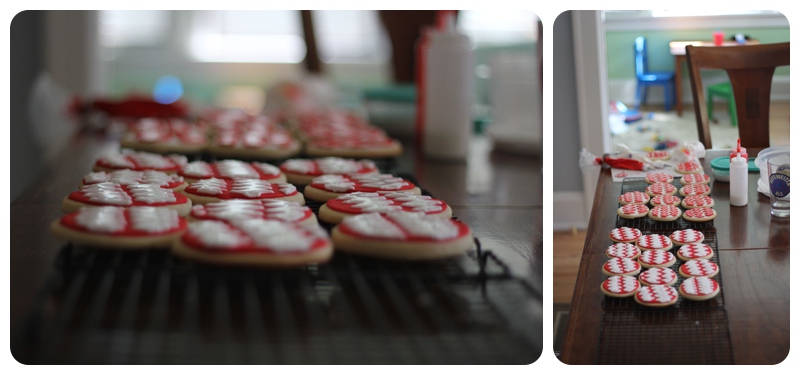
9. Let this completely dry before you stack the cookies, or bag them, or store them. It's okay to let them sit out to dry, I find that the RI is so hard that the actual cookie can't get that stale if you leave them out overnight again to dry. Or again, at least let them set for about 5-6 hours.
That's it! Washing everything after you are done is really annoying and these colors stain your hands and clothes like none other. So watch out, but have fun! The options are limitless when it comes to decorating. Well, limited only by your attention span and time.


Great tutorial! I see this being pinned all over Pinterest - super helpful! :)
ReplyDeleteDang girl! This is outstanding :) We would love to have you link up at Tell Us Tuesday - our readers would LOVE this tutorial!!
ReplyDeleteyou could easily sell these on etsy... just saying! I was looking at buying "paisley" ones for my sprinkle we had, but didn't have enough time (or felt like spending the money, so I went homemade). Just a thought!
ReplyDeleteMy God. I'm sure you are amazing at your "real job" but you could be a pro cookie decorator/crafting extrodaniere/the next Martha Stewart perhaps?! I'd kill for your attention to detail, lady! Nice work.
ReplyDeleteDitto to Erin... pinterest hits, here you come!
ReplyDeleteWay to go girl!
These look incredible. I have never tried royal icing before, but definitely want to (one of these days). I love the ones you did for CeCe's party. So fun and bright and colorful. The chevrons are pretty awesome too, though.
ReplyDelete